Cereal Crunch Bars

Nothing can bring you peace but yourself.
— Ralph Waldo Emerson
IMG_9321.jpg

It’s the most wonderful time of the year!

While celebrating the holidays has kind of an odd feeling around it this year, I’m destined to still make it as fun as possible not only for our little 10-month-old, but for my husband and I as well! I took out the decorations as early as possible, started listening to Michael Bublé and John Legend’s Christmas albums on repeat, even found some amazing mint mocha dairy free creamer—we are READY in this house!

I will say that most of this is for me and my sanity. I am obsessed with this time of year, so I’m not holding back one bit. Oliver really just wants to play too aggressively with the nutcrackers, climb on the gifts under the tree and just point to all of the ornaments hung up—so I’m waiting for next year for his excitement to be as high as mine! That being said, this little dessert is also more for me than him…oops.

While I would have given this boy chocolate the day he was born (exaggeration, but, I mean, another true love of mine!), I’m of course holding off until he’s at least one—and I read that usually around 2 is when it’s “acceptable” to give kids chocolate?! Yes, waiting until he’s at least 1 sounds better to me! Okay, back to it… I found this little chocolate bar/dessert to be this beautiful hybrid of no bake cookies + brownie batter + a Crunch bar, which is honestly kinda perfect! Your gal LOVES chocolate bars, but I never eat them, so I figured why not make some?! The peanut butter Panda Puffs cereal adds the most amazing texture and crunch to these cake batter/brownie-esque bars! This cereal was a true love of mine in high school, so we are bringing it back!

Sure, is this recipe “healthified?” A bit. But is the flavor all there and will you be hiding them in the fridge, so no one steals any of them?! Absolutely! I cannot wait for little O to be the age that he loves chocolate as much as his mom, but I’m totally cool not sharing these homemade Crunch bars for at least a few more months!

IMG_9299.jpg
IMG_9301.jpg
IMG_9323.jpg
IMG_9326.jpg


ingredients

Coconut Oil—1.75 oz, or ¼ C

Brown Sugar—6.5 oz, or ¾ C

Oat Milk—4 oz, or ½ C

Cocoa Powder—2.25 oz, or 2/3 C

Peanut Butter—6.5 oz, or 2/3 C

Vanilla Extract—1 TBL

Cereal [Panda Puffs]—4.5 oz, or 3 C

Salt—¾ tsp


process

In a medium saucepot, combine coconut oil, sugar, milk and cocoa powder on the stove. Allow to all combine together and lightly boil for 1-2 minutes.

Remove from the heat and add in the peanut butter and vanilla extract.

With your cereal of choice in a large bowl, pour the chocolate peanut butter mixture over it, mixing to combine and coat evenly.

Sprinkle with salt.

Pour into an 8”x 8” pan that is either lined with parchment or a nonstick spray.

Press down evenly.

Place in the refrigerator to set for at least 1-2 hours.

Once firm remove from the fridge and cut into desired size!

Best stored in an airtight container in the fridge.


Bon Appétit!

Salty Crust Peanut Butter Fudge

I am certain that everything will work out.
— Rochelle Fox
IMG_9078.jpg

I’ll come right out and say it: there’s nothing like a good seasonal nut butter to get me even MORE jazzed about the season that we are in! We all know how much I adore the fall season, and how much I am in love with Christmas and all of the magic that surrounds these upcoming months! When Wild Friends’ seasonal butters came out a few weeks ago, I was just filled with so much excitement!

This will be Oliver’s first Halloween, Thanksgiving, Christmas!! Sure, will an almost 1-year-old fully grasp what’s going on? Most likely not. Will his mom be over the moon excited about the decorating, the baking, the music, the entire vibe (yes, I said it) of the last 3 months of the year? DUH! For the past 8 months, Oliver’s entire life, the world has been weird. We haven’t seen family as much as we’d like, we haven’t been able to go to any of the places around Atlanta that we love to relax, no traveling, nothing that we had planned for Oliver’s first year, but we are rolling with it. With the holidays coming up, that’s one thing I will definitely make sure we do in full force!

That being said, I almost screamed when I saw that Wild Friends was having their seasonal nut butters come out. I am OBSESSED with these flavors—I never knew I needed their Gingerbread or Sugar Cookie peanut butter until a few years ago, and now I stock up! A spoonful of sugar cookie?! Yes, please! And adding it to both the crust AND the fudge was a no brainer. Sugar cookie for the crust, gingerbread for the fudge, damn. I don’t really know where or why or how this recipe came about, I was craving something salty and sweet, honestly!

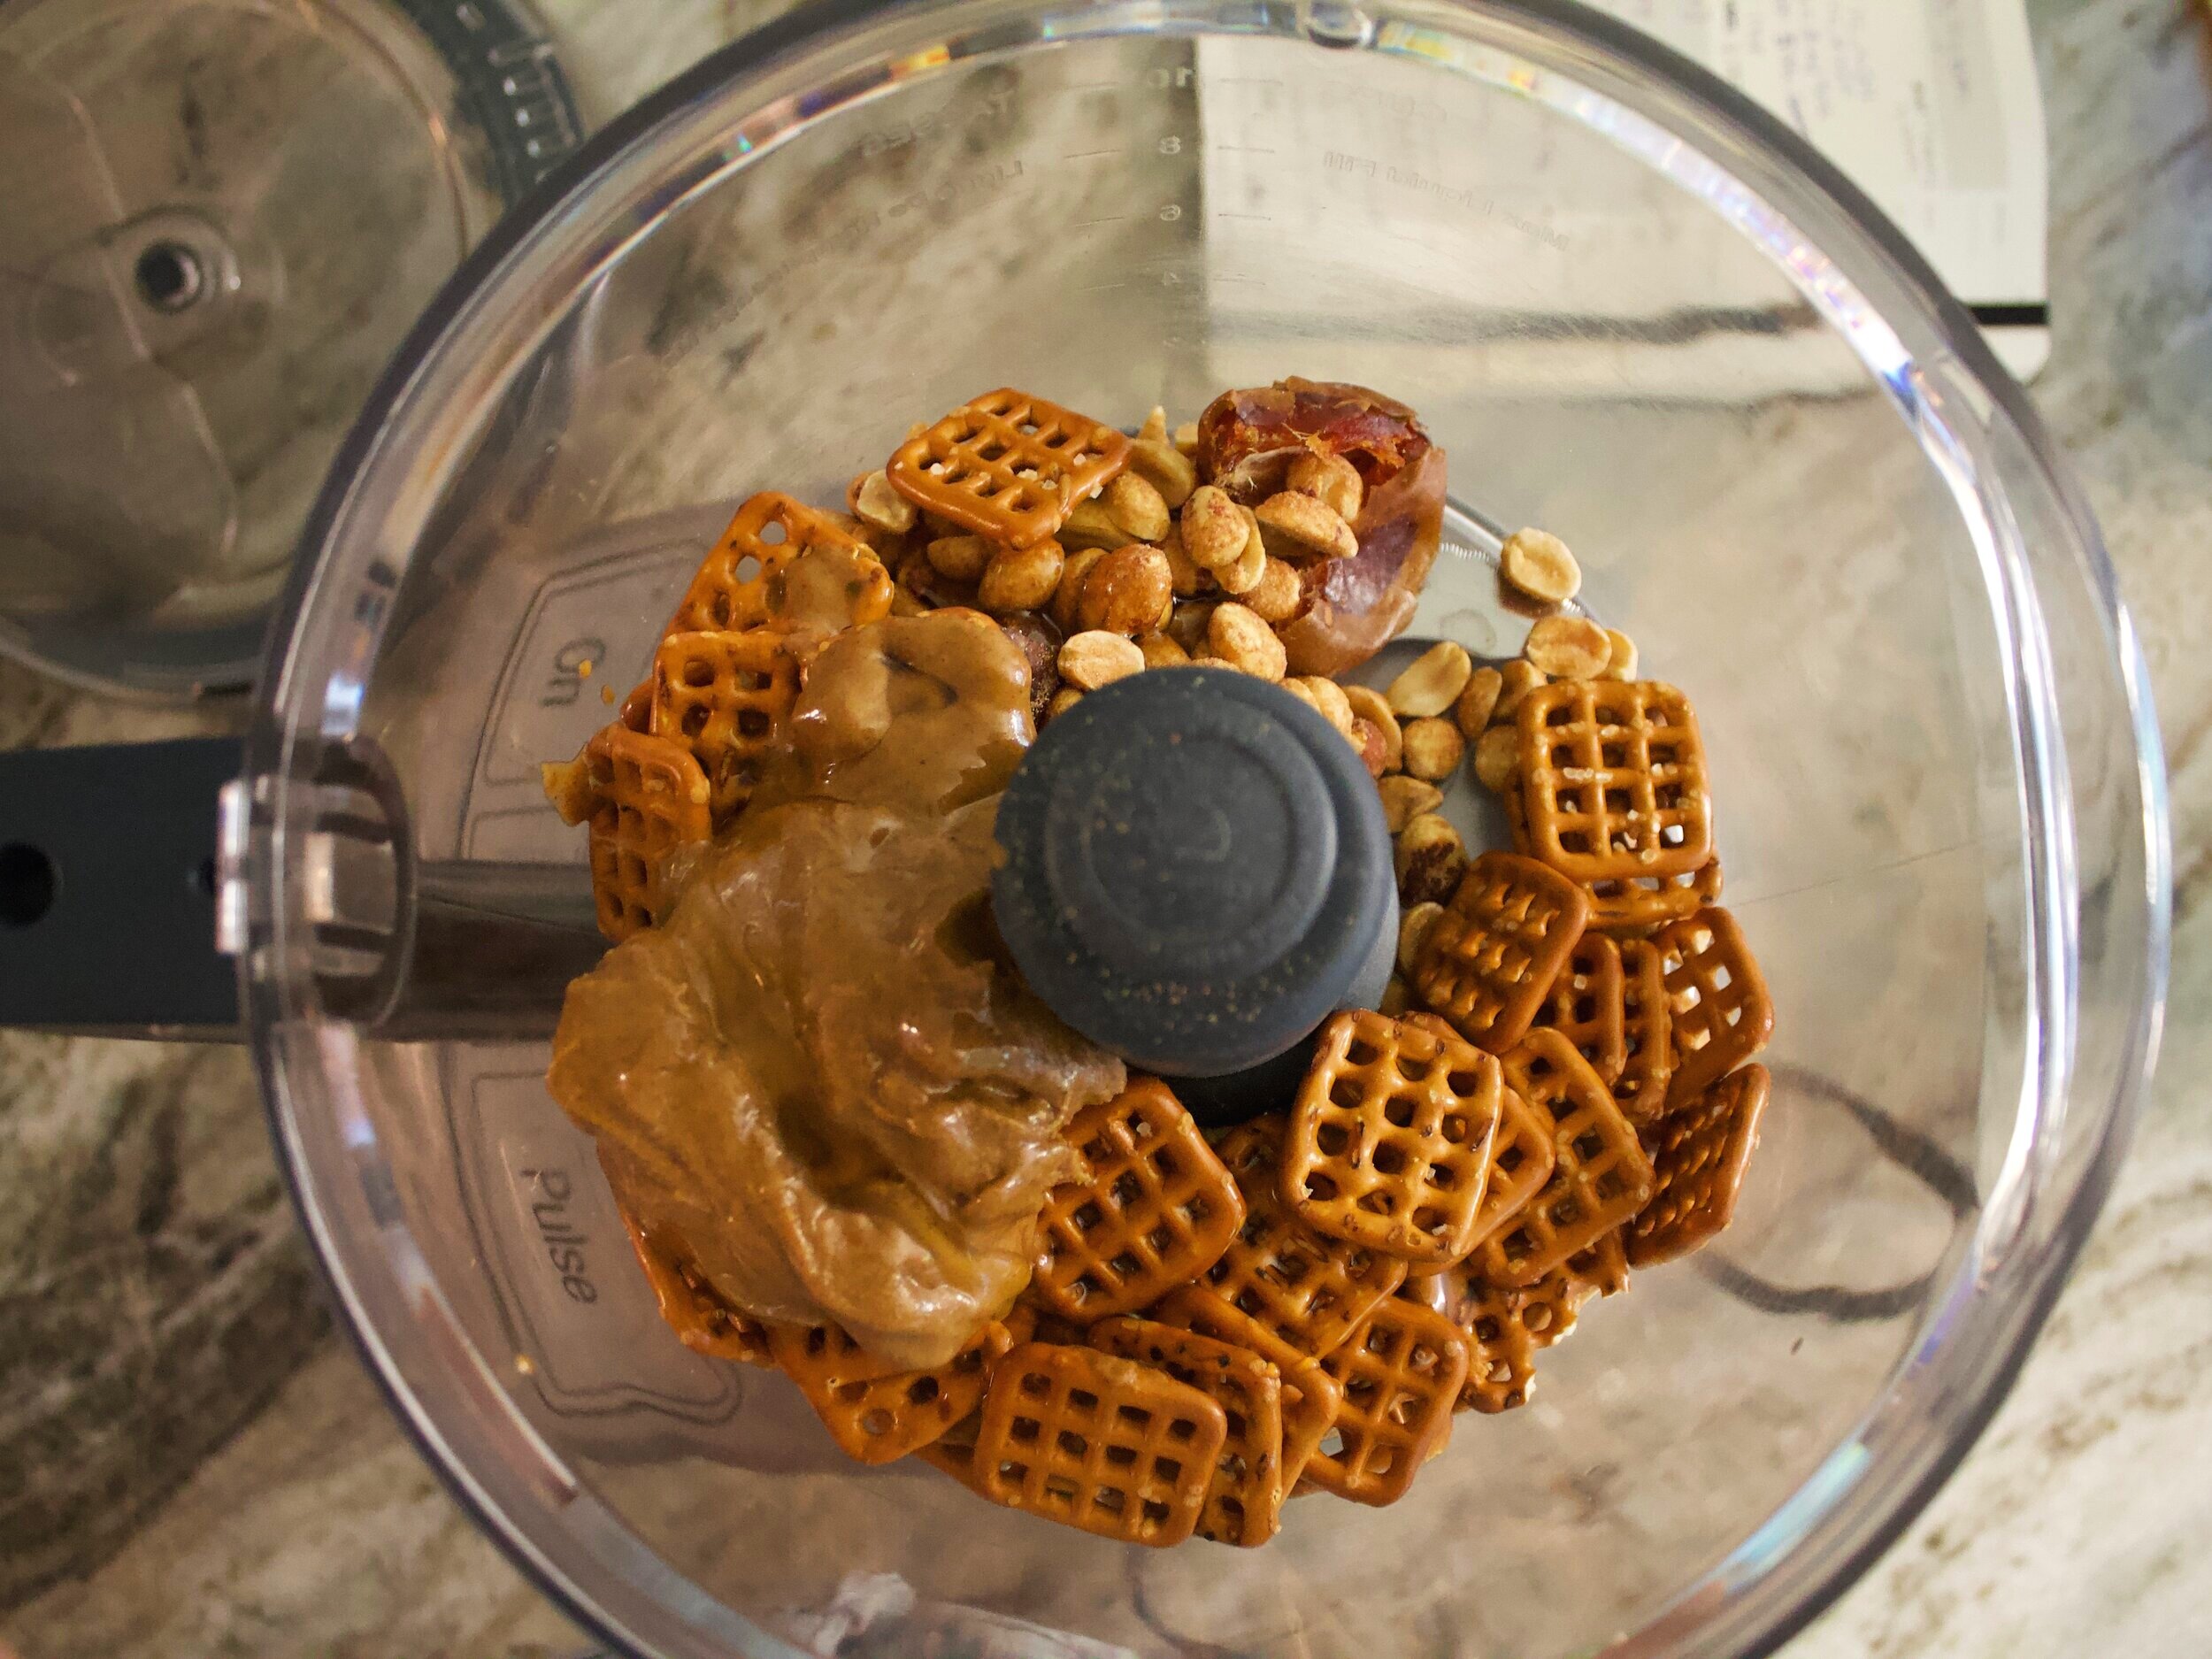
A pretzel crust has got to be one of my new favorite things, blended with some dates, some honey, nut butter—you’ve got yourself the perfect salty, sweet, crunchy crust. Then a a3-ingredient fudge? YES PLS! I threw in my favorite jam of all time: fig jam that I discovered many years ago at Whole Foods and only purchase when I go there maybe once a year. A creamy, nutty, slightly sweet fudge on top of a crunchy, salty crust, all topped with large flakes of salt—honestly, leave THIS out for Santa this year, my friends!

IMG_9026.jpg
IMG_9028.jpg
IMG_9029.jpg
IMG_9034.jpg
IMG_9040.jpg
IMG_9054.jpeg
IMG_9081.jpg
IMG_9078.jpg
IMG_9089.jpg

crust ingredients

Pretzels—2 oz, or 1 C

Peanuts, dry roasted + unsalted—4.75 oz, or 1 C

Dates, pitted—3 oz, or 8

Nut Butter, seasonal Wild Friends—3.75 oz, or 5 TBL

Vanilla Extract—1 tsp

Honey—3 TBL


process

In a blender or food processor, pulse until all ingredients are crushed into pea-sized pieces

When you squeeze a handful of the crust, it should hold together

Press into the bottom of an 8” x 8” pan, freeze


fudge ingredients

Chocolate—12.5 oz, or 2 C

Nut Butter, seasonal Wild Friends—12 oz, or 1 C

Fig Jam—3 TBL

Salt—large pinch


process

In a heatproof bowl or over a double boiler, melt the chocolate

Stir in the peanut butter and jam until homogenous

Pour this mixture over the crust, and even out with an offset spatula

Sprinkle your salt over top—I love a chunky salt for this, but any will do!

Allow to set in freezer for 30 minutes-1 hour until the fudge has firmed

Remove from freezer, cut into squares and store in a sealed container in either the fridge or the freezer!


Bon Appétit!

Tahini Caramel Bars

The universe is full of magic things, patiently waiting for our senses to become sharper.
— Eden Phillpotts
IMG_8828.jpg

I am welcoming a new love into my life: tahini!

I believe that I only have ONE recipe on here with tahini in it?! How is that possible?! And it’s from almost 4 years ago!! What. The. Heck. Anyways! This tahini caramel is out of this world. Dare I say that I prefer this to just a regular old caramel? I just might…

This exciting mix of being dairy free, baking with whole ingredients that actually taste good, and doing it all with a 6-month-old while also having been unable to really go anywhere since he was born is truly quite an adventure! I can no longer gain inspiration for things by going places, so it’s been far too much screen time and imagination for me to really get ideas for baking, for life, etc., which I both love and then also sort of dislike. I am constantly making lists in my head about places I want our family to travel to once we actually can, telling Oliver how many incredible things we will do once it’s allowed and safe, how fun airplanes are (I also love airports…), all of the food he’s going to get to try! Even just making these lists and going over them with my baby, yes, I have full on adult conversations with him, excites me as I want to truly spoil him with travel and life experiences!

All of this being said, during one of my weekly as-fast-as-possible grocery trips, I picked up some tahini and welcomed it like a long-lost friend. Is it a super unique ingredient? Not so much. Is it an incredible flavor that Oliver will be trying on his foods soon? Absolutely!! He began to try foods with spices on them this week and, let me tell you, cinnamon roasted carrots were a (messy) hit! So, while I sit here every day, or while I’m chasing our quick little 6-month-old around the house, I think of all of the foods Oliver is going to try when we can get out of our few block radius, jump on a plane, get in the car and drive for a few hours, whatever we can do to up his culture. For now, it’s going to start at home, start with this simple jar of tahini!

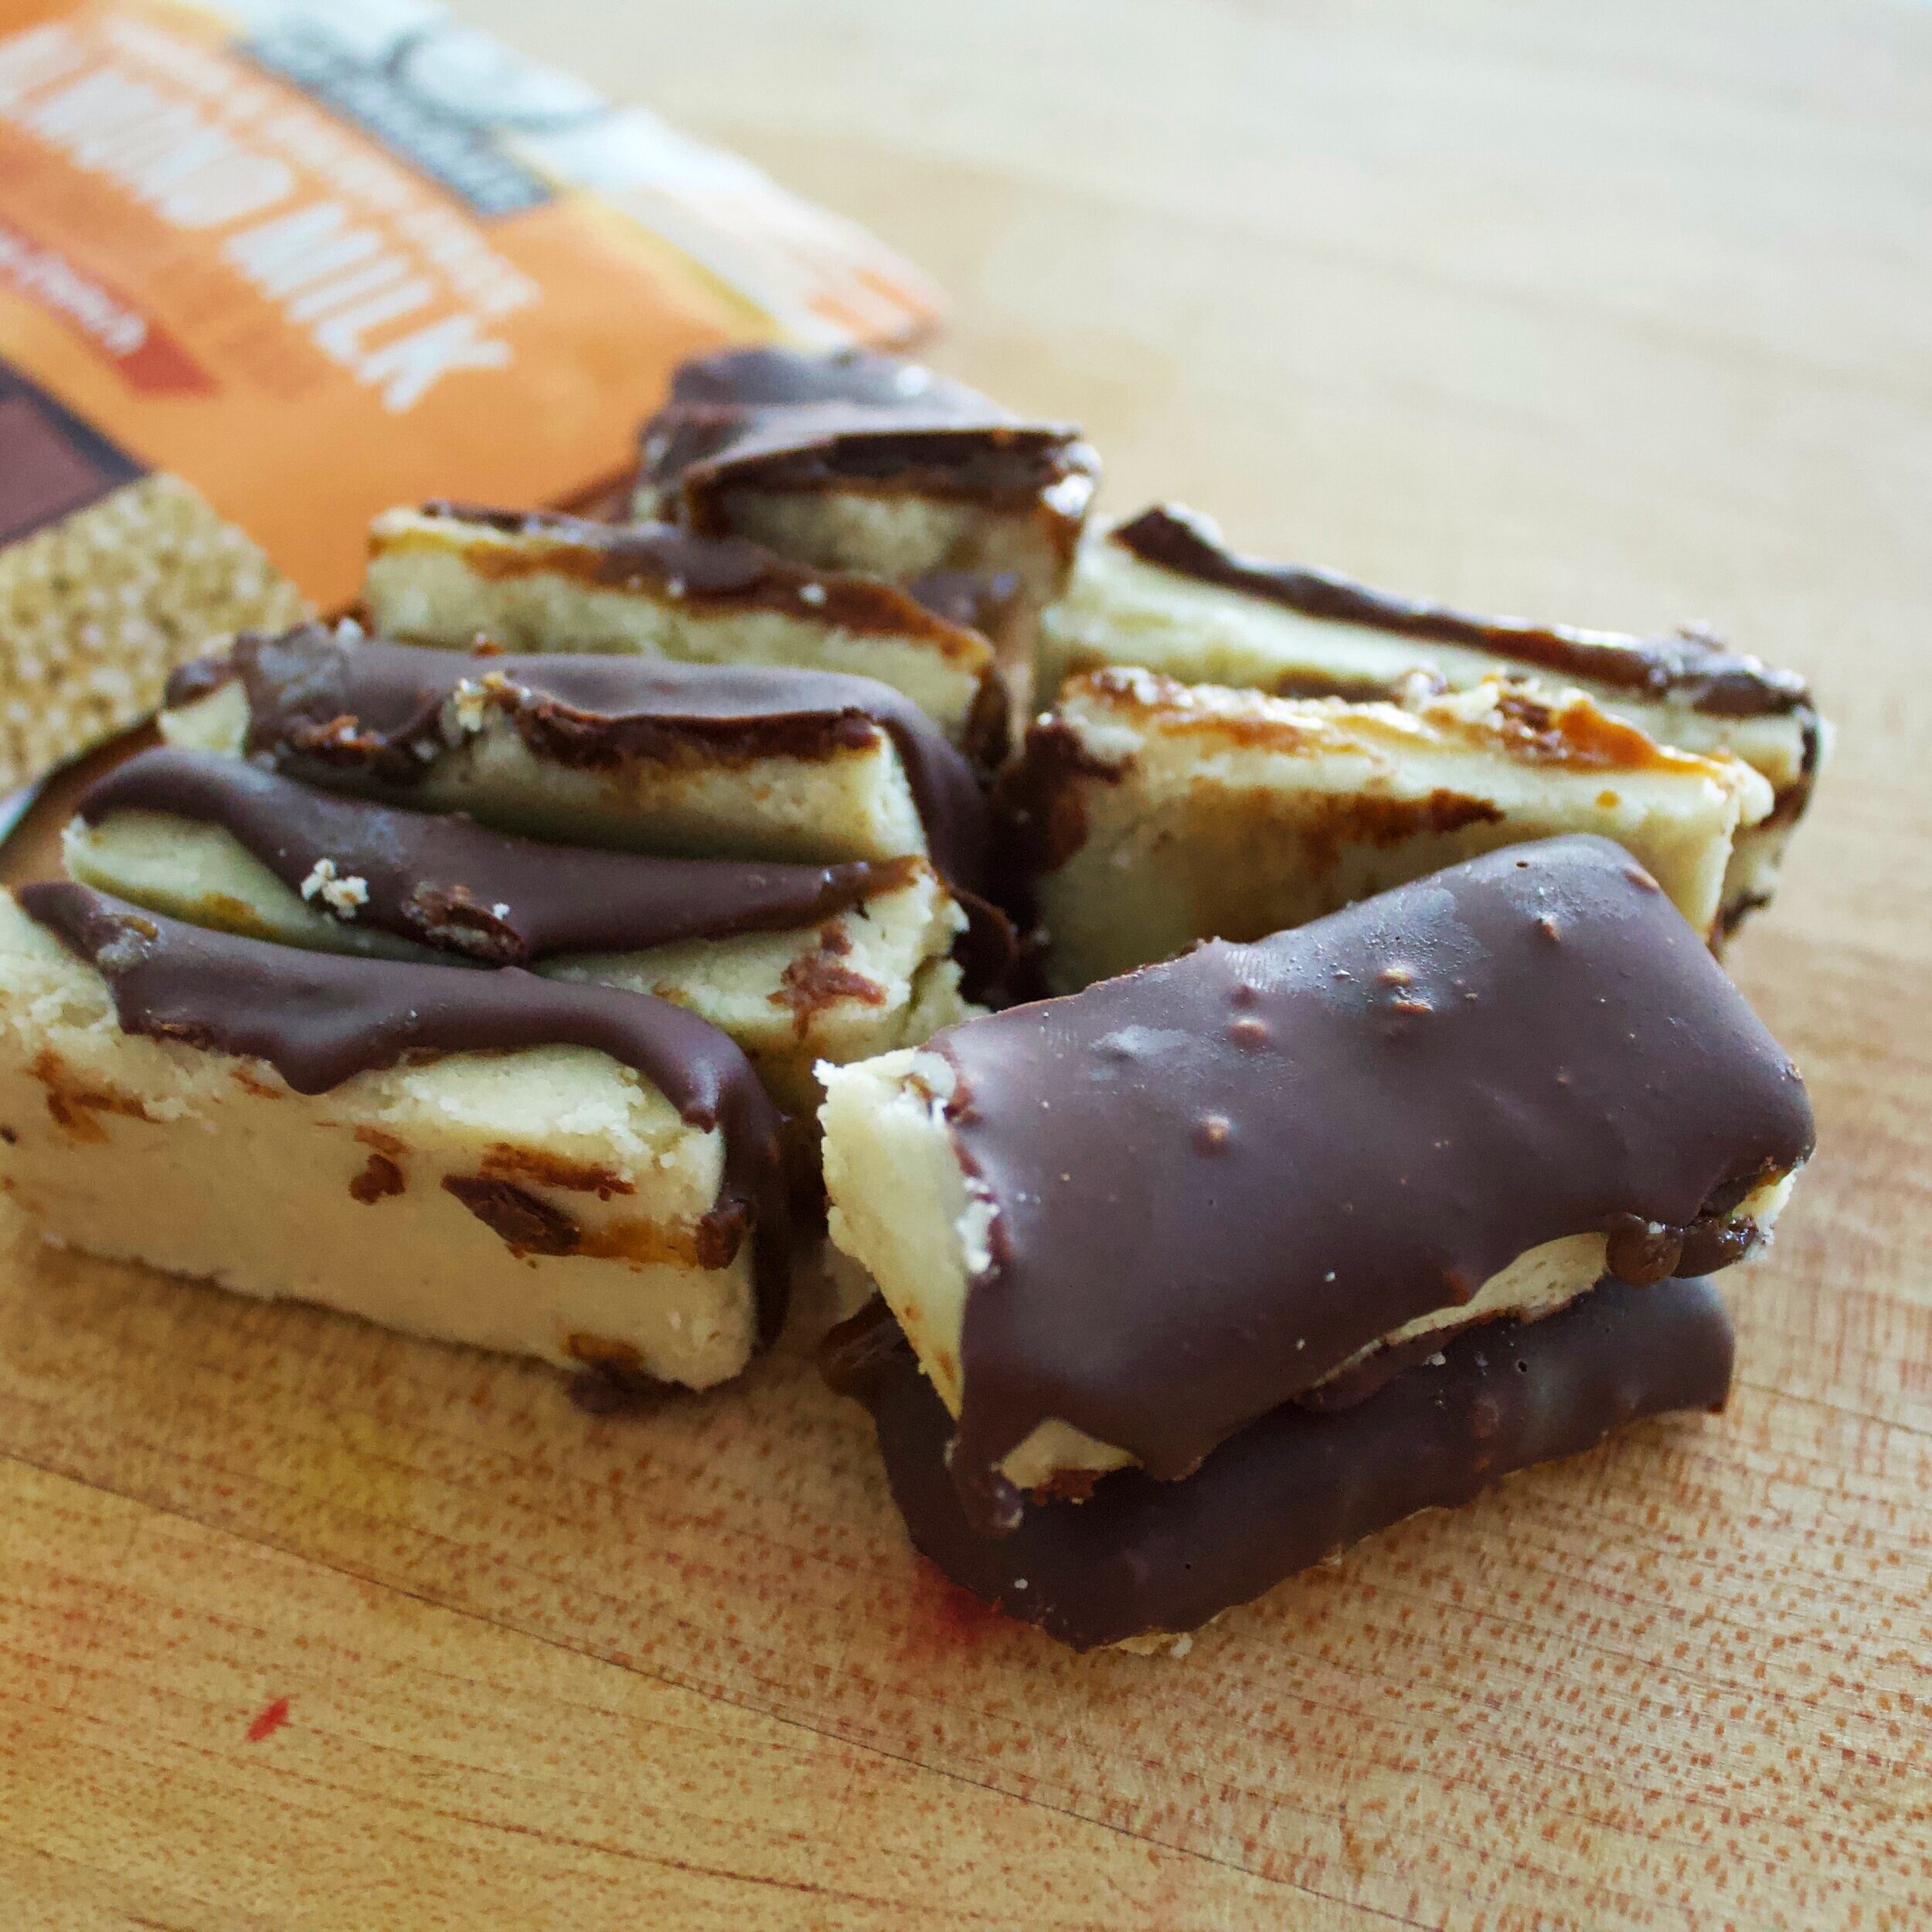
Thank you for reading my daydream above while I completely just skip over the fact that there’s a recipe below! As we want Oliver to be as enthusiastic about life as possible, having it start with food should be no surprise! This little dude sat with me as I made these, which also means it is fast AF to throw this together!! The shortbread crust? Takes maybe 4 minutes. The caramel? 5 minutes. While that is all setting up and you melt the chocolate: 10-15 minutes. FAST. AF. Aside from the tahini, which is subtle but has a beautiful aftertaste I might add, the star of this is the chocolate. Heck yes, I am talking about the Almond Milk Taza Chocolate (heart eye emoji). IT’S DAIRY FREE YET TASTES LIKE FULL ON MILK CHOCOLATE. What?! How?! It’s incredible. Also with nothing but 6 common ingredients, so dang satisfactory!! I have no words except go get yourself some!

And there we have it. My daily thoughts for you with a quick recipe for some tahini caramel bars attached! Thank you for humoring me, now go scoop up your baby, your dog, yourself, and treat yo’self to some of these incredibly delicious and perfect and smooth bites of heaven!

IMG_8763.jpg
IMG_8767.jpg
IMG_8775.jpg
IMG_8777.jpg
IMG_8800.jpg
IMG_8808.jpg
IMG_8819.jpg
IMG_8828.jpg


shortbread ingredients

Almond Flour—9 oz, or 2 C

Salt—1 tsp

Honey—2 TBL

Coconut Oil—3.75 oz, or ½ C


process

In a large bowl, combine almond flour and salt

Melt the honey and coconut oil together

Add this melted mixture to the dry ingredients

Mix until combined, should hold together when pressed

Press into an 8x8” pan, freeze while making the caramel


tahini caramel ingredients

Tahini—3 oz, or ¼ C + 2 TBL

Coconut Sugar—3 oz, or ½ C

Vanilla Extract—2 tsp

Oat Milk—1 oz, or 2 TBL

Cinnamon—½ tsp


process

In a small saucepot, combine the tahini, coconut sugar, vanilla, milk and cinnamon

Allow to simmer for 2-3 minutes

Let cool slightly, and then pour on top of the shortbread

Put back in the freezer for the caramel to firm up


chocolate ingredients

Taza Almond Milk Chocolate—5 oz, or 2 bars

Coconut Oil—1 TBL


process

In a heatproof bowl, combine the chocolate and coconut oil

Melt and mix until homogenous

Pour over the caramel layer, put in the fridge to set

Once set, remove from the pan/dish and cut into desired size and enjoy!


Bon Appétit!

Peanut Butter Cups

"Be softer with you. You are a breathing thing, a memory to someone, a home to a life." - Nayyirah Waheed

Continue reading if healthy dessert to change your life sparks your interest, or your tummy. I mean, that's what's up!

I don't think that I have ever been so patient and thorough with something in my life! I mean, is that so surprising? I'm rather stubborn and impatient with everything I do, because things obviously have to happen now or it's never going to get done! In all of my self love and kindness I've been practicing as of lately, patience is still something I can't seem to get a grasp on. While I'm very aware that most things, recipes included, will take many attempts, trial and errors, test batches, until you're 99% satisfied with it (because, I mean, we can always improve, right?!), I always want the first try to be perfect, no matter what it is!

Take my running for example. When I signed up for my first marathon, I was 100% sure that I could qualify for Boston because I could keep that pace for 10 miles, so why not 26.2? HAH yeah Katie, joke is on you. It's going to take some damn work! Heck, even when I'm doing any type of cross-training work, at the end I'm always like Hey, why don't I have ripped arms and a 6 pack? ... seriously, Katie, patience. The same goes for just about everything with me. You could throw me in a boxing ring, hand me a book in another language, ask me to plant an entire vegetable garden, and I'll almost always feel the urge to get it correct on the first try. What happens when I don't? I give up for a few days, then say some nice things to myself and go back to it, humbled a bit and feeling renewed.

One would think that after doing this on repeat - like Drake's Nice For What has been on for about 5 days - I would finally learn, but hey, go figure that self compassion takes a minute! That is your lesson for the day: be kind to yourself, have a bit of patience, don't be so damn judgmental with every little, or big, thing you do that isn't perfect. If I was perfect all of the time, didn't trip over myself, spill food and drinks constantly, never ever chaffed when I ran, always remembered to put on deodorant... then I think that would be a bit dull! Mistakes are good, they're learning experiences, they help shape you, figure out your strengths and weaknesses, likes and dislikes, make you human! 

SO. After that, what I'm trying to say is that these raw peanut butter cups are my little patience victory! I tested out 4+ recipes, I ate 4+ recipes...that's a lot of nuts in a weeks time! After lots of tiny tweaks, these are near perfect. Honestly, I even count these as a healthy snack. The base is very granola bar-esque: lots of nuts, lots of seeds, spices, a touch of sugar - I'd eat that all on its own! The filling, just nut butter + coconut sugar + coconut water = YES PLEASE! And a drizzle of chocolate on the top. Yum. This satisfies your sweet and salty cravings without a doubt. I like using pink Himalayan salt, the bigger chunks, and just breaking it down slightly in the food processor. This allows for you to get some rather salty bites, but with a sweeter filling, it's exactly what is needed! I love to keep these in the freezer, makes it more dessert-like to me! Also, it's beginning to get hot AF in this beautiful southern part of the country, so I'll take everything on ice!

Two raw desserts in a row? I know, weird, right?! As I'm learning more about my body and the things it just cannot digest anymore I'm slowly starting to learn what actually makes me feel amazing! Sure, a Reese's PB Cup is incredible, having 1, 2, or 8 won't kill me if it's not every day, but how about I recreate it to be nutrient packed, healthy and still have the same flavors? Girl, I do not see ANY harm in this, especially if my husband eats them two at a time!

base ingredients

Almonds—½ cup

Cashews—¾ cup

Hemp seeds—2 TBL

Chia Seeds—1 TBL

Cinnamon—1 ½ TBL

Coconut Sugar—1 ½ TBL

Maca Powder—½ tsp

Collagen Powder—1 scoop

Pink Sea Salt—½ tsp


filling ingredients

Nut Butter—2/3 Cup

Coconut Sugar—1 ½ TBL

Coconut Water—¼ Cup


topping ingredients

Chocolate—3 oz, or 1 bar

Coconut Oil—1 tsp


process

In your food processor, pulse together all of your base ingredients.

Feel the mixture to make sure that when you press together with your fingers it holds, but that it isn’t so wet that liquid is dripping.

Press into the bottom of a muffin pan, spring-form pan or whatever pan works best for you! I have found the putting these into a muffin pan works best for a little bit of portion control…

Freeze for ~1 hour.

For the filling, again, add all of the filling ingredients into the food processor. Pulse until combined.

Always taste this part before adding on top of your base. If you are using a simple nut butter that has very minimal ingredients, including sugar, you may want to add in a teaspoon+ more of the coconut sugar. Also, depending on how thick your nut butter is when you first start, you might want to add in more coconut water. The goal here is to have the filling be a bit looser/creamier so when you freeze it, it is not difficult to bite into.

Pour on top of your base, spread evenly—if you have used the muffin pan, start with 1½ teaspoons of the filling for each, then distribute whatever is left evenly at the end.

Freeze ~1 hour.

For the topping, melt the chocolate and coconut oil over a double boiler.

Once completely melted and combined, drizzle over your peanut butter cups. If you have made this in a full pan instead of the muffin pan, just pour all of the chocolate over the filling, spread to cover evenly.

Freeze ~1 hour.

Pop out, cut and enjoy!

Yield: 1 dozen


Bon Appétit!

Oatmeal Raisin Cookie Truffles

Happy New Year, my friends!

I hope that everyone’s end of the year was as spectacular and restful as mine. A two-week break from work, spending some much needed time with my family in Maine, snuggling my two dogs, and ringing in the New Year with my fiancé, I couldn’t have asked for a more wonderful vacation! Another plus? It snowed a lot while I was home! Well, one day and one blizzard, but enough for us to be stuck in the house for most of it! The dogs absolutely loved it (see Instagram) and it gave us all an excuse to lounge around for the day.

So, while Christmastime is by far one of my favorite times of the year, cue Michael Bublé and Elf and Gingerbread houses, I am pretty excited for 2016! I mean, I’m getting MARRIED this year!

What?!!?

Yes. Eight and a half months away!! You could say that I’m kinda sorta super duper excited about it!—even had my first dress fitting and met with our wedding cake maker over the holidays…which included over an hour of stuffing my face with multiple kinds of cake/buttercream/filling combos…

So 2016 is going to be amazing with just the wedding alone! What else is new about this year? Oh, well I started a KBB Dessert of the Month Club! (Inquire if interested!) Each month I’ll be sending out a lovely package full of homemade baked goodies, my own recipes, and many not posted to the website (just yet), but some will be—including the recipe below!

How did I decide to start the DOTM Club? While I believe that anyone can truly bake anything, posted on my site and others, sometimes you really just 1. Don’t have time, 2. Just aren’t too into baking, but love to eat desserts, or 3. Love to get yummy, homemade goodies sent to you! And so was born this fabulous little club.            (For January, I am sending out some to die for coconut macaroons as well as these simply delectable Oatmeal Raisin Truffles! )

To me, January is all about two things: getting back into your healthy habits (aka less gingerbread, more kale) and staying cozy while the temperature drops to -10˚F. The Oatmeal Raisin Truffles are more on the guilt free end of the spectrum of many of my desserts. They are bite size (so try and restrain yourself from eating the entire 4 dozen batch) and they are relatively low in the fat and sugar department, because, to bind properly, I’ve loaded them with a LOT of oats and a TON of raisins! And to finish, coating them in a dark chocolate is optional!

Yes, it’s cookie dough, yes it’s a dessert, but you really only need to eat 1, maybe 2, to feel satisfied! While this recipe may not be a beet-kale protein smoothie, it is a spice-packed, fiber-filled oatmeal raisin cookie truffle that’ll satisfy the start to your amazing 2016!


ingredients

Butter, room temperature—4 oz, or ½ C

Brown Sugar—5.25 oz, or ¾ C

Vanilla Extract—0.2 oz, or 1 tsp

Milk—2 oz, or ¼ C

Flour—4.25 oz, or 2/3 C

Salt—0.1 oz, or ½ tsp

Cinnamon—0.1 oz, or 1 tsp

Nutmeg—¼ tsp

Oats—6 oz, or 2 C

Raisins—4 oz, or ¾ C

Chocolate—8 oz

Butter—1 TBL

Sprinkles—optional


process

Cream together the butter and brown sugar.

Add the milk and vanilla.

In a separate bowl, combine the flour, salt, cinnamon, nutmeg, oats and raisins.

Slowly add into your creamed mixture.

Once you have combined all of the ingredients, and a dough has formed, scoop out into whatever size truffle that you’d like.

You may either use a small scoop or a scale, like I prefer to do. I weigh each ball into 0.5 ounces, just the right size to pop into your mouth!

Place all of your scooped dough onto a sheet tray lined with parchment or a Silpat and put into the refrigerator to firm up, for about an hour.

When you’re ready to dip your truffles, make a double boiler using a medium sized pot filled with about an inch of water, and then a heat safe bowl on top. Make sure that the water is not directly touching the bottom of the bowl; you do not want to scorch your chocolate!

Turn the burner onto medium-low heat.

In the bowl, place your chocolate and butter, making sure to stir every few minutes so that the chocolate melts evenly.

Once melted, begin to dip your chilled cookie dough truffles.

You may either dip the entire ball, or just half, whatever you’d like!

I then put a little bit of sprinkles on top of each truffle before the chocolate sets, because, well, why not!

Allow the chocolate to firm up, and enjoy!


Bon Appétit!