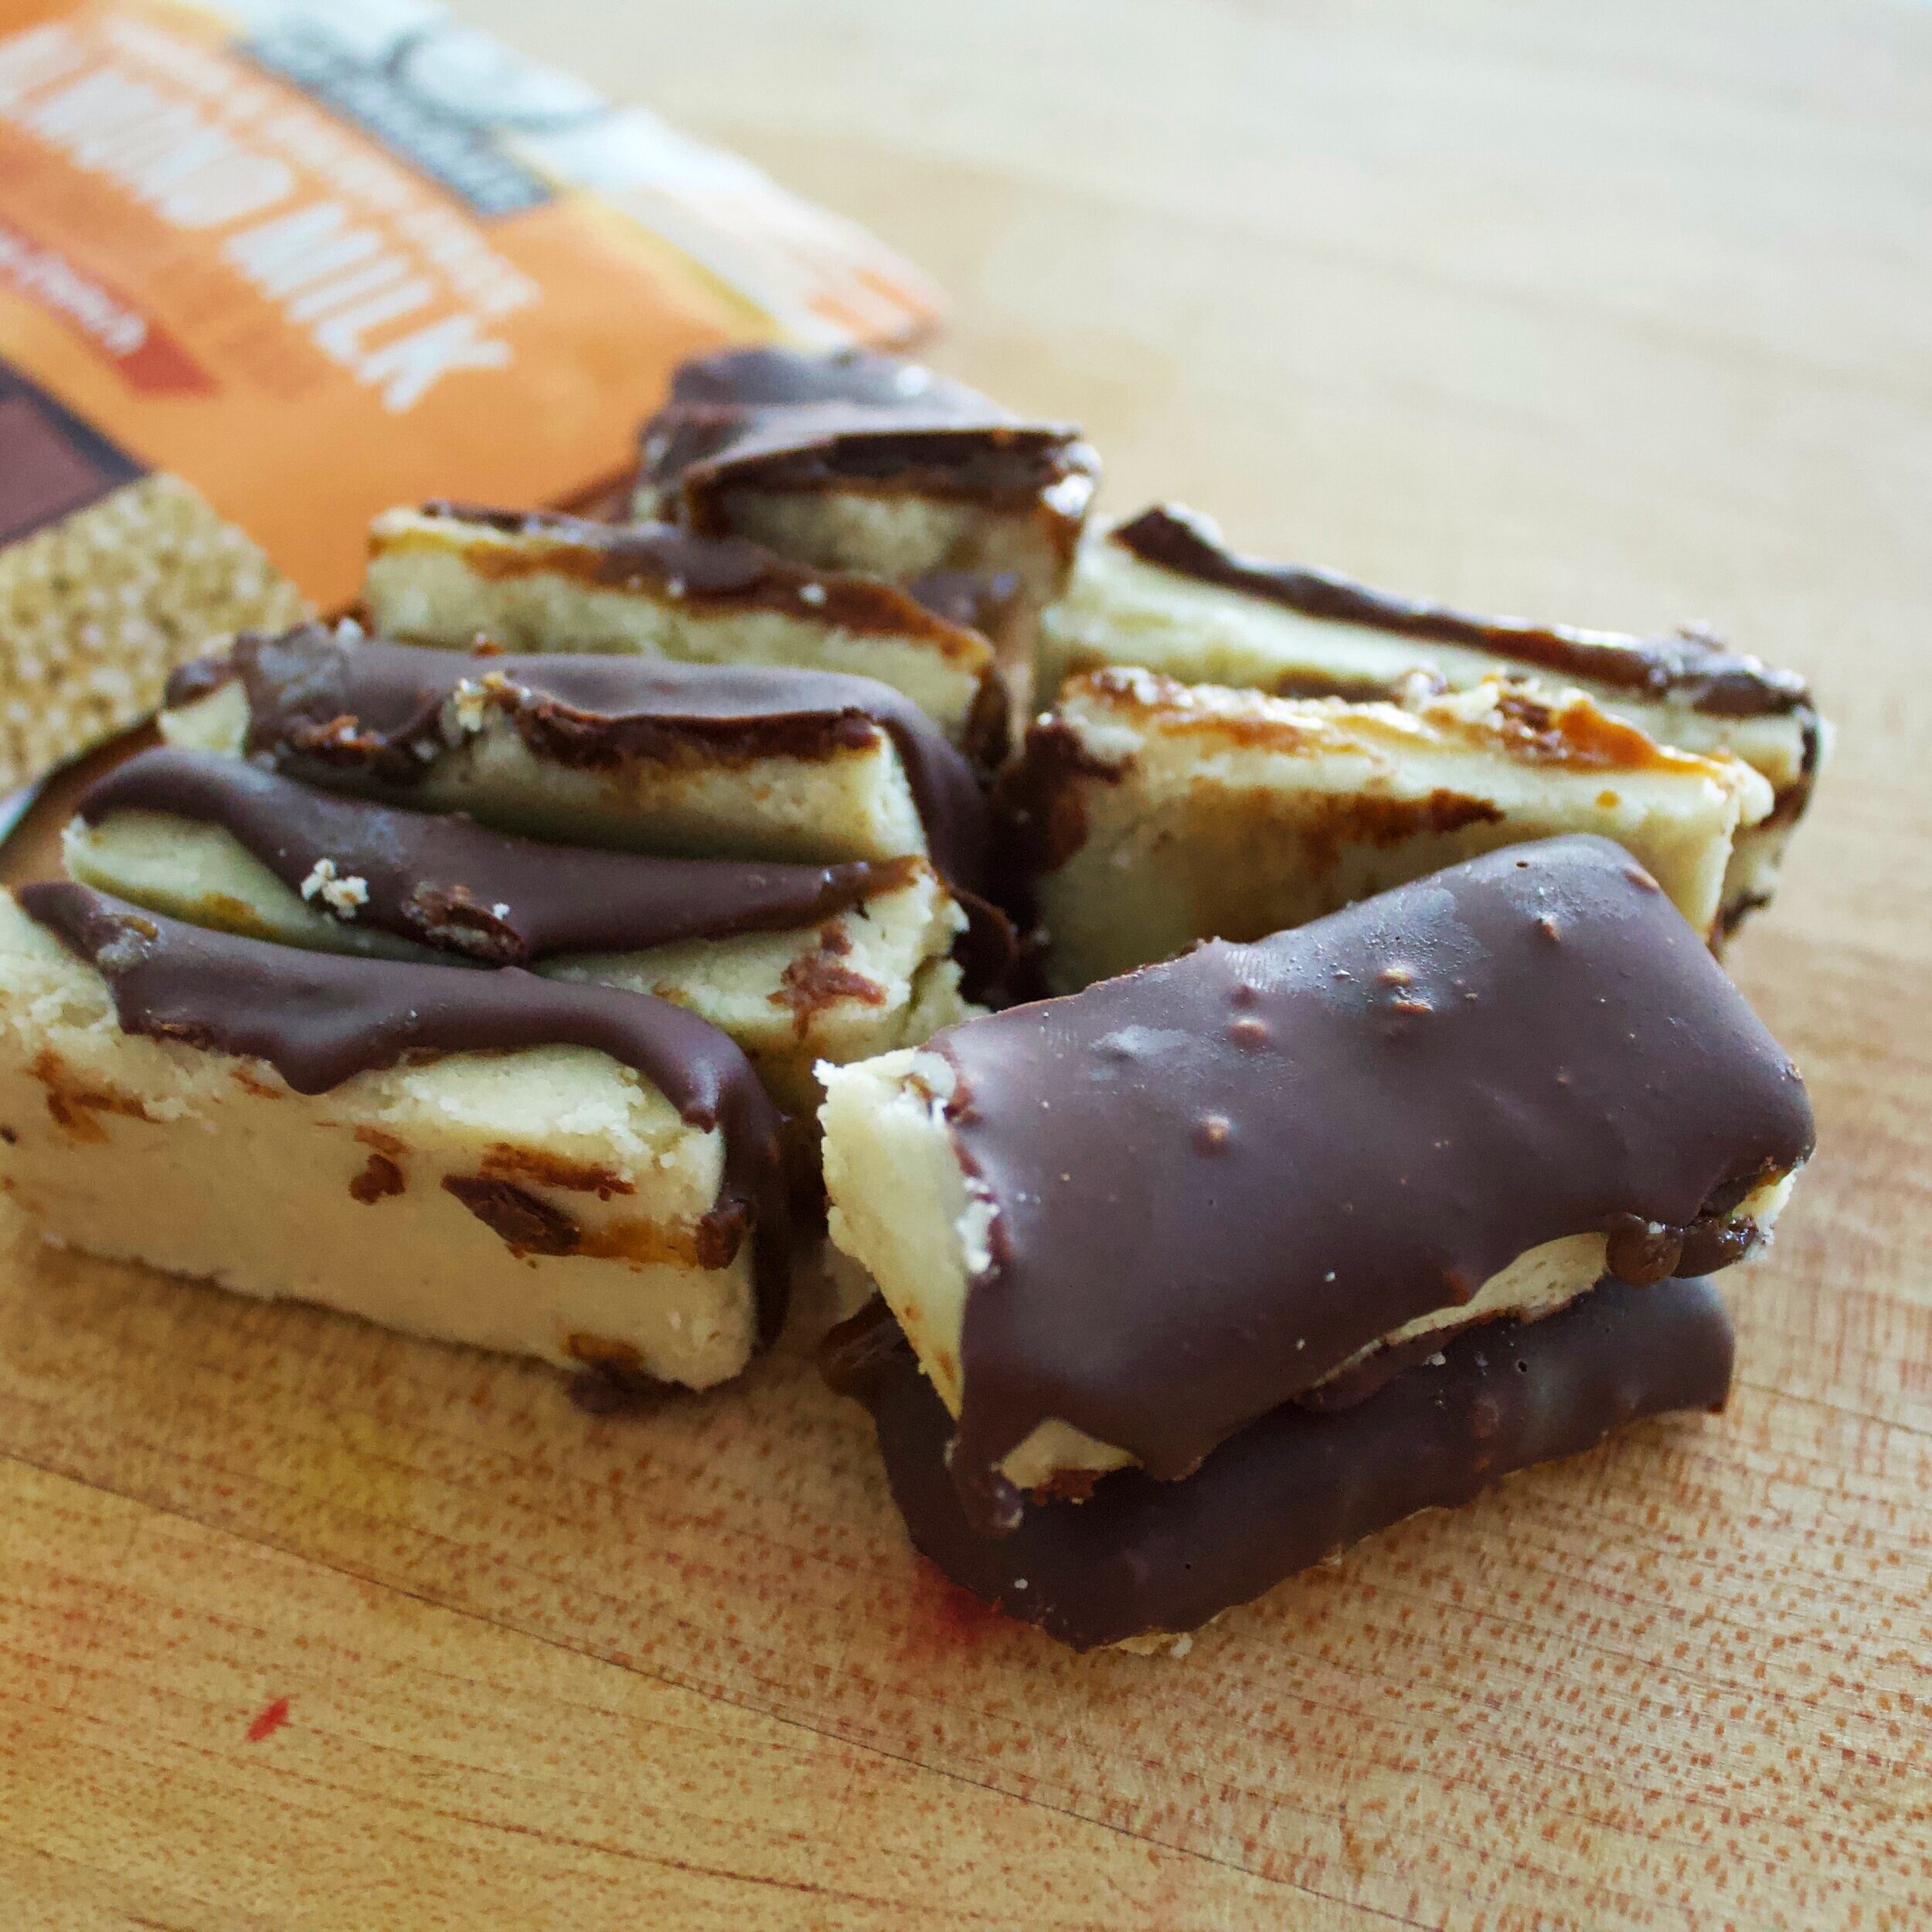
Tahini Caramel Bars

The universe is full of magic things, patiently waiting for our senses to become sharper.
— Eden Phillpotts
IMG_8828.jpg

I am welcoming a new love into my life: tahini!

I believe that I only have ONE recipe on here with tahini in it?! How is that possible?! And it’s from almost 4 years ago!! What. The. Heck. Anyways! This tahini caramel is out of this world. Dare I say that I prefer this to just a regular old caramel? I just might…

This exciting mix of being dairy free, baking with whole ingredients that actually taste good, and doing it all with a 6-month-old while also having been unable to really go anywhere since he was born is truly quite an adventure! I can no longer gain inspiration for things by going places, so it’s been far too much screen time and imagination for me to really get ideas for baking, for life, etc., which I both love and then also sort of dislike. I am constantly making lists in my head about places I want our family to travel to once we actually can, telling Oliver how many incredible things we will do once it’s allowed and safe, how fun airplanes are (I also love airports…), all of the food he’s going to get to try! Even just making these lists and going over them with my baby, yes, I have full on adult conversations with him, excites me as I want to truly spoil him with travel and life experiences!

All of this being said, during one of my weekly as-fast-as-possible grocery trips, I picked up some tahini and welcomed it like a long-lost friend. Is it a super unique ingredient? Not so much. Is it an incredible flavor that Oliver will be trying on his foods soon? Absolutely!! He began to try foods with spices on them this week and, let me tell you, cinnamon roasted carrots were a (messy) hit! So, while I sit here every day, or while I’m chasing our quick little 6-month-old around the house, I think of all of the foods Oliver is going to try when we can get out of our few block radius, jump on a plane, get in the car and drive for a few hours, whatever we can do to up his culture. For now, it’s going to start at home, start with this simple jar of tahini!

Thank you for reading my daydream above while I completely just skip over the fact that there’s a recipe below! As we want Oliver to be as enthusiastic about life as possible, having it start with food should be no surprise! This little dude sat with me as I made these, which also means it is fast AF to throw this together!! The shortbread crust? Takes maybe 4 minutes. The caramel? 5 minutes. While that is all setting up and you melt the chocolate: 10-15 minutes. FAST. AF. Aside from the tahini, which is subtle but has a beautiful aftertaste I might add, the star of this is the chocolate. Heck yes, I am talking about the Almond Milk Taza Chocolate (heart eye emoji). IT’S DAIRY FREE YET TASTES LIKE FULL ON MILK CHOCOLATE. What?! How?! It’s incredible. Also with nothing but 6 common ingredients, so dang satisfactory!! I have no words except go get yourself some!

And there we have it. My daily thoughts for you with a quick recipe for some tahini caramel bars attached! Thank you for humoring me, now go scoop up your baby, your dog, yourself, and treat yo’self to some of these incredibly delicious and perfect and smooth bites of heaven!

IMG_8763.jpg
IMG_8767.jpg
IMG_8775.jpg
IMG_8777.jpg
IMG_8800.jpg
IMG_8808.jpg
IMG_8819.jpg
IMG_8828.jpg


shortbread ingredients

Almond Flour—9 oz, or 2 C

Salt—1 tsp

Honey—2 TBL

Coconut Oil—3.75 oz, or ½ C


process

In a large bowl, combine almond flour and salt

Melt the honey and coconut oil together

Add this melted mixture to the dry ingredients

Mix until combined, should hold together when pressed

Press into an 8x8” pan, freeze while making the caramel


tahini caramel ingredients

Tahini—3 oz, or ¼ C + 2 TBL

Coconut Sugar—3 oz, or ½ C

Vanilla Extract—2 tsp

Oat Milk—1 oz, or 2 TBL

Cinnamon—½ tsp


process

In a small saucepot, combine the tahini, coconut sugar, vanilla, milk and cinnamon

Allow to simmer for 2-3 minutes

Let cool slightly, and then pour on top of the shortbread

Put back in the freezer for the caramel to firm up


chocolate ingredients

Taza Almond Milk Chocolate—5 oz, or 2 bars

Coconut Oil—1 TBL


process

In a heatproof bowl, combine the chocolate and coconut oil

Melt and mix until homogenous

Pour over the caramel layer, put in the fridge to set

Once set, remove from the pan/dish and cut into desired size and enjoy!


Bon Appétit!

Candy Cookie Cake

Happy Halloween, my friends!

What are your plans?! Trick-or-treating? Passing out candy? Ridiculous parties? Or, if you’re like me, you'll be devouring all of the candy you had to buy, knowing that no one will come up to your apartment door ringing the bell…

Yes. That’s me. I can’t resist the candy aisle for any holiday, and when you can get an assorted bag of all of the best mini-size chocolates, you go for it! As a chocolate-obsessed gal, I just can’t help myself and I’m not ashamed. Funny story—I recently did a small “about me” for my job’s website and had to write about my favorite foods…all I could think of was, well, chocolate…

Yes, Katie’s favorite food is chocolate…who am I?!

ANYWAYS! Back to this glorious cookie cake. As I mentioned in my post here, cookie cakes are just like a dream of mine—and I always am tempted to buy one when walking past Mrs. Fields. So, of course, challenge accepted, and I had to make this, especially since I’m trying to use the pounds of Halloween candy that I bought so I don’t binge eat it every night.

I also feel like, if I was to get actual Trick-or-Treaters and if handing out baked goods was acceptable, this would be the most incredible treat ever!! Like, oh yeah, if you go to Katie’s house, you can get slices of a cookie cake that is stuffed with candy…basically a 2 for 1! Ahh in my wildest dreams…

AND what I love so much about this is that you can put anything you want in it—yum! I mean, Kitkats, Twix and Snickers are the best chocolates to choose, but I won’t judge if you chose something a little less exciting and wonderful. So, if you’re like me and you bought way too much candy, this is a perfect way to use it! Bake up a few of these cakes, invite over some friends, watch Hocus Pocus, or even Saw, drink so wine—really there’s nothing you can do wrong with this candy-filled cake. While I do sometimes miss the weeks of costume making and end up wearing basically a black dress with cat ears, this new tradition I have of putting on big sweats and stuffing my face with candy and wine (maybe “Crazy Dog Lady” is this costume?) is something that I can get on board with!


cookie ingredients

Butter—4 oz, or ½ C

Brown Sugar—3 oz, or 1/3 C

Sugar—1 oz, or 2 TBL

Eggs—1

Vanilla—½ tsp

Flour—6 oz, or 1 C

Salt—½ tsp

Baking Soda—½ tsp

Halloween Candy, chopped—3 oz, or ¾+ C


process

In the bowl of your mixer, cream together the butter and sugars until light and fluffy.

Add in the egg and vanilla.

Sift together the flour, salt and baking soda. Slowly add this into your creamed mixture.

Scrape down the sides of your bowl.

Add in your chopped candy (reserve a small handful)—whatever you like best!

In terms of Halloween candy, I chose chocolate because, to me, that goes yummiest with this cookie cake! From there, pick your favorites. Mine happen to be Twix, Snickers and Kit Kats, but the candy aisle is your oyster!

Spray a spring form pan or a tart pan with nonstick spray.

Press the cookie dough in the pan, leaving about ½ an inch around the edge so that the cookie can spread slightly.

Sprinkle the remaining chopped candy on top of the cookie dough.

Refrigerate for at least 30 minutes so that it will firm up.

When you are ready to bake, preheat your oven to 350˚ F.

Bake your cookie cake for about 20 minutes, until the edges are slightly golden.

The center may look underbaked, but it will finish baking from the heat of the pan outside of the oven.

Allow to cool completely before decorating!


buttercream ingredients

Butter—2 oz, or ¼ C

Shortening—0.5 oz, or 1 TBL

Confectioner’s Sugar, sifted—5 oz, or 1 C

Cocoa Powder, sifted—0.5 oz, or 2 TBL

Milk—0.5 oz, or 1 TBL


process

In the bowl of the your mixer, cream the butter and shortening until smooth and fluffy.

Sift together the confectioner’s sugar and the cocoa powder.

Slowly add this into the mixer, scraping down the sides when necessary.

Add the milk in about a teaspoon at a time—you may need more if you want it a little creamier.

Scrape down the sides of the bowl, and then turn the mixer up to medium-high to give the buttercream a nice, final whip.


When your cake is completely cooled, you can begin to decorate with the buttercream!

Put it into a piping bag with whichever tip you’d like to use—a star tip will make nice rosettes or a rope, but it’s whatever look you’re going for.

Pipe around the outside boarder, decorate with some sprinkles or some more candies of your choice, and devour!


Bon Appétit!

Oatmeal Raisin Cookie Truffles

Happy New Year, my friends!

I hope that everyone’s end of the year was as spectacular and restful as mine. A two-week break from work, spending some much needed time with my family in Maine, snuggling my two dogs, and ringing in the New Year with my fiancé, I couldn’t have asked for a more wonderful vacation! Another plus? It snowed a lot while I was home! Well, one day and one blizzard, but enough for us to be stuck in the house for most of it! The dogs absolutely loved it (see Instagram) and it gave us all an excuse to lounge around for the day.

So, while Christmastime is by far one of my favorite times of the year, cue Michael Bublé and Elf and Gingerbread houses, I am pretty excited for 2016! I mean, I’m getting MARRIED this year!

What?!!?

Yes. Eight and a half months away!! You could say that I’m kinda sorta super duper excited about it!—even had my first dress fitting and met with our wedding cake maker over the holidays…which included over an hour of stuffing my face with multiple kinds of cake/buttercream/filling combos…

So 2016 is going to be amazing with just the wedding alone! What else is new about this year? Oh, well I started a KBB Dessert of the Month Club! (Inquire if interested!) Each month I’ll be sending out a lovely package full of homemade baked goodies, my own recipes, and many not posted to the website (just yet), but some will be—including the recipe below!

How did I decide to start the DOTM Club? While I believe that anyone can truly bake anything, posted on my site and others, sometimes you really just 1. Don’t have time, 2. Just aren’t too into baking, but love to eat desserts, or 3. Love to get yummy, homemade goodies sent to you! And so was born this fabulous little club.            (For January, I am sending out some to die for coconut macaroons as well as these simply delectable Oatmeal Raisin Truffles! )

To me, January is all about two things: getting back into your healthy habits (aka less gingerbread, more kale) and staying cozy while the temperature drops to -10˚F. The Oatmeal Raisin Truffles are more on the guilt free end of the spectrum of many of my desserts. They are bite size (so try and restrain yourself from eating the entire 4 dozen batch) and they are relatively low in the fat and sugar department, because, to bind properly, I’ve loaded them with a LOT of oats and a TON of raisins! And to finish, coating them in a dark chocolate is optional!

Yes, it’s cookie dough, yes it’s a dessert, but you really only need to eat 1, maybe 2, to feel satisfied! While this recipe may not be a beet-kale protein smoothie, it is a spice-packed, fiber-filled oatmeal raisin cookie truffle that’ll satisfy the start to your amazing 2016!


ingredients

Butter, room temperature—4 oz, or ½ C

Brown Sugar—5.25 oz, or ¾ C

Vanilla Extract—0.2 oz, or 1 tsp

Milk—2 oz, or ¼ C

Flour—4.25 oz, or 2/3 C

Salt—0.1 oz, or ½ tsp

Cinnamon—0.1 oz, or 1 tsp

Nutmeg—¼ tsp

Oats—6 oz, or 2 C

Raisins—4 oz, or ¾ C

Chocolate—8 oz

Butter—1 TBL

Sprinkles—optional


process

Cream together the butter and brown sugar.

Add the milk and vanilla.

In a separate bowl, combine the flour, salt, cinnamon, nutmeg, oats and raisins.

Slowly add into your creamed mixture.

Once you have combined all of the ingredients, and a dough has formed, scoop out into whatever size truffle that you’d like.

You may either use a small scoop or a scale, like I prefer to do. I weigh each ball into 0.5 ounces, just the right size to pop into your mouth!

Place all of your scooped dough onto a sheet tray lined with parchment or a Silpat and put into the refrigerator to firm up, for about an hour.

When you’re ready to dip your truffles, make a double boiler using a medium sized pot filled with about an inch of water, and then a heat safe bowl on top. Make sure that the water is not directly touching the bottom of the bowl; you do not want to scorch your chocolate!

Turn the burner onto medium-low heat.

In the bowl, place your chocolate and butter, making sure to stir every few minutes so that the chocolate melts evenly.

Once melted, begin to dip your chilled cookie dough truffles.

You may either dip the entire ball, or just half, whatever you’d like!

I then put a little bit of sprinkles on top of each truffle before the chocolate sets, because, well, why not!

Allow the chocolate to firm up, and enjoy!


Bon Appétit!

Peanut Butter Marshmallow Candy

Merry Christmas! Too soon? It is December, so, for me, it’s Christmas all month long!

I wanted to kick off this holiday baking month with some “candy” that my mom makes each year for Christmas. Traditionally, my mom makes these with a thick peanut butter crust and a layer of chocolate on top. I added some homemade marshmallows between those two layers to kick it up a notch, to turn my moms PB Candy into PB Fluff Candy! Or could we call it S’mores Candy?

Let’s stick with PB Fluff—bring back some of those happy childhood times when you would open your lunchbox up to a peanut butter and fluff sandwich!

Anyways, let’s stop being sidetracked by childhood nostalgic moments...

Each year for Christmas, my mom will make at least two pans of this incredible candy. Usually, it will go out as gifts with some other homemade breads and cookies, wrapped in adorable tins with snowmen on them, spreading endless cheer. Other times, my brothers and I will eat so much that we get stomachaches, but it’s worth it.

First off, who doesn’t love peanut butter?!(—another nut butter can be substituted!) But peanut butter. You can eat it by the spoonful, you can put it on toast, you can eat it by the spoonful, you can cover fruit in it. Yeah, endless possibilities, and you can turn it into a thick, wonderfully sinful crust that you will eat 10 pieces too many of. Sounds magical, huh?

Want some homemade marshmallows on top? This recipe from over the summer is OH so simple, and makes this candy that much more fabulous. Final piece of this delicious puzzle? A melted butter and chocolate glaze—as you know peanut butter and chocolate ARE a match made in dessert heaven!

While this may not be coated in candy canes or be a cute little gingerbread man that you can decorate with icing and sprinkles, this is such a fabulously tasty peanut butter fluff candy that can be given as gifts, enjoyed at holiday parties, or just quietly eaten in the corner with a fork…

I would say go ahead, make a batch, but I think that saying make three batches is going to be your safest bet—you will not want to run out of this candy at any point during this absolutely magical month of December!

IMG_5945.JPG

ingredients

Butter (melted)—12 oz, or 1 ½ C

Peanut Butter—17.5 oz, or 2 C

Confectioner’s Sugar—22.5 oz, or 4 ½ C

Graham Cracker Crumbs—1.5 oz, or ½ C

Oats—4.5 oz, or 1 ¼ C

Marshmallows—Recipe found here, or 1 bag (fluff can be used, too!)

Butter—4 oz, or ½ C

Semi-Sweet Chocolate Chips—12 oz, or 2 C


process

In a large bowl, combine the 12 oz of melted butter, peanut butter, confectioner’s sugar, graham cracker crumbs and oats.

Mix until a dough forms.

Press into the bottom of a 9” x 13” pan.

Next, whether you have decided to just use store bought marshmallows, or my homemade marshmallow recipe (super simple!), layer this on top next.

This homemade marshmallow recipe will take only about 20-25 minutes to make. It’s so quick and easy, and who won’t be impressed by them??!

In a heatproof bowl, melt together the 4 oz or butter and chocolate chips either in your microwave or over a double boiler.

Once melted and mixed, pour over your marshmallows.

Allow to set and cool.

Cut and enjoy!


Bon Appétit!

Ginger Spice Cookies

          Happy November! Now that Halloween is over, the true holiday season is upon us! Why yes, I may begin to watch Elf soon (don’t tell Roberto), and humming some tunes that are only appropriate for next month may occur while I prepare my Thanksgiving dessert menu, but I just cannot help it. While I absolutely adore fall and all that it has to offer, November 1st-December 26th has me in a rather nonstop giddy state. Who knows, maybe there is just 100x the normal amount of love in the air, or maybe I am just super excited for Peppermint Mocha season (sorry, PSL, you no longer win!), but as of November 1st, general happiness is at an all time high!

            So, of course, I had to bake a staple in the winter diet—ginger cookies. Growing up, my grandparents would always have a huge box of these in their house, and I would, not so sneakily, eat handfuls at a time. I used to just let them soak in milk or hot chocolate, get super mushy, and then eat them, about 10 in a sitting, before possibly going back for more. Wow, sugar obsessed much? Not ashamed!

            As I now feel as though it is acceptable for me to purchase these forever favorite ginger snaps, I thought it would be even better to make my own version, so I don’t have to go back to the supermarket every other day to shamefully buy another box! With my addition of candied ginger, the spiciness of this cookie multiplies, and at the same time, brings the sweetness level down—this allows you to eat more of these, guilt free because your mouth isn’t screaming at you for a sugar overload! Best part of my ginger spice cookies? When you roll them in sugar and bake them, they form a nice, crisp outer shell, but leaving the insides soft and chewy, the most amazing combination of textures.

            It’s a good thing that I am feeling extra full of love these days because, as much as I am obsessed with these cookies, my fiancé is even more! So go and take your cheery self into the kitchen, maybe put on a pair of favorite socks that happen to have reindeer on them, or your coziest snowflake sweater, and get to baking!

IMG_5631.JPG

ingredients

Butter—6 oz, or 12 TBL

Brown Sugar—8 oz, or 1 ¼ C

Eggs—1

Molasses—2.75 oz, or ¼ C

Flour—12.5 oz, or 2 ½ C

Baking Soda—0.1 oz, or ½ tsp

Salt—0.05 oz, or ¼ tsp

Ground Ginger—0.15 oz, or 2 tsp

Candied Ginger (cut into small pieces)—0.75 oz, or 1 TBL

Allspice—0.1 oz, or ½ tsp

Black Pepper—0.1 oz, or ½ tsp

Sugar—as needed to roll dough in


process

In the bowl of your mixer, cream together the butter and brown sugar.

Once smooth, add in your egg and molasses. Mix until combined.

Sift together all of your dry ingredients and then slowly add to your creamed mixture.

Once the dough has formed, add in your chopped candied ginger.

Transfer your cookie dough either into another bowl or wrap it in plastic, allow it to firm up in the refrigerator for about an hour.

When you are ready to bake your cookies, preheat your oven to 350˚ F.

Form your cookie dough into whatever sized balls you would like, 2 oz is the perfect cookie size to me!

Roll them in sugar and then put on a sheet pan that has been sprayed with nonstick spray.

Press down slightly.

Put into your preheated oven and bake for 12-15 minutes.

Remove from the pan and allow to cool slightly before eating.


Bon Appétit!