Zucchini Banana Cakes

Obstacles do not block the path. They are the path.
— Zen Proverb
IMG_8722.jpg

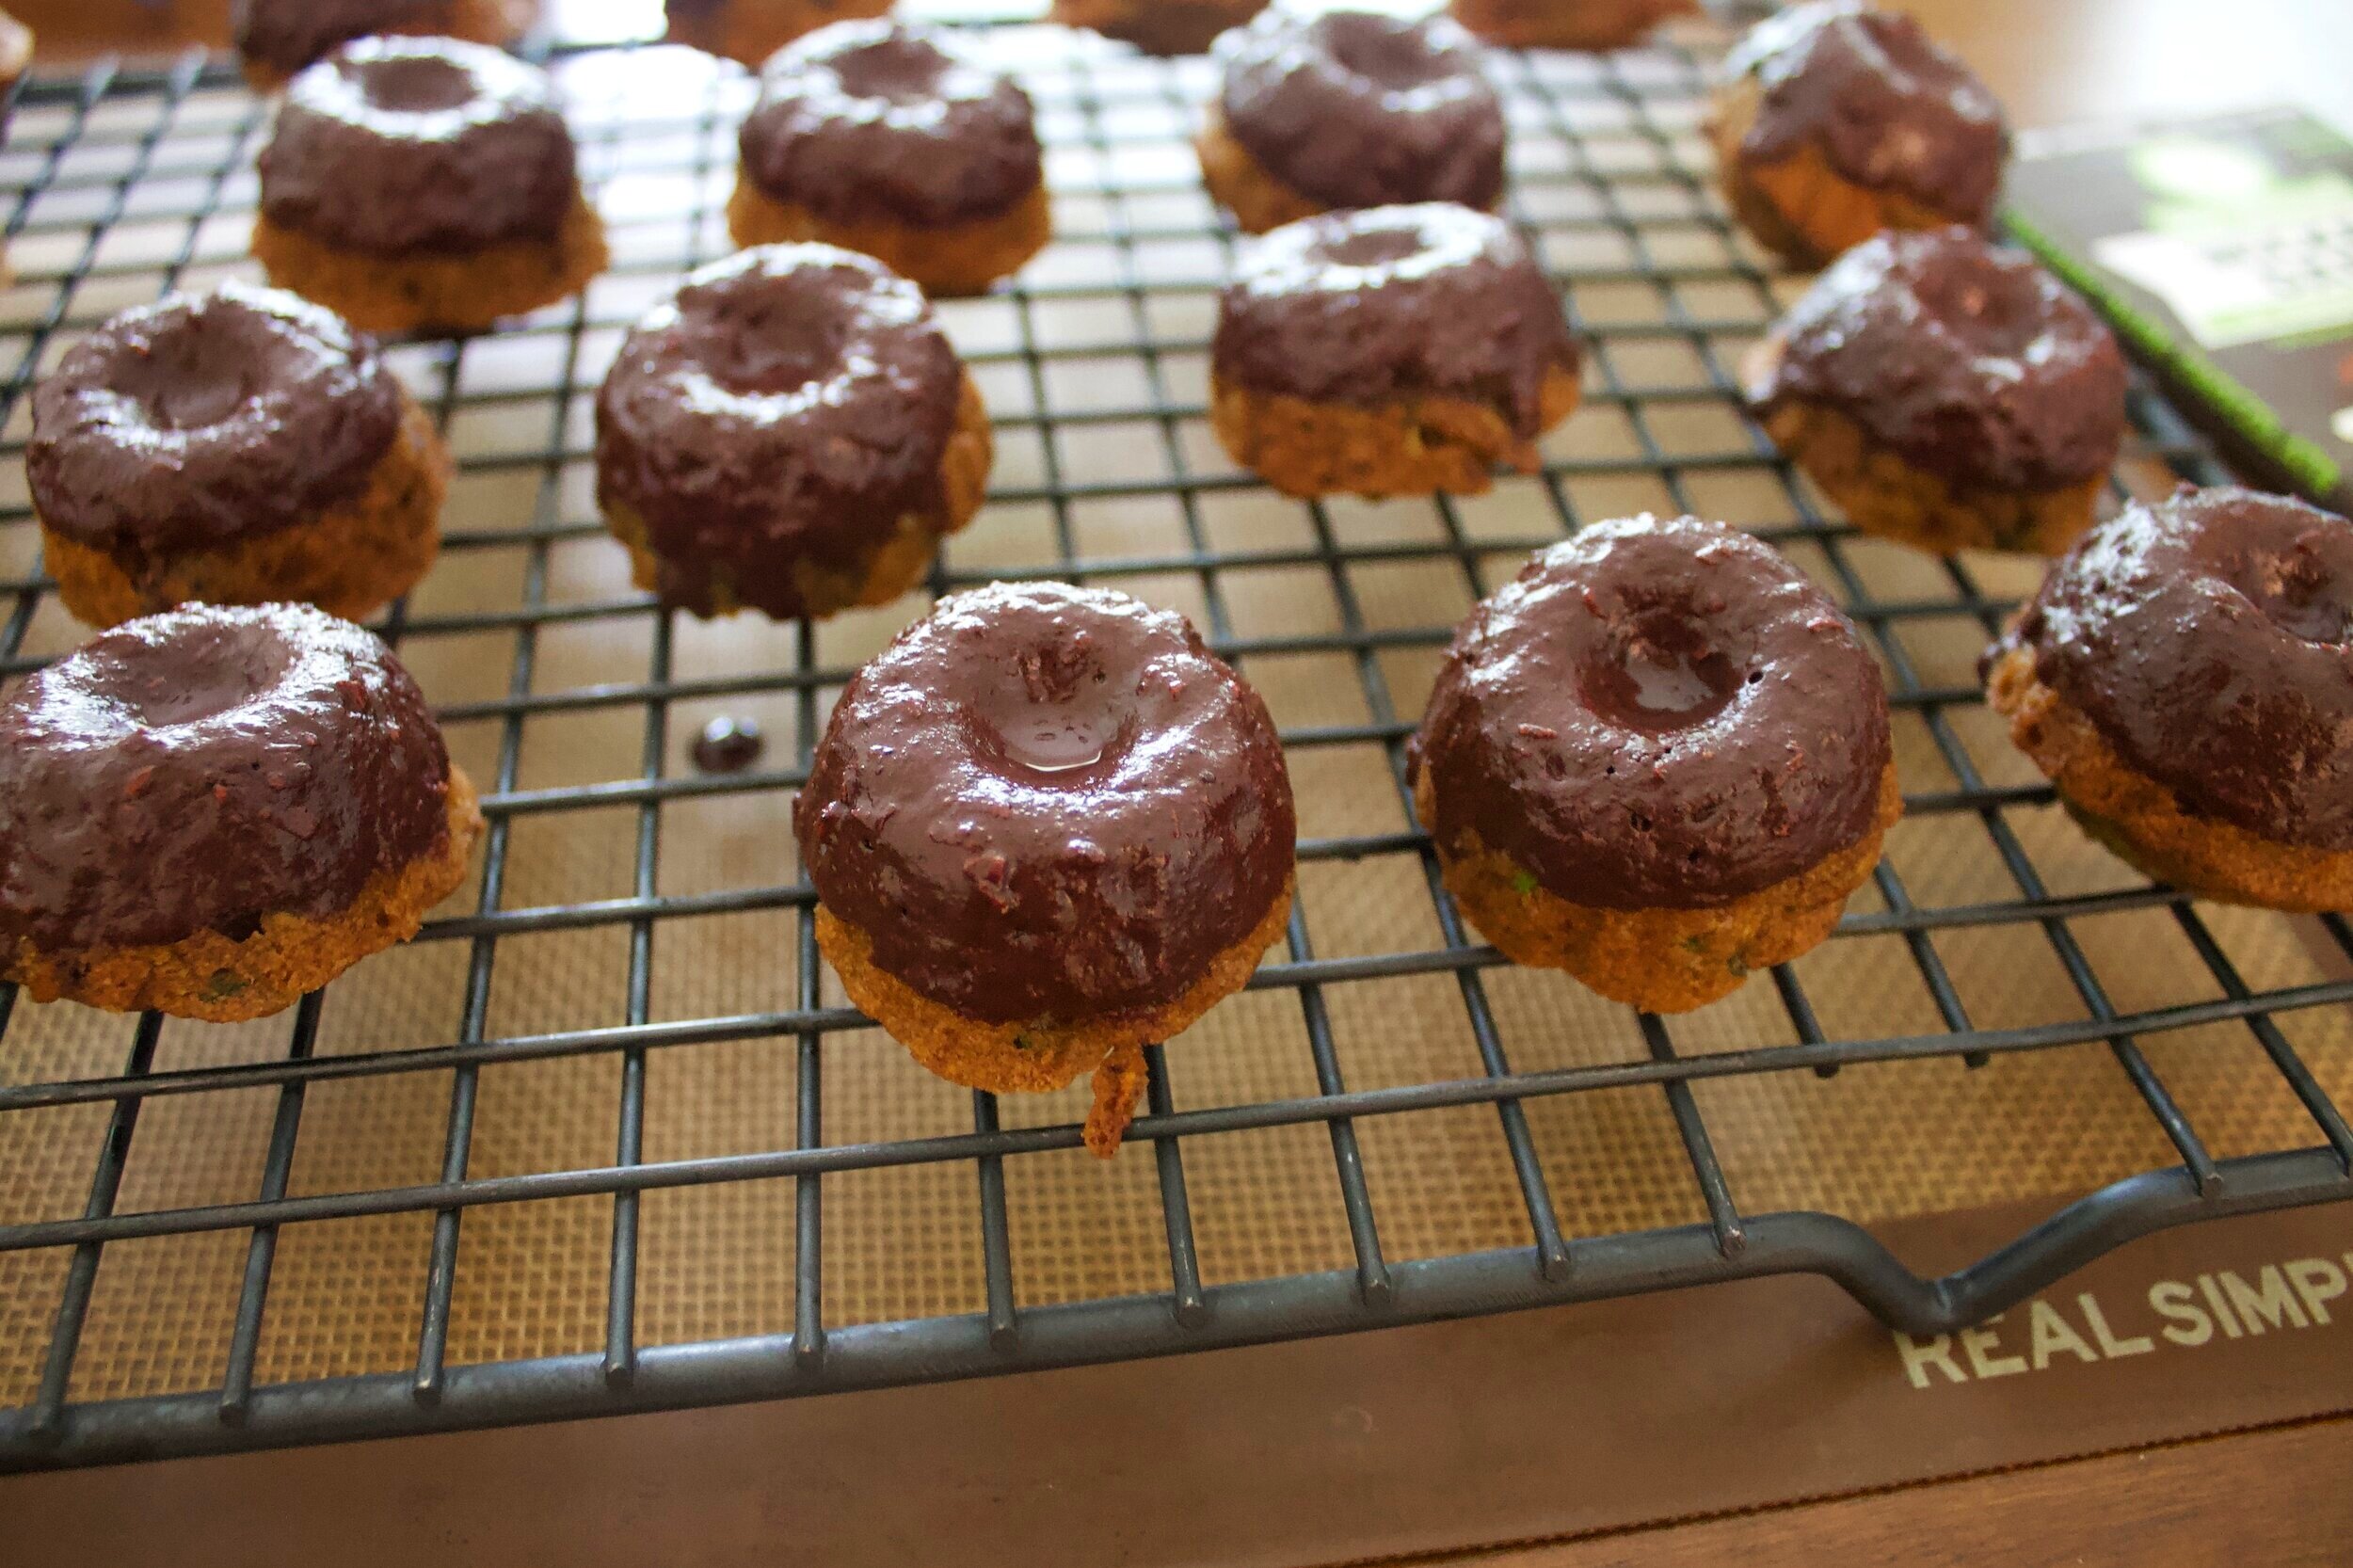
Can we just start by saying that I forgot how much I LOVE adding things like zucchini, banana, and the like to my baked goods?! They are like an instant moist maker (if you know, you know) and I couldn’t be happier! With this recipe, I wanted to see if I could go eggless, just as a fun little challenge for myself—and I was not prepared to fall in love with these little cuties as much as I did!

To me, zucchini cakes and breads are such a summer staple, as zucchinis are truly thriving and, even during this time, they can be found in abundance at the grocery store. At our local shop, they are front and center in the produce section, so naturally, I grabbed way too many of them for our weekly consumption! Then I was like seriously, Katie?! Why haven’t you baked with zucchini yet this season?! And these little bites were born! To go even a step further, I threw in a banana (#quarantinebananabread), subbed the butter for coconut oil (a true obsession of mine), used some coconut sugar (if you haven’t tried this yes, DO IT! Your life will be changed), and, the pièce de résistance, TAZA CHOCOLATE!!

What do I love about Taza?! Uhm well for starters it’s dairy free. Yes, so your girl can eat it with a happy tummy! And there are truly just a handful of ingredients, no added sugar, no added anything, it’s such a nice bean to bar company and I am living for it!! The dark chocolate I used in these babies is unreal! The perfect combination of just a bit bitter with just a bit sweet, so you aren’t having any sugar spikes in these mini cakes! For the glaze? Oh, I went for it and used their coconut chocolate bar. It is so. dang. divine!! We all know your girl loves chocolate, so when I got a big box of both their traditional and nut milk bars, I was on cloud 9!

Anyways, let me come down a bit here! Let’s just end this little bit by saying that 1. They are the perfect size, so popping in a few of these at a time is truly encouraged; 2. My husband loves them—and when he likes something, it makes me even happier!! Mainly so I’m not the only one eating them; 3. These are SO great for summer! Easy to whip up, simple ingredients, take only 15 minutes to bake, what more could you ask for?!

As a lover of all things chocolate and then adding in fresh produce into something as well, I’m SUCH a happy camper—and trust me, you will be too once you stop reading my ramble and get to baking!!


IMG_8660.jpg
IMG_8683.jpg
IMG_8688.jpg
IMG_8691.jpg
IMG_8699.jpg
IMG_8703.jpg
IMG_8725.jpg
IMG_8714.jpg
IMG_8722.jpg

ingredients

Coconut Oil—3.75 oz, or ½ C

Coconut Sugar—3 oz or 2/3 C

Banana—1 medium

Vanilla Extract—1 tsp

Flour—5.5 oz, or 1 C

Baking Powder—¾ tsp

Baking Soda—½ tsp

Salt—½ tsp

Cinnamon—1 tsp

Zucchini, grated—4.75 oz, or 1 C

Oat Milk—1.5 oz, or 3 TBL

Chocolate, chopped—1 bar (2.5 oz)


Chocolate, chopped—1 bar (2.5 oz)

Coconut Oil—1 TBL


process

Preheat your oven to 350˚F.

In a bowl, combine softened coconut oil and coconut sugar, mix until homogenous.

Fold in the mashed banana and vanilla extract.

In a separate bowl, sift together the flour, baking powder, baking soda, salt, and cinnamon.

Gently alternate folding in this mixture and the milk into the banana mixture.

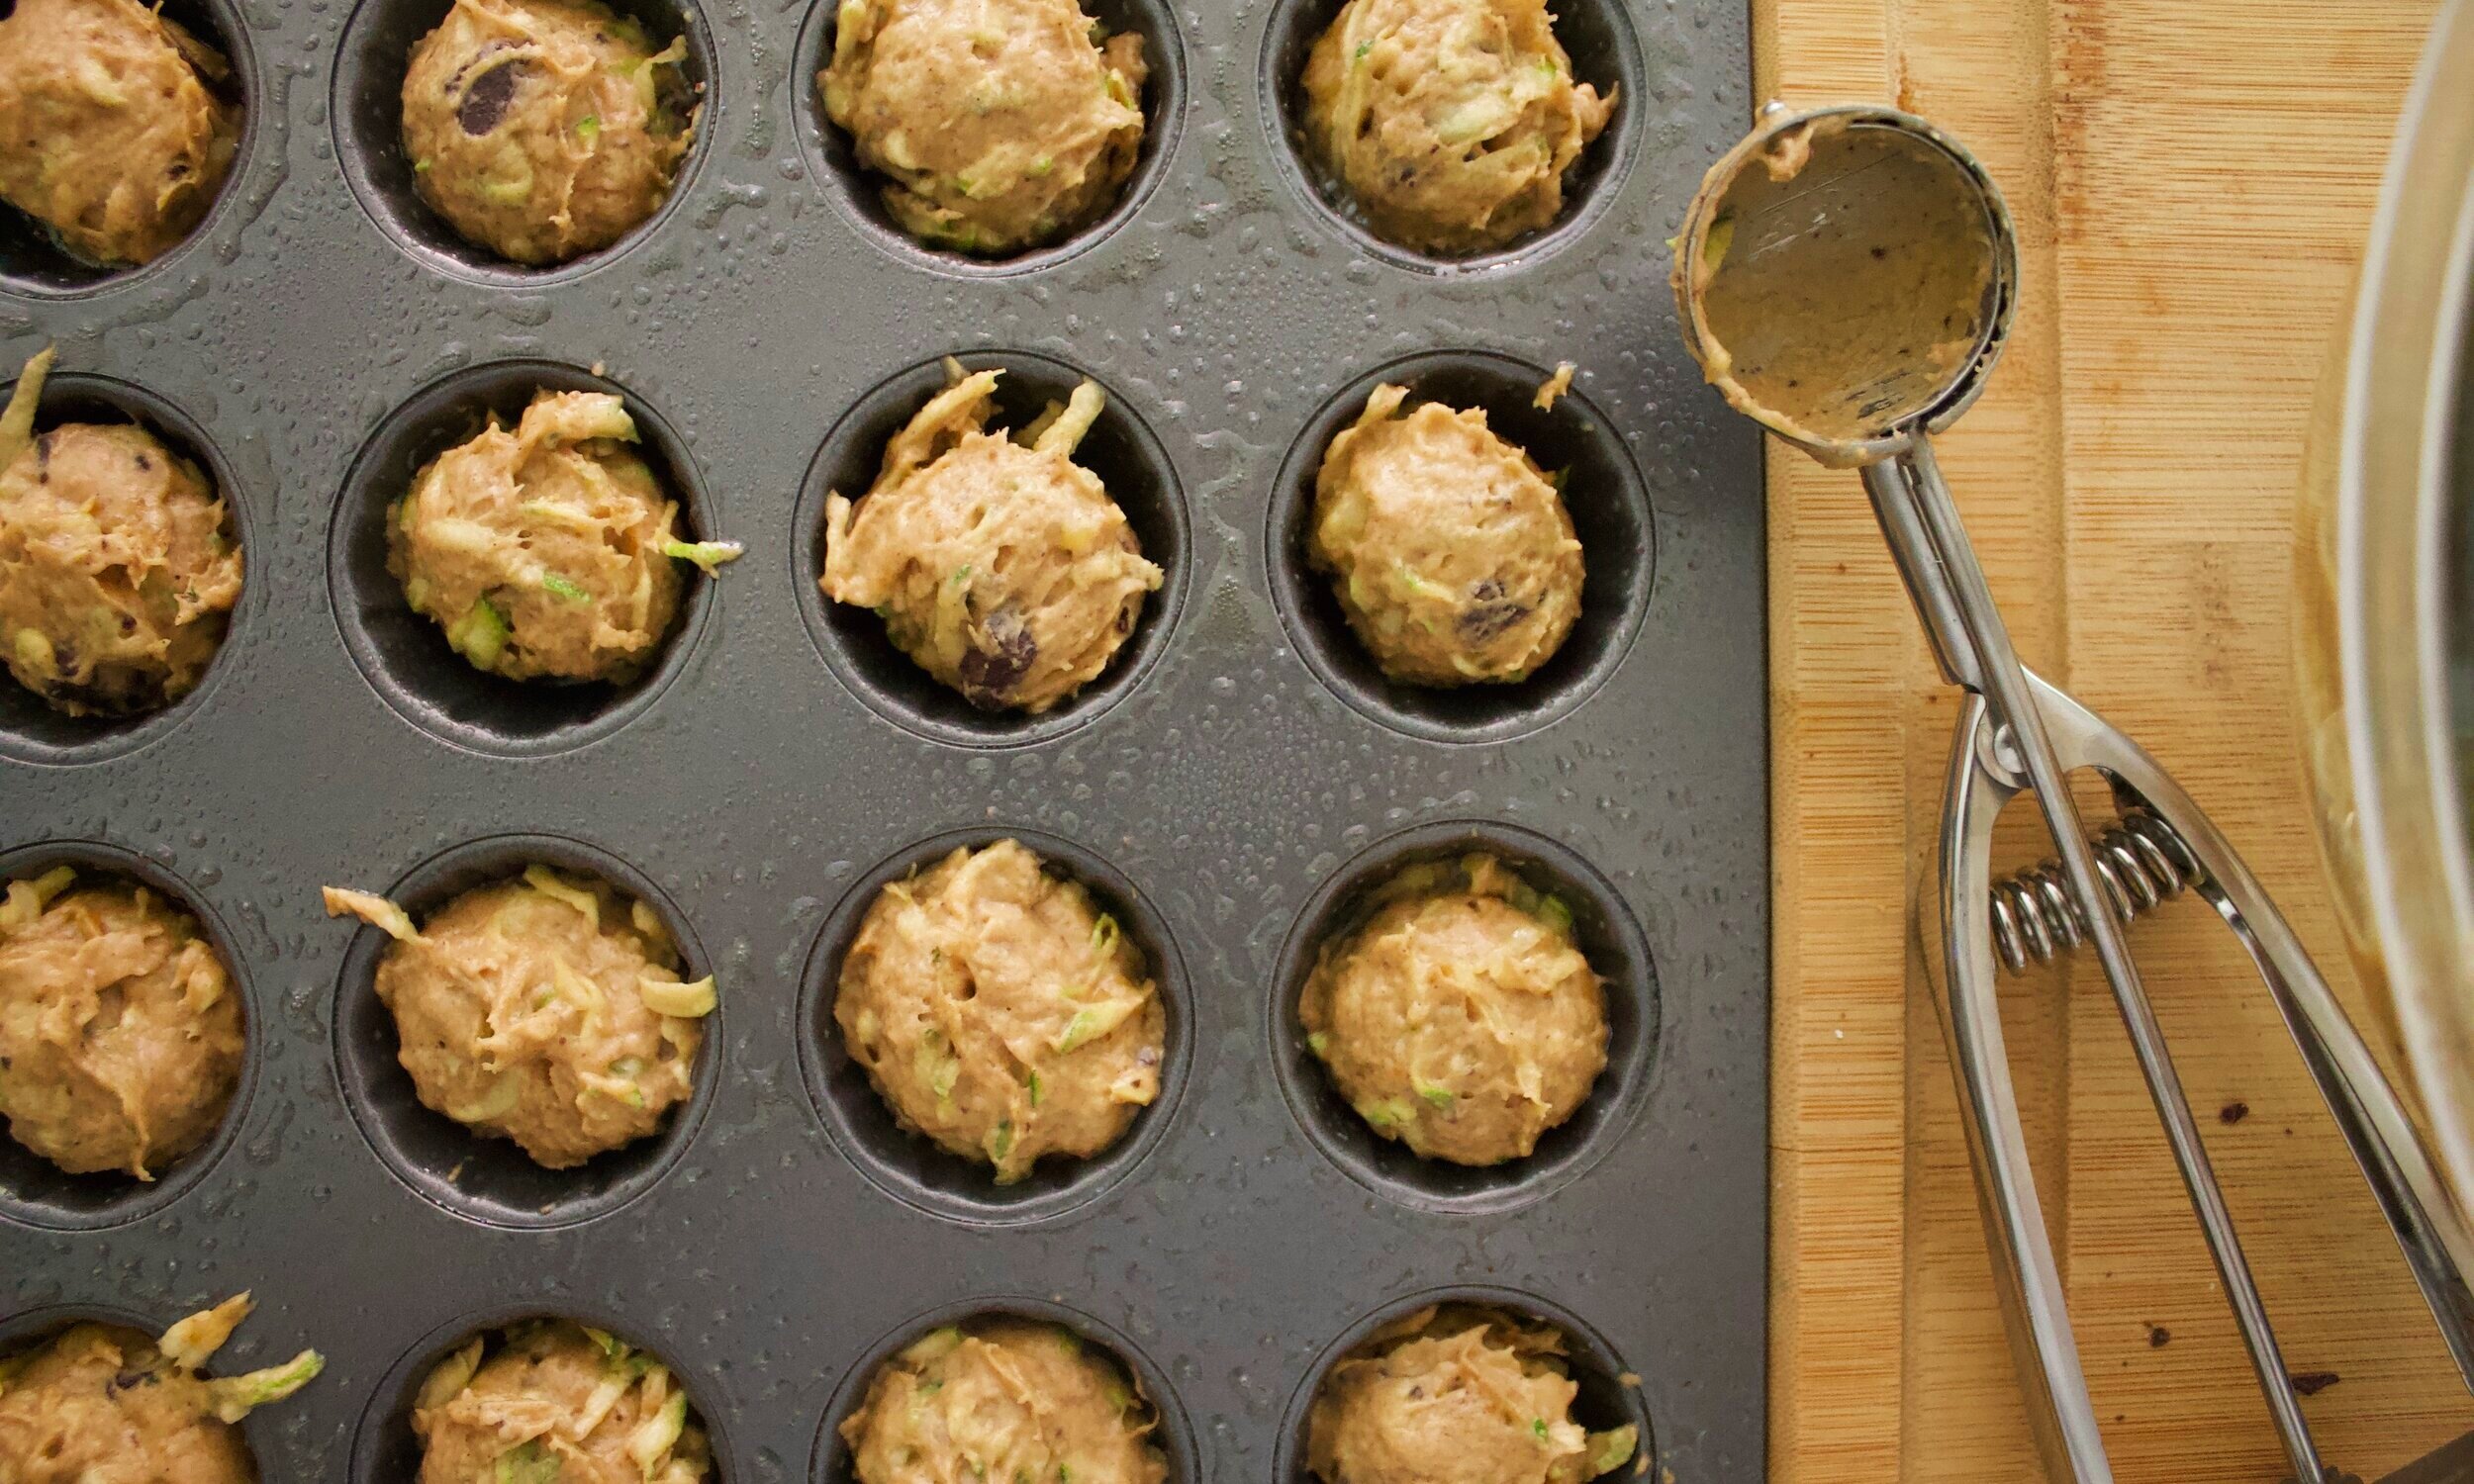
Fold in the grated zucchini and chocolate.

Spray either a mini bundt pan or cupcake pan with nonstick spray.

Scoop this batter until it is ¾ way up the sides of each cup.

Bake for 7 minutes, rotate, then 7 more minutes.

Remove from the oven and allow to cool completely on a cooling rack.

To make the glaze, melt together another TAZA chocolate bar with 1 TBL of coconut oil.

Dip each mini cake into the melted chocolate, allow to set before storing.

These keep wonderfully in the refrigerator, while still very moist due to both the banana and zucchini!


Bon Appétit!

Sweet and Salty Snacking Bars

Live the actual moment. Only this moment is life.
— Thich Nhat Hanh

Can I call it consistent if it’s just two posts? Yes? Okay, perfect! As I have always been a HUGE planner and list maker, having a baby has taken that to an entirely different level. At the start of each week I make a nice long list as to what I want to get done, from the bigger things to the basically insignificant things (yes, I wrote ‘weed garden’ down…) just so that I can visually see and tick off everything throughout the week. There’s nothing like the feeling of completing a to-do list! That being said, I’ve been adding in time for me to recipe test and blog each week. Finally! I am back to it. Big win for this mama!

This week on parent-friendly-recipes-that-won’t-eat-up-your-whole-day, we are going back to a childhood favorite of mine! Do y’all remember Sunbelt granola bars?! The chewy ones covered in chocolate?! Yeah, they were AMAZING. I’m not afraid to admit that I used to eat multiple at a time—who could resist? To this day, I’m still a big snacker. Sure, I try my best to be better at three meals, but lunch isn’t always for me! Maybe it’s because I’m constantly eating handfuls of nuts or fruit or chocolate…

Anyways! Back to these granola bars. I’ve been wanting to spice up my snack game with a little something something homemade. Probably one of my all-time favorite things I make are these raw granola bars. They’re SO simple and quick, which, as we know, is my go-to these days. With these bars, I wanted to go even more back to basics! I’m hoping that once Oliver is old enough to eat and then old enough to talk, he will be ALL about my homemade bars. Is it too much to want him to bake with me and love eating raw cookie dough as much as I do?! Ugh I can’t wait!! There are so few ingredients in these, and I was able to make them AND clean up before his nap was over, so a win all over!

The base is sweetened from dates and loaded with oats, which I think is what gives it the very authentic childhood granola bar taste. Cashews, coconut, a little bit of salt, nothing too overwhelming so that every flavor can be tasted. Plain and simple. Of course, we had to jazz it up somehow! And so I went for it and added a chocolate layer in the middle. Oohhhh la la. Yes, please! A little bit of cocoa powder, coconut sugar (the flavor of coconut sugar is out. of. this. world.), and coconut oil or butter, and that’s it! Again, a basic yet extremely satisfying layer! More of the base on top, freeze them and boom – you’ve got yourself a nice sweet and salty snacking bar! I also am so tempted to do a jam filling. A peanut butter filling. A coconut-based filling. The limit does not exist!

Could I eat the entire tray of them? Duh, don’t even tempt me! Will I? No, because I’m a sweet wife who will let their husband have a few. In true mom/baker/health obsessed gal fashion, these bars won’t take you an entire afternoon to make, have a flavor that is so satisfying and nostalgic, and the ingredients are simple and wholesome. I have somehow done it again!


16-2” bars

base/topping layer ingredients

Cashews—7.5 oz, or 1 ½ C

Oats—5 oz, or 1 ½ C

Dates, pitted—8

Coconut flakes, unsweetened—1 oz, or ½ C

Coconut Oil, melted—3.25 oz, or ½ C

Salt—pinch


process

In the bowl of a food processor, combine the nuts, oats, dates, coconut and salt. Pulse until the nuts are almost fully ground.

Slowly stream in the coconut oil.

This base should hold together when squeezed in your hand. If it does not, add in more coconut oil (1 tsp at a time).

Reserve 1 cup of this for the topping.

Press the remainder into the bottom of an 8”x8” baking dish.

Set aside.


chocolate layer ingredients

Cocoa Powder—2 oz, or ¾ C

Coconut Sugar—1 oz, or 3 TBL

Butter—3 oz, or 6 TBL

Salt—pinch


process

In a small pot over the stove, melt the butter.

Whisk in the cocoa powder and sugar until homogenous.

This will be a slightly thick and like a fudge consistency!

Pour over the base layer into an even layer.

Sprinkle more salt over the chocolate.


Take the reserved crumble and sprinkle over the top of the chocolate, press into the chocolate, making sure that it is in nice chunks!

Stick in the freezer until it has frozen.

When ready to cut, remove from freezer and cut into 2” squares.

Best stored in the freezer!


Bon Appétit!

Raw Chocolate Coconut Slice

Beyond a wholesome discipline, be gentle with yourself. You are a child of the universe, no less than the trees and the stars; you have a right to be here. And whether or not it is clear to you, no doubt the universe is unfolding as it should.
— Max Ehrmann

Raw. Vegan. Gluten Free. Chocolate. Slice.

I am like that bad partner who comes and goes as they please, throws a lot of nice stuff your way, then leaves again. I’m hoping that y’all will keep coming back for more, but maybe you won’t. Let’s hope I can shape up and be that girlfriend you love and miss so much!

Okay, now that you know how I’m feeling and that I’m truly working on this relationship, let’s get into it. Happy New Year! 2019! Yeah! Funny thing about me—I have this weird tick when it comes to numbers. Volume on the radio has to be at certain numbers, same with the tv. If I’m running, I can’t just stop my Garmin on any number, there are specific ones I like…so yes, I’ll keep going if I’m not comfortable with the number. Same goes with times of doing things, and here we are at 2019. NINETEEN is not a number I love. Nope, don’t love 1, don’t love 9, certainly am not a fan of 1-9! I like 20, but eh that 19 really is messing with me.

That being said, I think this year is going to be gooooddd. That self care has already started to kick in, mentally and physically I’m stronger, I’m quite a bit less stressed than usual (don’t get me wrong, I am still a stressed out lil lady, but we’re improving!), and I’m even finding my work to be chill sometimes. Like enjoying it. Minus the fact that Atlanta is now cold (eye roll) for the next month, I am oh so content! Did I mention that my rough and tough New England body can’t even handle the chilly mornings that are below 35˚?! I’ve turned soft.

This has turned silly and not even a life update, not even a recipe talk, just a cool ol’ Kitkat ramble!

Okay. This recipe.

I worked on it for a MINUTE. Like, woof, over a month on this bad boy and I love it so much. The whole dairy free life has really sparked creativity in me. Also, just the fact that I now am more in tune with my digestion, I know what to eat and avoid, how to eat certain things to make my tummy less gurgly, too. Listen. To. Your. Body. Yeah, Sarah’s Day reference, get at me!

The base of this raw/vegan/gf slice is dreamy. I would just snack on it alone. OH! Idea! Let’s make it into a granola-type next time. Taking note now.The blend of nuts and seeds with a touch of sweetness from the dates, mmmm yes. And a hint of peppermint, really just calms and soothes you. Oh, and cacao powder. Toasted coconut. Duh. What a lovely match!

Next is the MOOSE. Mousse. You can’t even taste the bananas. Blew my mind when I threw this together! I wanted a creamy, smooth, luxurious mousse, and ya girl has come out on top! It’s so smooth. Like body butter smooth. YUM. And to me, it’s a spoonful of health! Or like…healthier. And sprinkle the top with basically a blizzard of toasted coconut, you got yourself a ZERT!

Here you have it, my first pride and joy of 2019. Tummy ache free, delicious, has the goods, has the seeds, has the cacao, has the oils, has it ALL! It’s also been slowly enjoyed by my roommate and I this week… so I’d say the number 19 isn’t all that bad if it’s going to start like this!

base ingredients

Almonds—5 oz, or ¾ C

Pepitas—2 TBL

Dates—4

Toasted Coconut—1 oz, or 2/3 C

Chia Seeds—1 TBL

Maca powder—1 tsp

Flax Meal—1 TBL

Vanilla Powder—1 tsp

Pink Sea Salt—1 tsp

Cacao Powder—2 TBL

Coconut Oil—1.5 oz, or 3 TBL

Peppermint Extract—¼ tsp


process

Combine all of the ingredients in your blender or food processor and pulse until all ground and combined.

If you are having a tough time, add in a Tablespoon of coconut milk.

Press this into the bottom of a tart pan. You can also use a pie dish, cake pan, whatever you have that works best! The tart pan is nice because you can remove the sides.

Put in the freezer while you prep the mousse.


mousse ingredients

Banana—2

Coconut Milk—2 TBL

Coconut Oil—2 TBL

Cacao Powder—1.75 oz, or ½ C

Peppermint Extract—¾ tsp

Dark Chocolate—2 oz

Toasted Coconut—1 oz, or 2/3 C


process

In the same blender or food processor (don’t even think to clean it!), combine all of the ingredients except the toasted coconut.

Pulse until nice and smooth. You may add a splash more coconut milk if needed!

Spread this evenly over the base.

Cover with the remainder of the toasted coconut and freeze.

You may also put this in the fridge, but I prefer the ‘icebox’ bar better.

When ready to eat, remove from the freezer, slice a nice thick piece and enjoy!


Bon Appétit!

Peanut Butter Cups

"Be softer with you. You are a breathing thing, a memory to someone, a home to a life." - Nayyirah Waheed

Continue reading if healthy dessert to change your life sparks your interest, or your tummy. I mean, that's what's up!

I don't think that I have ever been so patient and thorough with something in my life! I mean, is that so surprising? I'm rather stubborn and impatient with everything I do, because things obviously have to happen now or it's never going to get done! In all of my self love and kindness I've been practicing as of lately, patience is still something I can't seem to get a grasp on. While I'm very aware that most things, recipes included, will take many attempts, trial and errors, test batches, until you're 99% satisfied with it (because, I mean, we can always improve, right?!), I always want the first try to be perfect, no matter what it is!

Take my running for example. When I signed up for my first marathon, I was 100% sure that I could qualify for Boston because I could keep that pace for 10 miles, so why not 26.2? HAH yeah Katie, joke is on you. It's going to take some damn work! Heck, even when I'm doing any type of cross-training work, at the end I'm always like Hey, why don't I have ripped arms and a 6 pack? ... seriously, Katie, patience. The same goes for just about everything with me. You could throw me in a boxing ring, hand me a book in another language, ask me to plant an entire vegetable garden, and I'll almost always feel the urge to get it correct on the first try. What happens when I don't? I give up for a few days, then say some nice things to myself and go back to it, humbled a bit and feeling renewed.

One would think that after doing this on repeat - like Drake's Nice For What has been on for about 5 days - I would finally learn, but hey, go figure that self compassion takes a minute! That is your lesson for the day: be kind to yourself, have a bit of patience, don't be so damn judgmental with every little, or big, thing you do that isn't perfect. If I was perfect all of the time, didn't trip over myself, spill food and drinks constantly, never ever chaffed when I ran, always remembered to put on deodorant... then I think that would be a bit dull! Mistakes are good, they're learning experiences, they help shape you, figure out your strengths and weaknesses, likes and dislikes, make you human! 

SO. After that, what I'm trying to say is that these raw peanut butter cups are my little patience victory! I tested out 4+ recipes, I ate 4+ recipes...that's a lot of nuts in a weeks time! After lots of tiny tweaks, these are near perfect. Honestly, I even count these as a healthy snack. The base is very granola bar-esque: lots of nuts, lots of seeds, spices, a touch of sugar - I'd eat that all on its own! The filling, just nut butter + coconut sugar + coconut water = YES PLEASE! And a drizzle of chocolate on the top. Yum. This satisfies your sweet and salty cravings without a doubt. I like using pink Himalayan salt, the bigger chunks, and just breaking it down slightly in the food processor. This allows for you to get some rather salty bites, but with a sweeter filling, it's exactly what is needed! I love to keep these in the freezer, makes it more dessert-like to me! Also, it's beginning to get hot AF in this beautiful southern part of the country, so I'll take everything on ice!

Two raw desserts in a row? I know, weird, right?! As I'm learning more about my body and the things it just cannot digest anymore I'm slowly starting to learn what actually makes me feel amazing! Sure, a Reese's PB Cup is incredible, having 1, 2, or 8 won't kill me if it's not every day, but how about I recreate it to be nutrient packed, healthy and still have the same flavors? Girl, I do not see ANY harm in this, especially if my husband eats them two at a time!

base ingredients

Almonds—½ cup

Cashews—¾ cup

Hemp seeds—2 TBL

Chia Seeds—1 TBL

Cinnamon—1 ½ TBL

Coconut Sugar—1 ½ TBL

Maca Powder—½ tsp

Collagen Powder—1 scoop

Pink Sea Salt—½ tsp


filling ingredients

Nut Butter—2/3 Cup

Coconut Sugar—1 ½ TBL

Coconut Water—¼ Cup


topping ingredients

Chocolate—3 oz, or 1 bar

Coconut Oil—1 tsp


process

In your food processor, pulse together all of your base ingredients.

Feel the mixture to make sure that when you press together with your fingers it holds, but that it isn’t so wet that liquid is dripping.

Press into the bottom of a muffin pan, spring-form pan or whatever pan works best for you! I have found the putting these into a muffin pan works best for a little bit of portion control…

Freeze for ~1 hour.

For the filling, again, add all of the filling ingredients into the food processor. Pulse until combined.

Always taste this part before adding on top of your base. If you are using a simple nut butter that has very minimal ingredients, including sugar, you may want to add in a teaspoon+ more of the coconut sugar. Also, depending on how thick your nut butter is when you first start, you might want to add in more coconut water. The goal here is to have the filling be a bit looser/creamier so when you freeze it, it is not difficult to bite into.

Pour on top of your base, spread evenly—if you have used the muffin pan, start with 1½ teaspoons of the filling for each, then distribute whatever is left evenly at the end.

Freeze ~1 hour.

For the topping, melt the chocolate and coconut oil over a double boiler.

Once completely melted and combined, drizzle over your peanut butter cups. If you have made this in a full pan instead of the muffin pan, just pour all of the chocolate over the filling, spread to cover evenly.

Freeze ~1 hour.

Pop out, cut and enjoy!

Yield: 1 dozen


Bon Appétit!

Crispy Chocolate Molasses Cookie Crust

HAPPY BEST MONDAY OF THE NEXT 2 MONTHS!!

Why, you ask?—you’re probably thinking that I’m crazy..

Hmm, maybe because Thanksgiving is this week?! And that means for the next 5 weeks it’s basically a holiday celebration every. single. day. Y’all know how much I love the holidays, my husband groans when September/October comes around because I’m just going crazy with my urge to start decorating! No, no, I don’t put a tree up that early (although I do beg!), and I don’t put any Christmas lights up until November 1st, no holiday music until the middle of November…I’m not that bad!

What do I do that’s over-the-top? I light every single wintery smelling candle, I put far too many warm spices into our coffee, I break out all of the cozy sweaters and blankets, and I START BAKING ALL THINGS HOLIDAY THEMED!! How much is too much molasses to eat every single day?

So here you go, a little bit of my September-December obsession for you!

It all started when Roberto and I agreed to host Thanksgiving this year in Atlanta. The savory side of the meal doesn’t really stress me out—I can manage some sides, rolls, salad, while I throw all of the other stuff on my husband (…like the 17# turkey…). It’s the desserts that I was obviously pumped about but also got a little bit of the sweats when planning it all out. The Big 3 had to be in there: Apple, Pumpkin and Pecan. But then I’m like HAH I’m not making your typical pies, that’s ridiculous! Sooooo, yes, I have been over planning on pies this year. Ginger and bourbon apple pie—check. Caramel pumpkin pie—absolutely. And, finally, a chocolate ganache pecan pie with a chocolate molasses cookie crust.

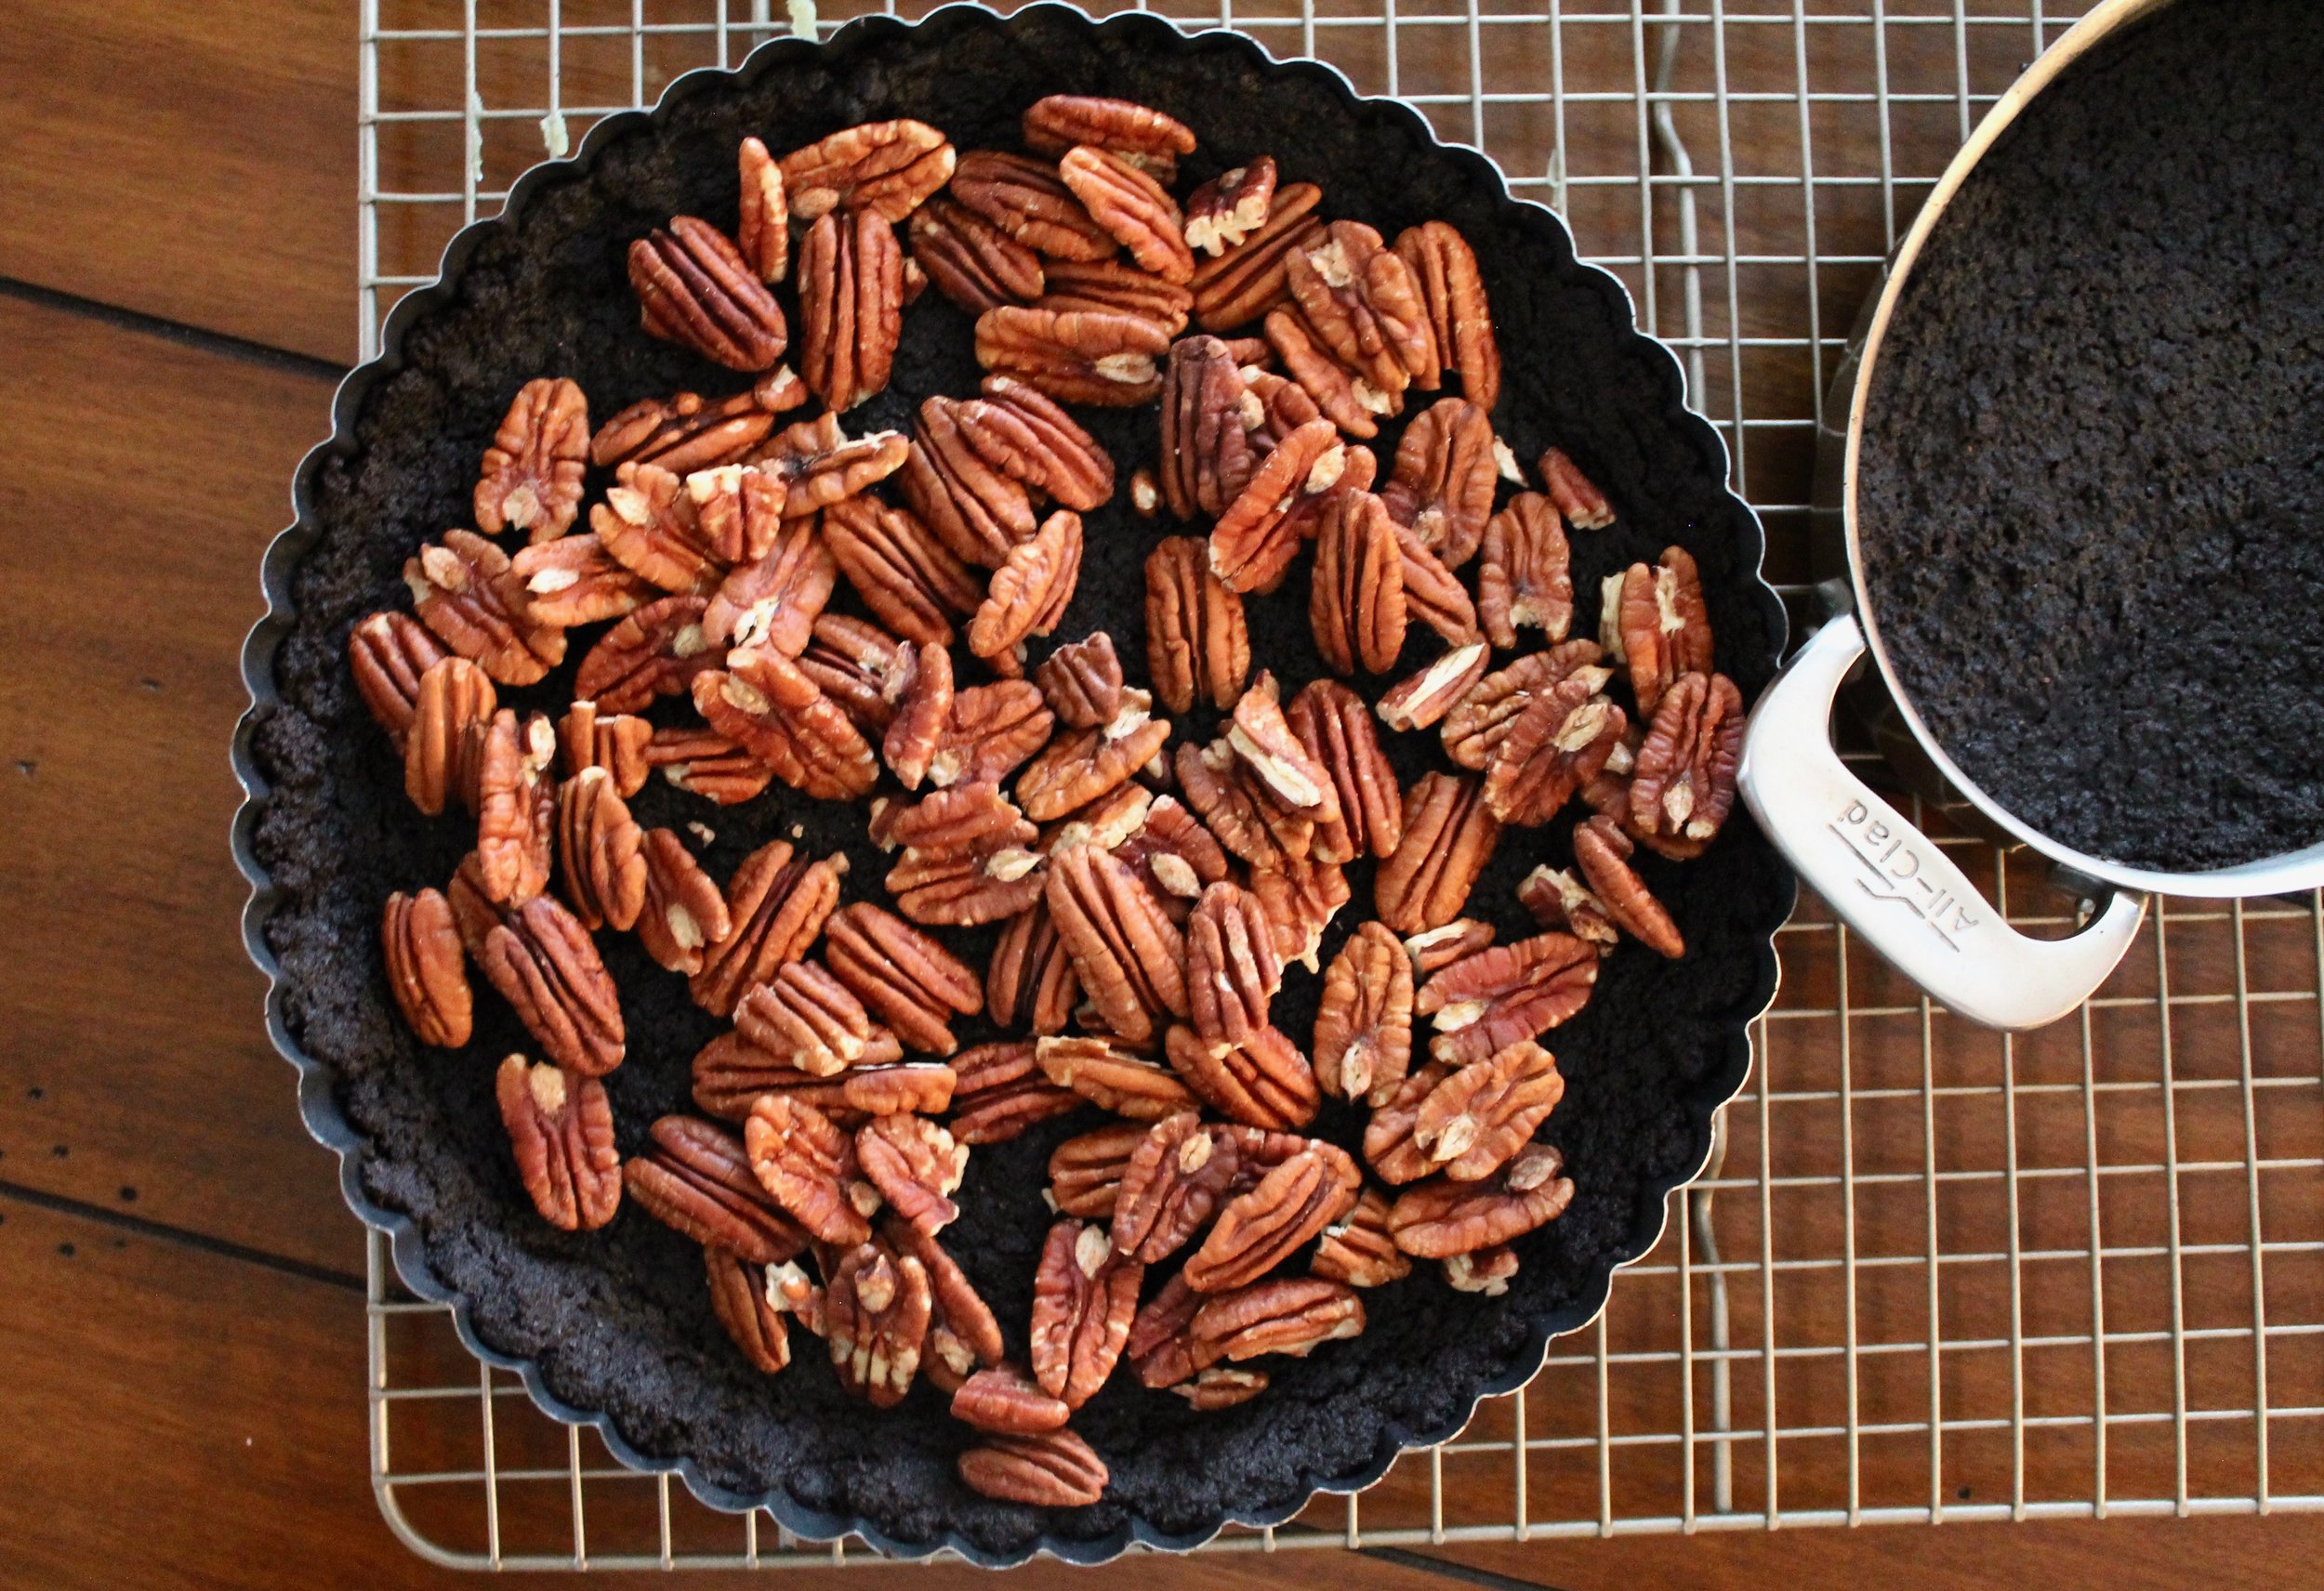
I always love to change-up the crusts that I do for my pies, whether it’s your typical pie dough, a sweet dough crust or, like this below, a chocolate gingerbread cookie ground up into crumbs, mixed with melted butter, then pressed into the tart pan! To me, a pecan pie is just a little bit on the sweet side, so I cut the syrupy filling and swapped it with my chocolate ganache tart filling (added toasted pecans, of course!). With this change, naturally, I had to do something a bit more fun for the crust. A gingerbread crust would have been amazing, but then I was like uhhh a gingerbread cocoa crust?  YES PLEASE!

This crust is spiced like a gingerbread cookie would be, not super, super sweet like a you’d think a cookie crust would be, and then it’s got some yummy dark chocolate cocoa powder mixed in—a win in every category if you’re asking holiday-obsessed Katie!

Here you have it, a little game changer in your Thanksgiving (or holiday!) menu! It’ll definitely be something that will wow your guests, especially if you accidentally cook a dry turkey, under salt your mashed potatoes or only set the table for 9 instead of 10! So, as Thanksgiving can be a little hectic, very loud, maybe some people had more than their share of wine, and others just fall asleep before dinner is even served—this pie will always be a win!

Best enjoyed the morning of, the day after, the next 5 weeks of holiday fun, with great company, a nice deep red, and most likely your stretchiest of pants!

ingredients

Butter—10 oz, or 1¼C

Sugar—7.25 oz, or 1C

Eggs—1

Molasses—2.5 oz, or ¼C

Honey—2 tsp

Flour—9.5 oz, or 2C

Cocoa Powder—1.5 oz, or ½C

Baking Soda—1 tsp

Cinnamon—2 tsp

Cloves—½ tsp

Ginger—1½ tsp

Nutmeg—1 tsp

Turmeric—½ tsp

Salt—1 tsp


Butter, melted—2 oz, or 4 TBL

Cookies, ground—6 oz, or 1.5C

Pecans, toasted—4 oz, or 1C


process

Sift together all of your dry ingredients—flour, cocoa, baking soda, cinnamon, cloves, ginger, nutmeg, turmeric and salt.

In the bowl of your mixer, cream together the butter and sugar until light and fluffy.

Once creamed, add in your egg, molasses and vanilla.

When all incorporated, slowly add in your dry ingredients until just combined.

Wrap the dough in plastic wrap and chill for at least 1 hour in the fridge before baking.

When you’re ready to bake the cookies, preheat your oven to 350˚ F.

Roll the cookie dough into balls about 2TBL’s in size—if you’re using them for the crust, this won’t be as important because you’ll be grinding them up!

Bake for about 12-15 minutes, until no longer ‘wet’-looking.

Allow to cool completely before grinding.

Toast your pecans in a 350˚F oven for about 8 minutes, until toasted. Cool.

When you’re ready to make your crust and tart, combine ground cookies with the melted butter.

Press crust into your tart pan, making sure that it’s about ¼” thick and even on the bottom as well as up the sides.

Bake in a 350˚F oven for about 12-15 minutes, until the crust has baked and is set.

Put all of your toasted pecans in the bottom of your cookie crust.

Make your chocolate ganache filling (found here!).

Pour into your crust and place into the refrigerator to set up for at least 6 hours.


Bon Appétit!