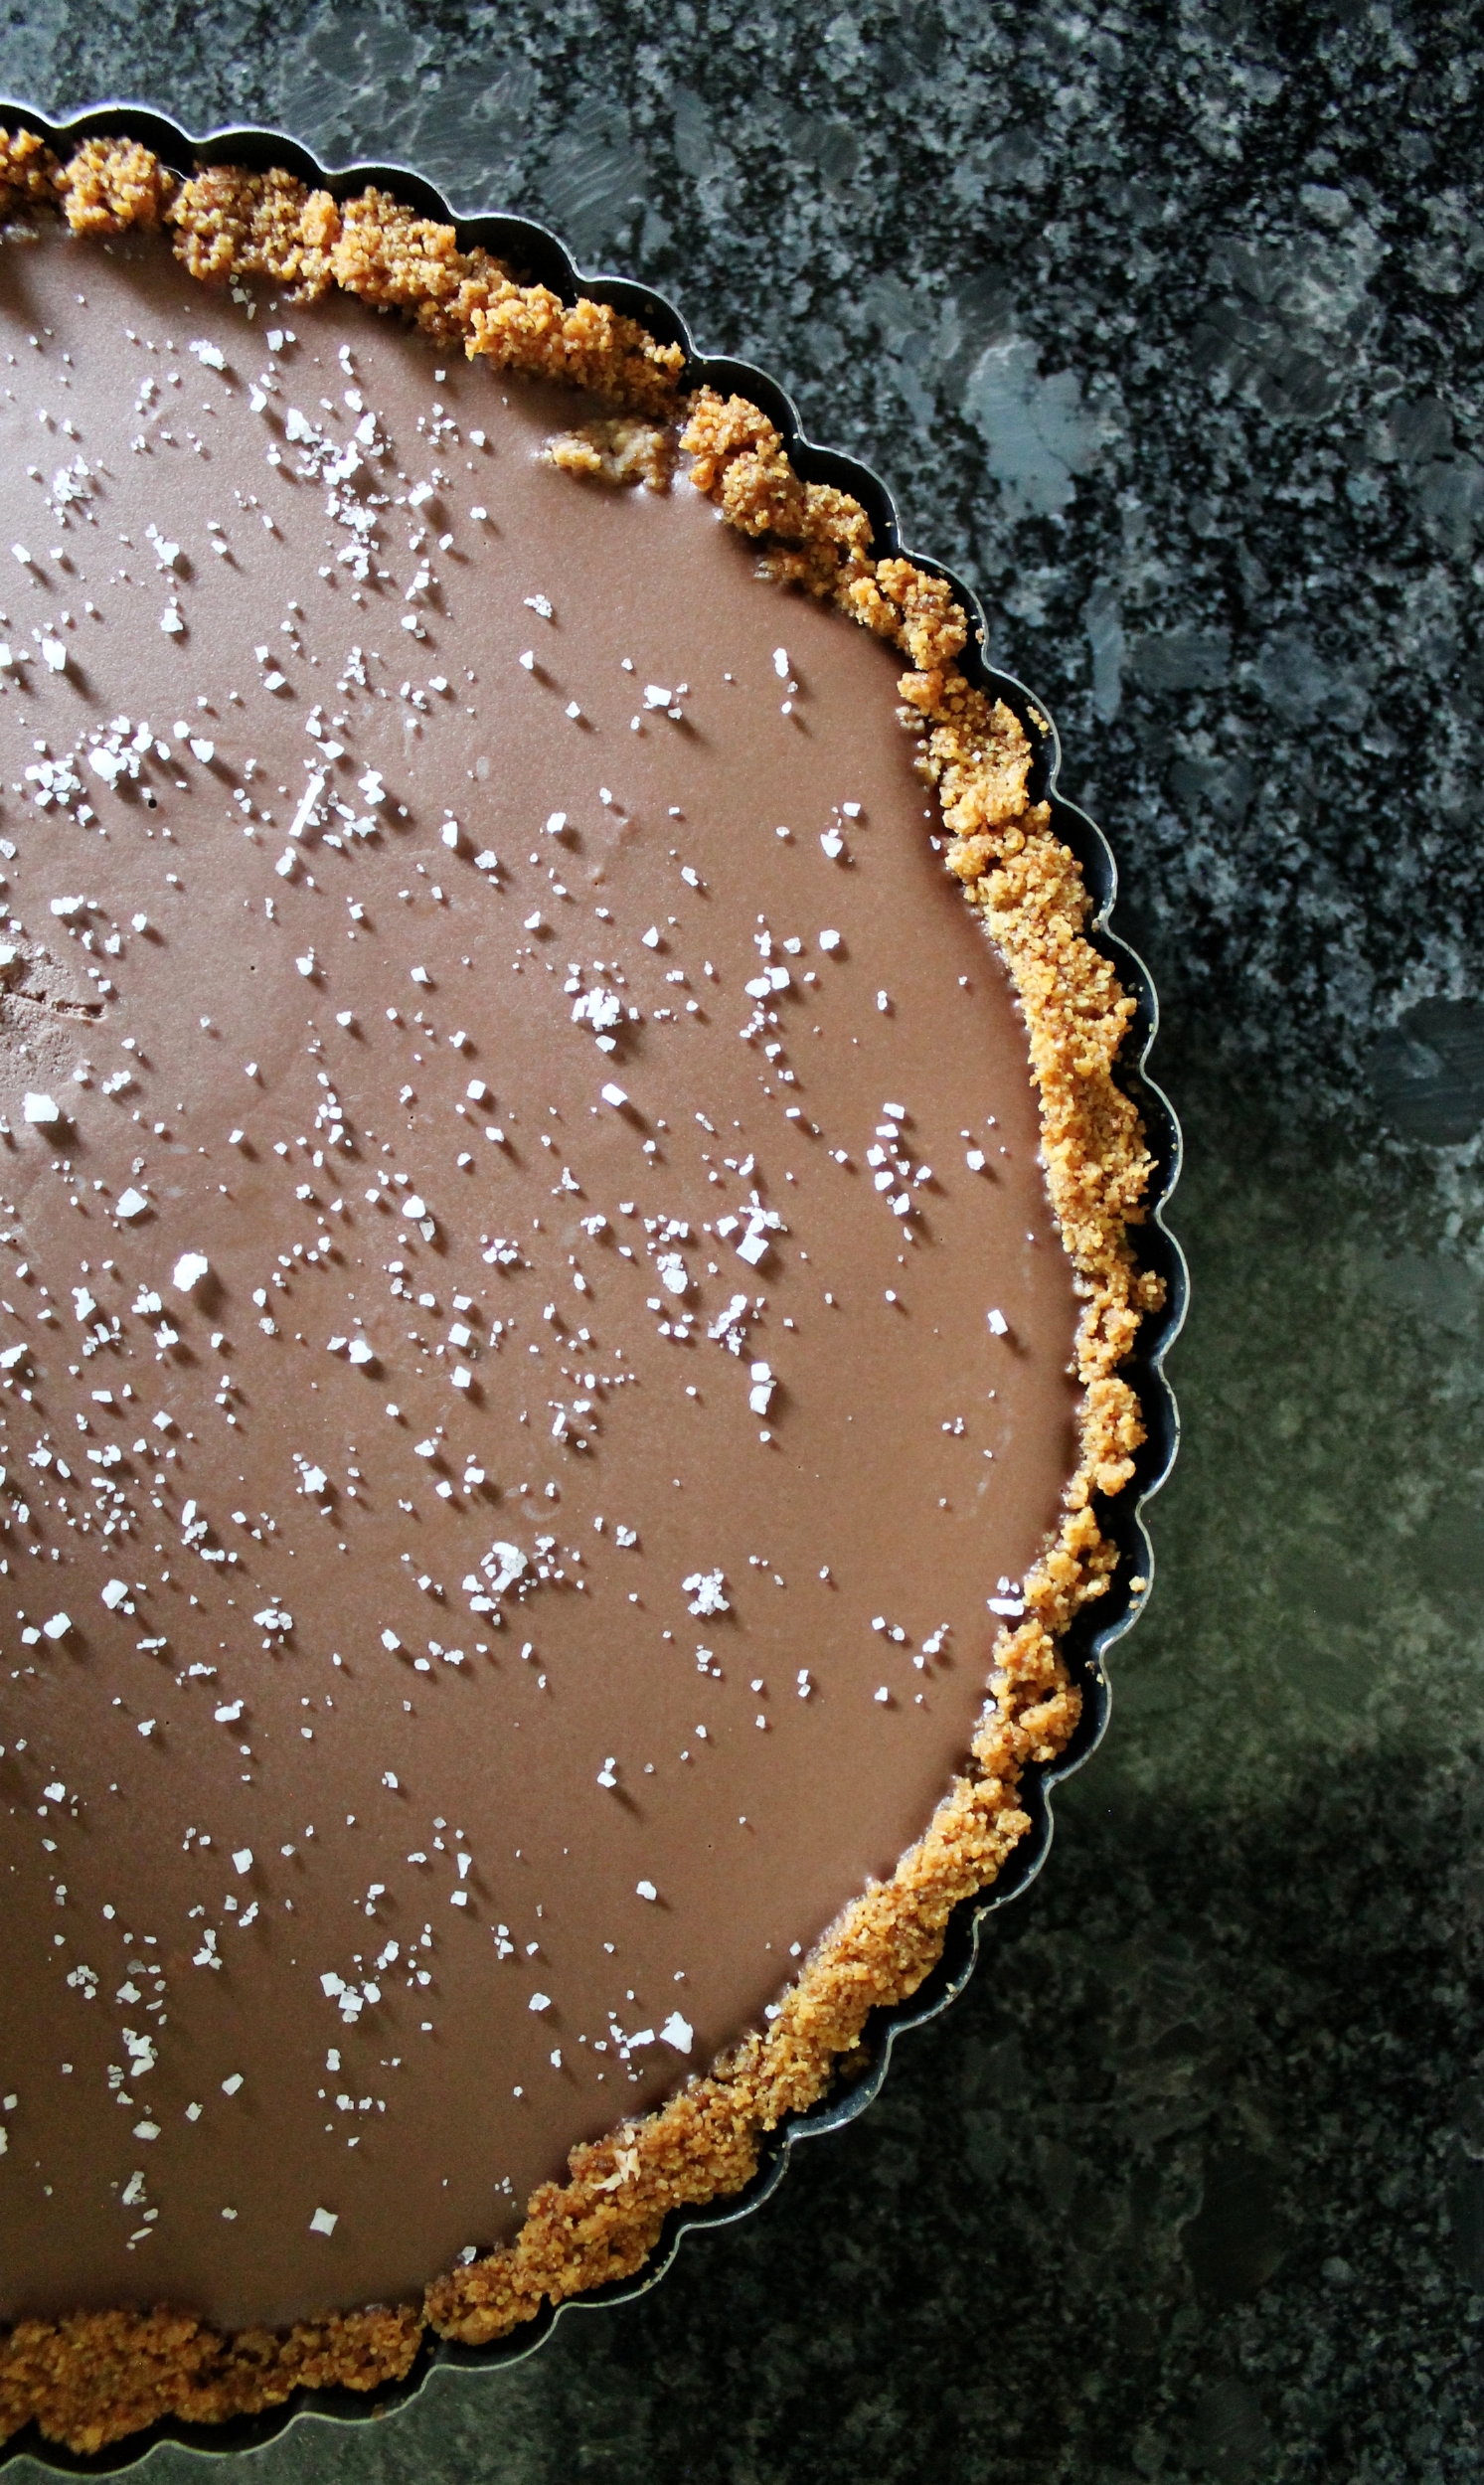
Coconut Chocolate Tart

When you get to a place where you understand that love and belonging, your worthiness, is a birthright and not something you have to earn, anything is possible
— Brené Brown

I believe I say this with each recipe, but dang, this gf/df coconut chocolate tart is making mama proud this week!

As I (think?) mentioned, your girl has joined the dairy free club! I always insisted that I just ate too much whenever I was getting sick from ice cream, pizza,  lattes ... but guess what? I stopped consuming dairy and BOOM! my stomach issues are almost nonexistent!

I'm sure that story was so whatever to y'all, but sometimes I just need a disclaimer, okay?!

I'm currently transitioning my life to a place that I want, not what annnyyyyone else wants, and it feels SO damn good. See that quote up at the top? Yeah, we're all worthy of every single happiness and we need to stop tricking our minds to think otherwise. It breaks my heart that I was really self-sabotaging, I was telling myself I had to do x, try y, be z all for every. one. else. Then these past few months I said screw that, get your booty back into school because you want to, make a decision for your career that's going to make you happy, join that kickboxing gym you've had your eye on for months because it'll make you feel like a badass (and hopefully become one soon enough!). I was tired of letting my anxiety control my life - no one's letting that happen but me!

Et voilá! My (soon to be) M.S. in Nutrition + my degree in baking + my LOVE for sugar has all brought me here. All brought y'all this recipe! I'm honestly so in love. Like a few notches below my love for my pup and husband (...yes, you see who I put first there, oops!). First off, we all love a good graham cracker crust. This one happens to have some coconut sugar, maca powder (hellloooo salted caramel taste and energy boost) and it's all combined with coconut oil! How could it not be a winner? And what else - uhh how about a layer of toasted coconut then topped with a dairy free chocolate filling. AH I need a slice right now, please. The filling is so dang simple: coconut milk + 70-80% dark chocolate + coconut oil. Add some coarse salt after it has set and THERE YOU HAVE IT! Something so beautiful.

With the help of my amazing husband, who tried everything I asked/begged him to, the perfect gluten free/dairy free coconut chocolate tart was born! Ohhhh and is it a beauty. It is just one of those desserts that I know will become a staple because 1. it's quick, 2. minimal and clean ingredients, 3. it will satisfy all of those dietary restrictions, and 4. IT'S SO FREAKING GOOD! I'm not kidding. I mean I just screamed that at you, didn't I?!

Decided to go light on the rambling today because, I mean, you need to just get to the photos, to the recipe, get yourself a bit covered in coconut and chocolate, and have yourself a sweet evening! You can thank me in about 4 hours when the tart is finished and you're on your third piece ;)

crust ingredients

Graham Cracker Crumbs—5.5 oz, or 1 ½ C

Coconut Sugar—1.75 oz, or 1/3 C

Coconut Oil, melted—5.5 oz, or ½ C

Maca Powder—1 tsp


Coconut, toasted—1 oz, or 1/3 C


process

Preheat your oven to 350˚F.

Spread the coconut onto a sheet tray and toast for ~10 minutes.

You want the coconut to be a nice, golden brown.

While coconut is toasting, combine the crumbs, coconut sugar and maca powder (optional!) in a medium bowl.

Melt the coconut oil over low heat. Once melted, pour over the crumb mixture.

Mix to combine.

This should be a wet-like-sand consistency.

Press the crust into a tart shell—pie shell also works fine!

Bake in the already preheated oven for 8-12 minutes, until slightly more golden.

Allow to cool completely before sprinkling the coconut flakes evenly in the bottom of the crust.

Store wrapped in freezer until ready to use.


tart filling ingredients

Coconut Milk—10 oz, or 1 ¼ C

Chocolate, 70%—5 oz

Coconut Oil, melted—2.75 oz, or ¼ C


process

Scale out all of your ingredients separately.

Melt the coconut milk over low-medium heat.

Once it begins to simmer, pour over your chocolate (chopped, in a heat proof bowl).

Allow to sit for 5-10 minutes.

Stir with a spatula or wooden spoon until the milk/chocolate mixture is homogenous and smooth.

Add in the coconut oil, stir.

Once all of the ingredients are completely combined and smooth, pour into your prepped graham crust shell.

Place in refrigerator for at least 3 hours so the chocolate filling can set.

Once set, sprinkle some coarse salt on top, slice and enjoy!


Bon Appétit!

Graham Cracker Donut Ice Cream Sandwiches

Hello, my friends! I am back, and I am sorry! I haven’t posted for weeks, and I promise I have a sort of excuse, and I am giving you an insane recipe that may trump all ice cream sandwiches…ever…

So. Let’s see. Since I last posted, my brother visited me in WV, my fiancé came back from two too-long months away for work, we went to Germany for a week for a birthday party of a dear friend, and now I am back—about to head home to Maine for a week for even more fun festivities! Basically, the month of July is all about traveling and not staying in one place for too long, which I am loving because it’s just been amazing.

First off, Germany. Need I say more? We were in Munich and then a small town outside of the city for many celebrations. Oh, and guess what? My best friend is living in Munich for a couple of years, so hello to Luci-Katie time!!

Secondly, we are headed to Connecticut to see two of my incredible friends (who I met in WV, go figure!) tie the knot! I am so excited, like can’t contain my excitement, can’t wait to see my friend in a gold sequined dress, can’t wait to dance the night away with the two brides, kind of pumped. I’ve been counting down the days to this weekend in forever. Ugh. SO MUCH LOVE!

And last, but not least, I am then headed to beautiful little Maine for a week. This includes dress alteration #1, my bachelorette party, bridal shower, so much dog snuggles and friend cuddles…tell me how could this be any better?! Oh shoot, and beach time. Lots and lots of beach time—heart eye emoji here, please.

By the time I am back, it’ll be almost August and summer will have slipped away…ugh why did I have to make that so sad so quickly?!

Back to the happiness and sugar-high!

Okay, okay…so I made these ice cream sandwiches, right? But what is so mind-blowing about them to me is that they use graham cracker donuts. Like, this is basically a s’more, but with an ice cream center and two fluffy donuts to hold it altogether. Yeah, this girl is ALL about the campfires, bonfires, s’more fires…but with the heat clouding my thoughts, I needed something to cool me down some.

And boom—donuts + ice-cream = new obsession!

Yes, you can use whatever flavor ice cream you want, I chose peach because we just made it at work, and it just screams summertime in my opinion! Final touch? Drizzle on melted chocolate for an even messier, even tastier treat.

Yep…mouth salivating, going to walk to the freezer to get one right now...

So, while I may have been MIA for a couple of weeks, and will be going up and down the east coast quite a bit over the remainder of the month, I hope that you all can forgive me and make these ASAP! Trust me, this drippy mess is worth every sticky little bite!

ingredients

Flour—5.5 oz, or 1 C + 1TBL

Graham Cracker Crumbs—1.75 oz, or 1/3 C

Brown Sugar—4 oz, or ½ C

Baking Soda—¾ tsp

Salt—½ tsp

Eggs—1

Milk—4 oz, or ½ C

Vanilla Extract—1 tsp

Butter, melted—2 oz, or 4 TBL


process

Preheat your oven to 375˚ F.

In a bowl, combine the flour, crumbs, brown sugar, baking soda and salt.

In another bowl, mix together the egg, milk and vanilla.

Add the wet ingredients into the dry. Mix until almost combined.

Add in the melted butter.

Mix.

Pour your donut batter into either a piping bag or a large sealable baggie.

Spray your donut pan with nonstick spray.

Fill each section about ½ - ¾ full of batter.

Bake in your preheated oven for 8 minutes, until the donut springs back when touched.

Allow to cool before assembling ice cream sandwiches.


assembly

Once your donuts have cooled, it’s time to fill them!

For this recipe, I used homemade peach ice cream that I had made at work, but any and all flavors will work!

Take one generous scoop of ice cream and put it in the center of your donut.

Gently press down with either a spoon or an offset spatula.

Place another donut on top, press firmly to hold in place.

Now you may either wrap in plastic wrap and put in the freezer, or cover the ouside with more graham cracker crumbs and sprinkles, and then freeze!—clearly the second option is the route I took.

While the ice cream sandwiches are firming up, melt some chocolate over a double boiler.

Drizzle over the ice cream sandwiches, and now it’s time to eat!


Bon Appétit!

Peanut Butter Marshmallow Candy

Merry Christmas! Too soon? It is December, so, for me, it’s Christmas all month long!

I wanted to kick off this holiday baking month with some “candy” that my mom makes each year for Christmas. Traditionally, my mom makes these with a thick peanut butter crust and a layer of chocolate on top. I added some homemade marshmallows between those two layers to kick it up a notch, to turn my moms PB Candy into PB Fluff Candy! Or could we call it S’mores Candy?

Let’s stick with PB Fluff—bring back some of those happy childhood times when you would open your lunchbox up to a peanut butter and fluff sandwich!

Anyways, let’s stop being sidetracked by childhood nostalgic moments...

Each year for Christmas, my mom will make at least two pans of this incredible candy. Usually, it will go out as gifts with some other homemade breads and cookies, wrapped in adorable tins with snowmen on them, spreading endless cheer. Other times, my brothers and I will eat so much that we get stomachaches, but it’s worth it.

First off, who doesn’t love peanut butter?!(—another nut butter can be substituted!) But peanut butter. You can eat it by the spoonful, you can put it on toast, you can eat it by the spoonful, you can cover fruit in it. Yeah, endless possibilities, and you can turn it into a thick, wonderfully sinful crust that you will eat 10 pieces too many of. Sounds magical, huh?

Want some homemade marshmallows on top? This recipe from over the summer is OH so simple, and makes this candy that much more fabulous. Final piece of this delicious puzzle? A melted butter and chocolate glaze—as you know peanut butter and chocolate ARE a match made in dessert heaven!

While this may not be coated in candy canes or be a cute little gingerbread man that you can decorate with icing and sprinkles, this is such a fabulously tasty peanut butter fluff candy that can be given as gifts, enjoyed at holiday parties, or just quietly eaten in the corner with a fork…

I would say go ahead, make a batch, but I think that saying make three batches is going to be your safest bet—you will not want to run out of this candy at any point during this absolutely magical month of December!

IMG_5945.JPG

ingredients

Butter (melted)—12 oz, or 1 ½ C

Peanut Butter—17.5 oz, or 2 C

Confectioner’s Sugar—22.5 oz, or 4 ½ C

Graham Cracker Crumbs—1.5 oz, or ½ C

Oats—4.5 oz, or 1 ¼ C

Marshmallows—Recipe found here, or 1 bag (fluff can be used, too!)

Butter—4 oz, or ½ C

Semi-Sweet Chocolate Chips—12 oz, or 2 C


process

In a large bowl, combine the 12 oz of melted butter, peanut butter, confectioner’s sugar, graham cracker crumbs and oats.

Mix until a dough forms.

Press into the bottom of a 9” x 13” pan.

Next, whether you have decided to just use store bought marshmallows, or my homemade marshmallow recipe (super simple!), layer this on top next.

This homemade marshmallow recipe will take only about 20-25 minutes to make. It’s so quick and easy, and who won’t be impressed by them??!

In a heatproof bowl, melt together the 4 oz or butter and chocolate chips either in your microwave or over a double boiler.

Once melted and mixed, pour over your marshmallows.

Allow to set and cool.

Cut and enjoy!


Bon Appétit!

Pecan Pie Semifreddo

Is it ice cream? Is it gelato? No, it’s semifreddo!

Oh my goodness, my fellow dessert enthusiasts, I have become every ounce obsessed with this homemade semifreddo. Don’t have an ice cream machine but want something that is 1. Homemade 2. Ice cream and 3. Super tasty?! Look no farther, it is here!

As I continue my streak of Thanksgiving dessert twists, here, I give you a Pecan Pie Semifreddo—which means semi frozen in Italian. The texture in this semifreddo is that of a slightly frozen mousse, and yes, you do put it in the freezer! The combination of heavy cream to sugar to eggs allows for this ridiculously smooth and creamy dessert that melts in your mouth and doesn’t give you a brain freeze.

How is this anything like a pecan pie? Well, listen up, look at that gorgeous crust, it is packed with pecans, butter and, my favorite, brown sugar. While I love pecan pie and all of its sweetness, this crust has just the right amount of sugar so that you will most definitely be reminded of your old favorite.

To make this semifreddo really pop, I swirled in some homemade duche de leche. This brings up the sweetness level yet does not take away from that simple taste of the egg-heavy cream combination that you worked so hard on!

Who knew that one could be so infatuated with a dessert, let alone this play on pecan pie. But, I most certainly am, and I’m not even a little ashamed! Looking to show up that pecan pie this Thanksgiving? Surprise everyone with an even better pie—a semifreddo! Exploding with pecan goodness and a velvety dulce de leche yumminess, I swear, you’ll be passing out the recipe by the end of the night!

crust ingredients

Butter, melted—1.5 oz, or 3 TBL

Graham Cracker Crumbs—2 oz, or ½ C

Brown Sugar—1 oz, or 1/8 C

Pecans, chopped—2 oz, or ½ C


crust process

Preheat the oven to 350˚ F.

Combine all of your ingredients, you want it to have the consistency of wet sand.

Press into the bottom of your pan.

I like to use a tart pan for this. It looks very elegant, and quite pie-like, but using a spring form pan, loaf pan, whatever you choose works just as well!

Bake in the oven for 8 minutes, you will be able to smell the toasting crust.

Remove and allow to cool completely before putting your semifreddo in.


semifreddo ingredients

Heavy Cream—12.5 oz, or 1 ½ C

Sugar—8 oz, or 1 C

Eggs—3

Yolks—2


semifreddo process

Begin by whipping your heavy cream in your mixer, or by hand, until medium-stiff peaks form. You will know when this has occurred when you lift the whisk and your whipped cream has a slight curl to the end of it.

Reserve your whipped cream in another bowl in the refrigerator.

Wash and dry your mixing bowl.

Combine the sugar, eggs and egg yolks in your mixing bowl.

Place on top of a small saucepot that has been filled with about an inch of water, making sure that it is not directly touching your bowl.

Turn the burner on low and, with a whisk, constantly whip your egg sugar mixture until the sugar has dissolved—this should be around 120˚ F.

Once you have reached this stage, turn off your burner and put the bowl on your mixer with the whisk attachment.

Whip on medium-high until your eggs have turned a pale yellow and have formed ribbons.

To do the “ribbon test”: when you believe that your eggs have been whipped long enough, stop the mixer and dip the whisk attachment into the batter, go back and forth, making a line with the eggs. If they hold for 3-5 seconds without sinking back into your mixture, then you are good to go!

Now, take the whipped cream from the beginning and fold into your whipped eggs.

How to fold in the cream? First, put a small bit of the whipped cream in to temper, mixing quickly with your spatula, next put into about ½ of your remaining cream. As a chef of mine used to say, “12:00, 6:00, give it a quarter turn,” meaning simply that start with your spatula at 12:00 on your bowl, drag down to 6:00, and give the bowl a quarter turn. Do this until all of the cream is mixed in and is homogenous.

Transfer on top of your crust that has been baked and cooler.

Now, you may either put this in the freezer as is to freeze, or, if you want to add a little extra sweetness, mix in some caramel or dulce de leche! Recipe shown here.

I like to swirl in lots of dulce de leche so that I find yummy pockets in each bite!

Once frozen, remove from your pan, slice and serve.


Bon Appétit!