Chocolate Anniversary Cake

Ready for a crazy fact on this Monday morning? Roberto and I have been dating for 6 years. Something even more wild? In almost 7 months, it will be wedding time! As our last little dating anniversary, I wanted to make it just as special as our first one oh so many years ago! But first—we reflect!

Back to what seems like so long ago, but really just 2010, on our first date. Roberto planned a super fabulous dinner at an Italian place near school, I nervously sweat through maybe 3 shirts, and just ended up wearing something super plain and jeans with a lot of zippers on them…

So, with Italian food being in my top 5, you’d think I would have been so excited, but I barely touched my food, ate too much bread and didn’t even get dessert. Yeah, horrible representation of myself that night!

Luckily, Roberto knew me before that, and had seen me eat a ginormous pizza to myself..

After the fail at a romantic Italian dinner, we then decided to watch football, which is not something to be nervous about, right? Wrong. I got so nervous about the date that I straight up fell asleep. With Roberto there. Embarrassing, no?

I believe that in that first date I did almost everything I could to ruin any potential we had—poor outfit choice, barely ate anything, fell asleep mid game, probably drooled and snored a lot.

But alas! Look at us now, I can’t stop eating and, while I may still fall asleep early rather often, at least I know he’s seen the worst of me.

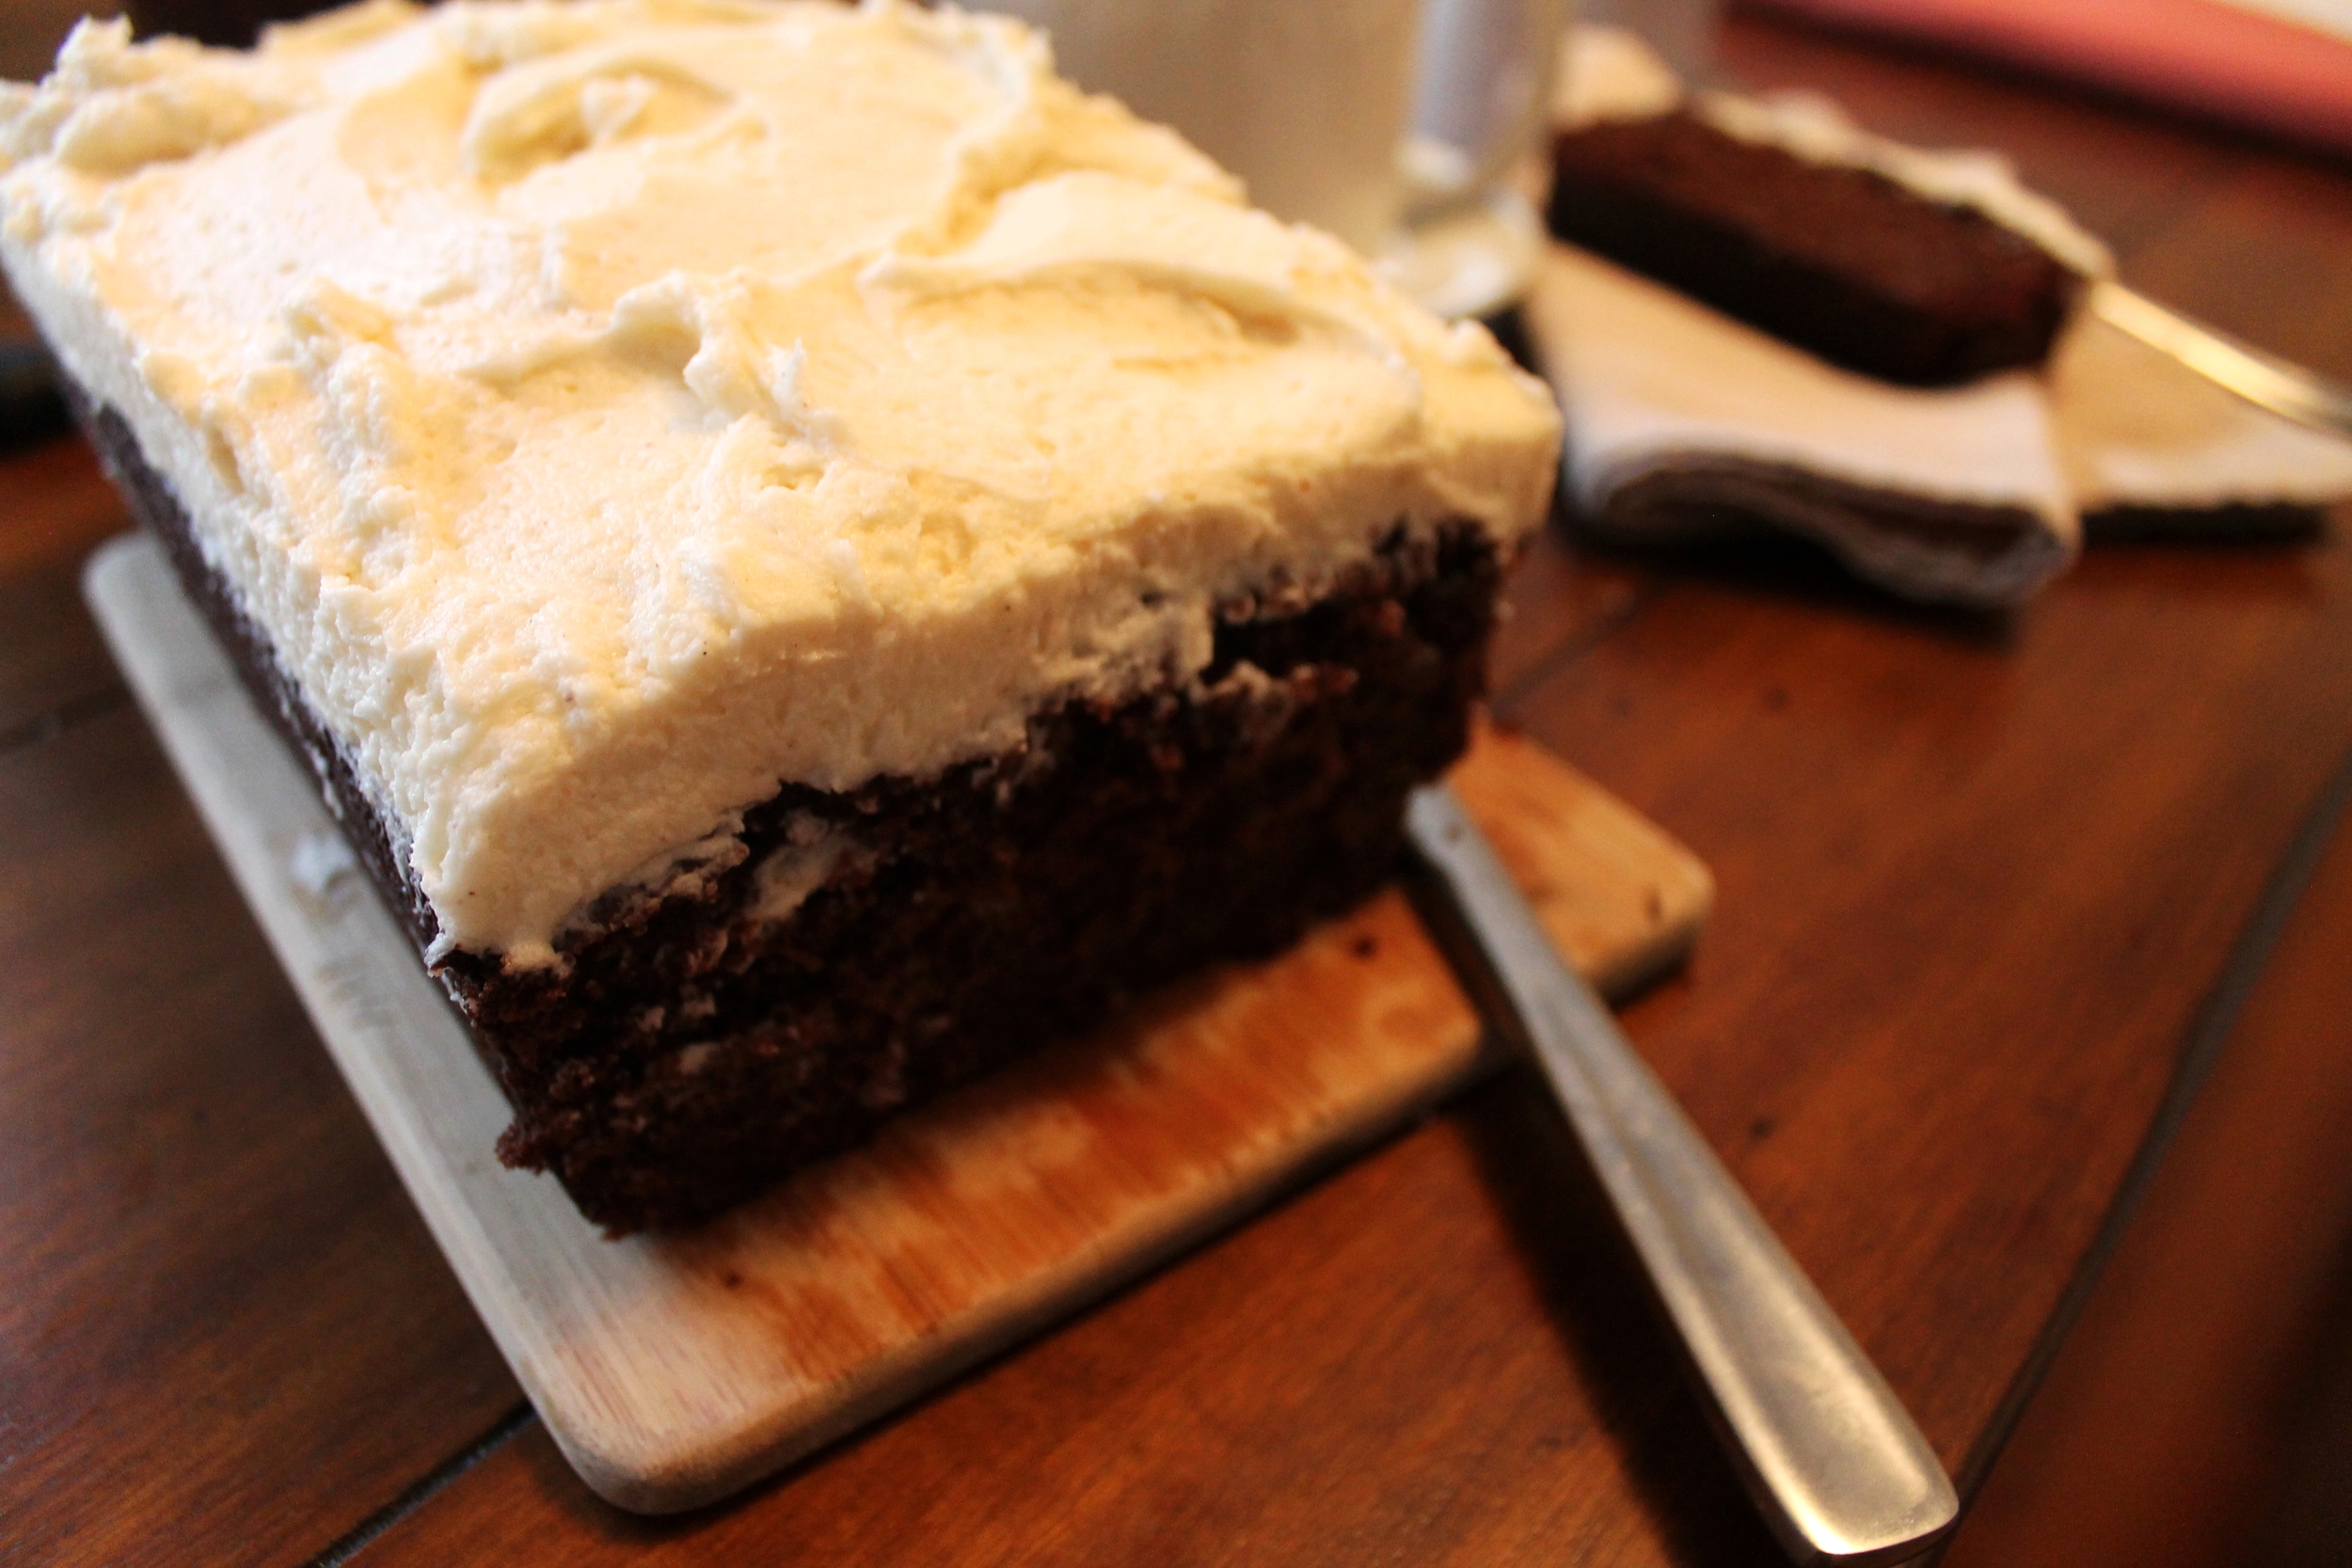
So, for our last little celebration before the wedding (!!!) in September, this rich chocolate cake was a must to make the day truly special! I wanted to make it as decadent, as fun, and as simple as the two of us—which means enhancing the flavors ever so slightly to really make them pop.

With the addition of coffee to the chocolate cake, your mind will be blown with how rich it becomes. While the coffee flavor is quite faint, it helps the chocolate cake truly shine, and I promise you will never taste anything so delicious and moist! The filling is my personal favorite match made in heaven: chocolate and peanut butter. I don’t even think that I need to explain why this is the perfect buttercream of all time! All of that super yummy, ooey gooey fabulousness of peanut butter basically wrapped in chocolate? Sign me up for a spoonful or two!

Lastly, the quick little meringues as a tasty garnish on top give these cakes just the pop of color and crunch that you need! Making them is a cinch, and they are so versatile—a perfect vehicle for all flavors and colors, and they allow you to dress up this full of love, anniversary cake!

While these crazy 6 years with Roberto may have started on an awkward, strange note, they have only become more weird and wild. To me, there is no better way to celebrate than with a glass of champagne and lots and lots of this chocolate anniversary cake!

cake ingredients

Sugar—9 oz, or 1 ¼ C

Flour—6 oz, or 1C + 1 TBL

Cocoa Powder—2 oz, or ¾ C

Baking Powder—1 ¼ tsp

Baking Soda—½ tsp

Salt—½ tsp

Corn Syrup—1.25 oz, or 2 TBL

Milk—3.75 oz, or ½ C

Eggs—3

Vanilla Extract—1 ¼ tsp

Brewed Coffee—3.5 oz, or ½ C

Butter—6 oz, or 1 ½ sticks


process

Preheat your oven to 350˚ F.

In a bowl, sift together the sugar, flour, cocoa powder, baking powder, baking soda and salt.

In a separate bowl, combine the corn syrup, milk, eggs, vanilla and brewed coffee.

Using your paddle attachment and mixer, cream the butter until smooth and fluffy.

Once you have creamed your butter, add in half of the dry sifted ingredients and half of the wet ingredients.

Mix.

Scrape down the sides of the bowl.

Add the remaining sifted ingredients and wet ingredients.

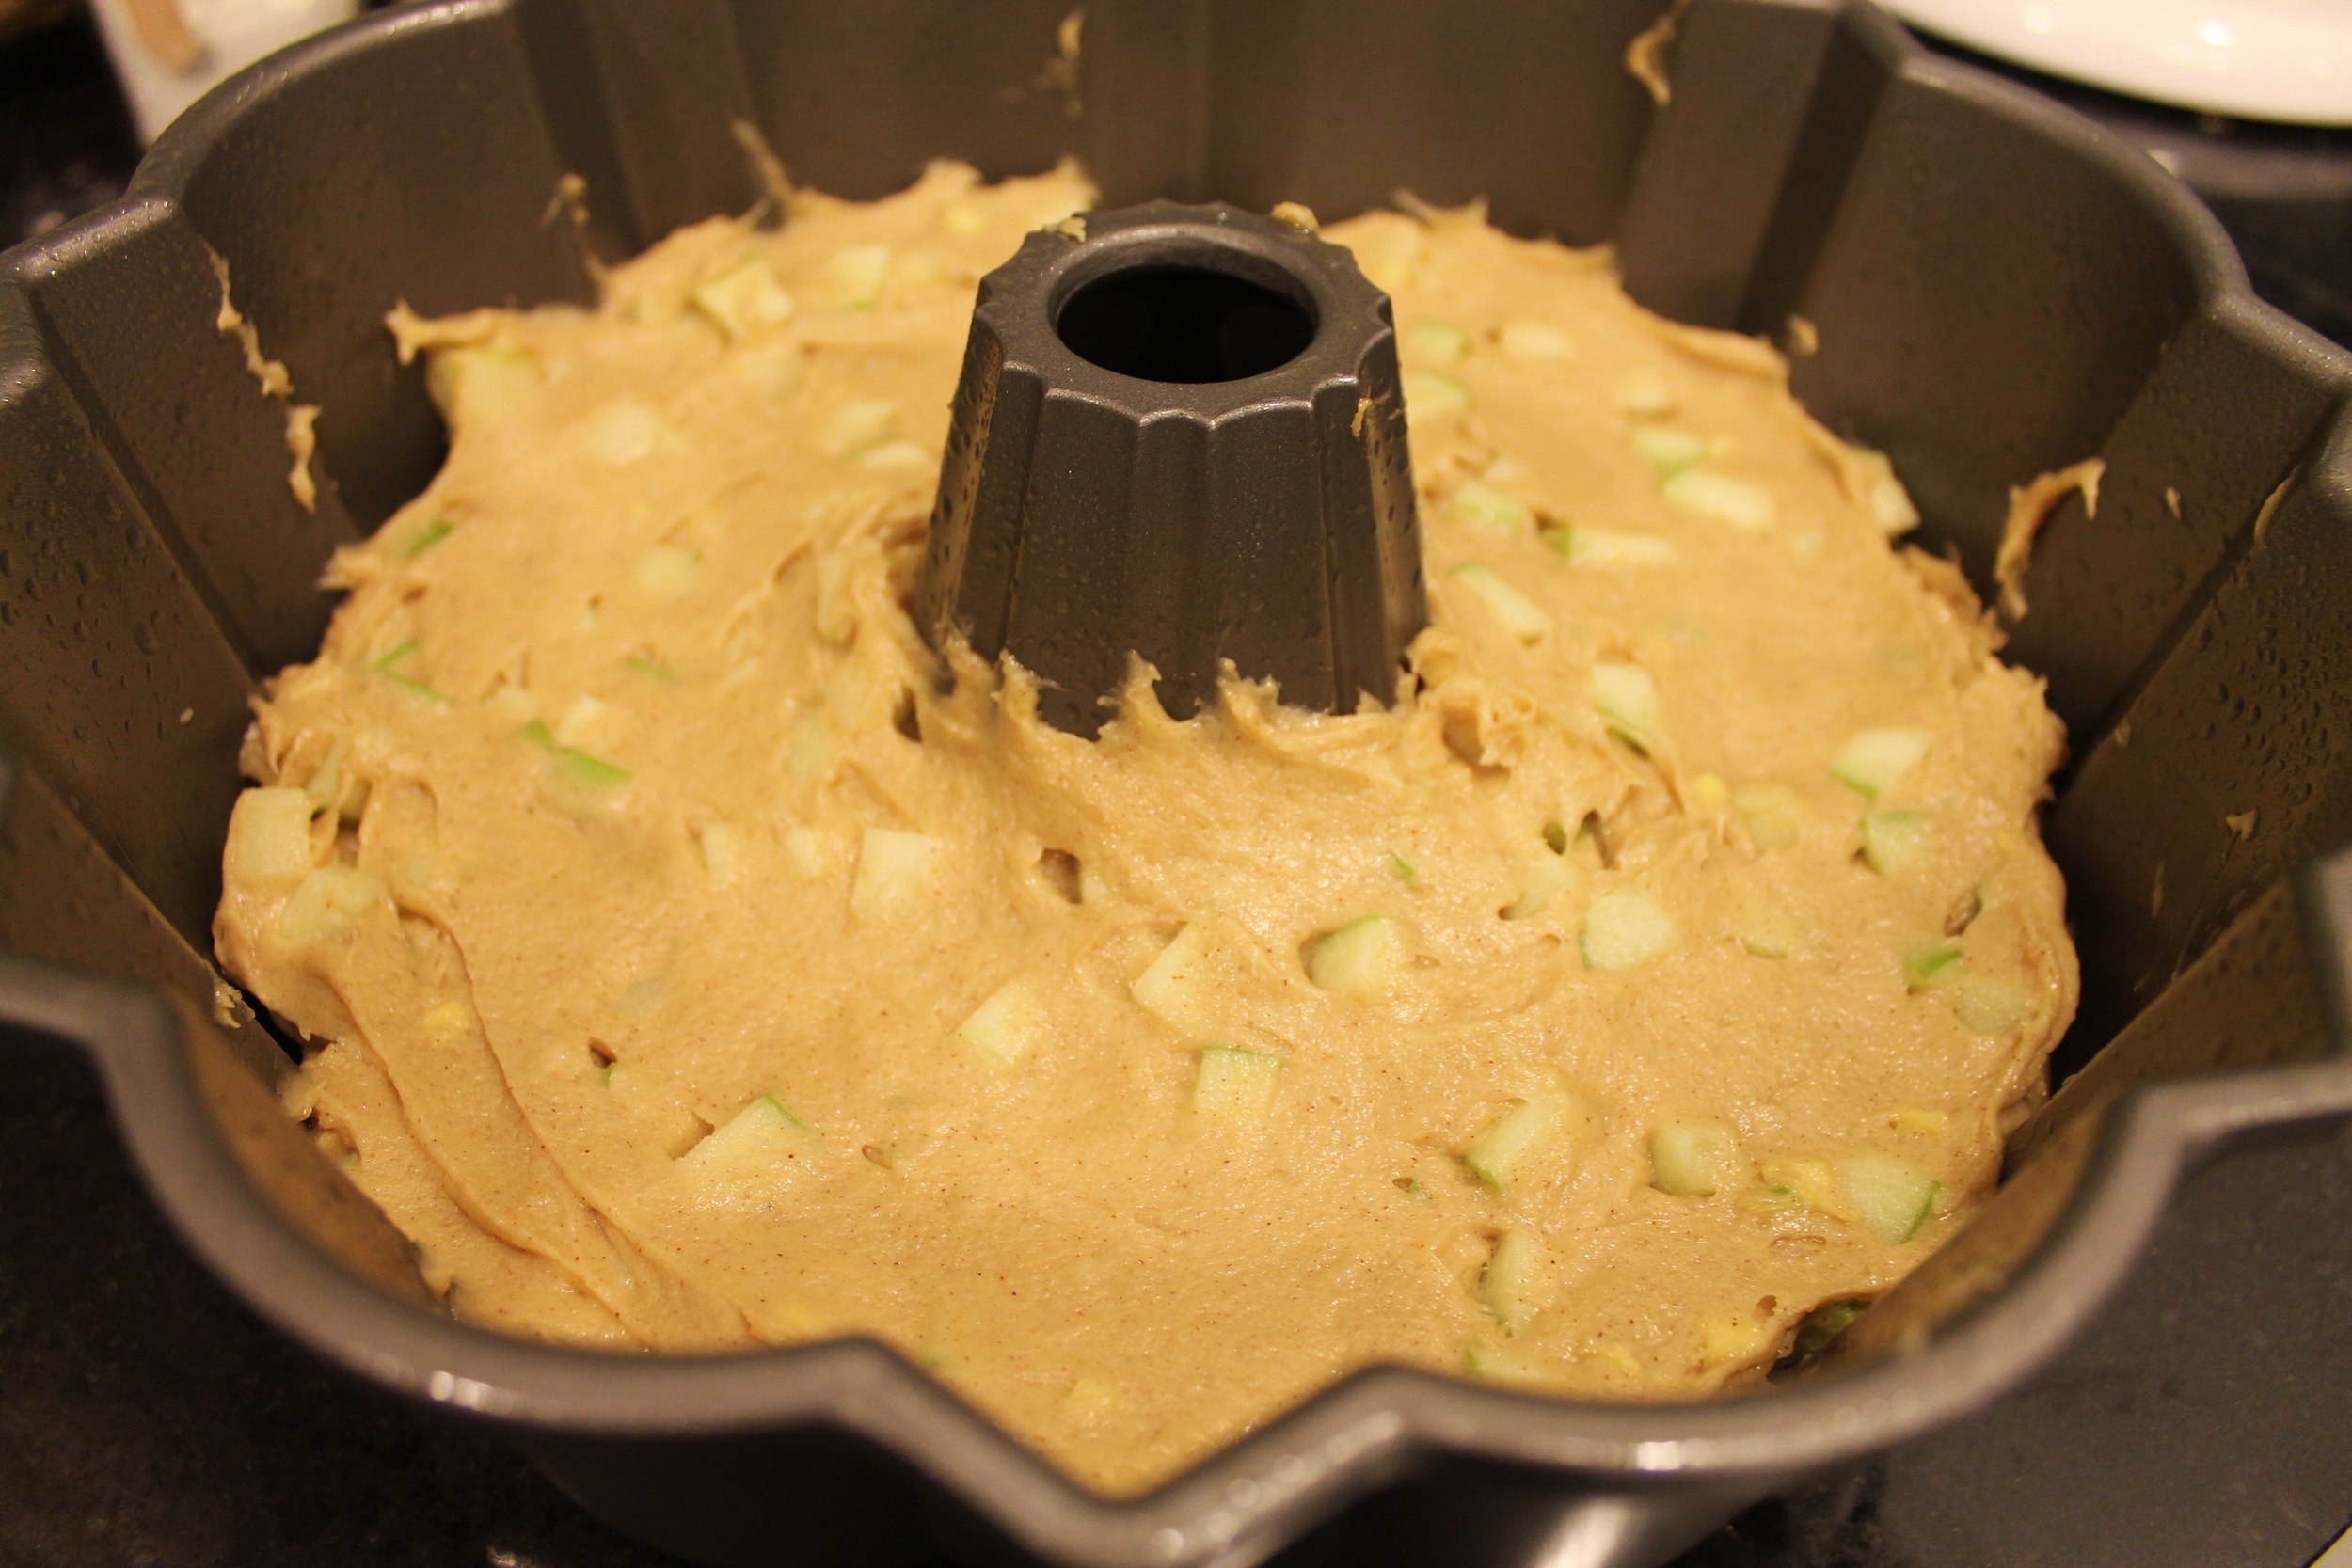
Once all combined, pour cake batter into your prepared 10” cake pan.

To prepare your pan, spray with nonstick spray and then sprinkle a very light dusting of flour on it, making sure to fully (but thinly) coat the bottom and sides of your pan.

Bake for 30-35 minutes, until the center of the cake springs back when touched

Allow to cool completely before cutting and decorating.


buttercream ingredients

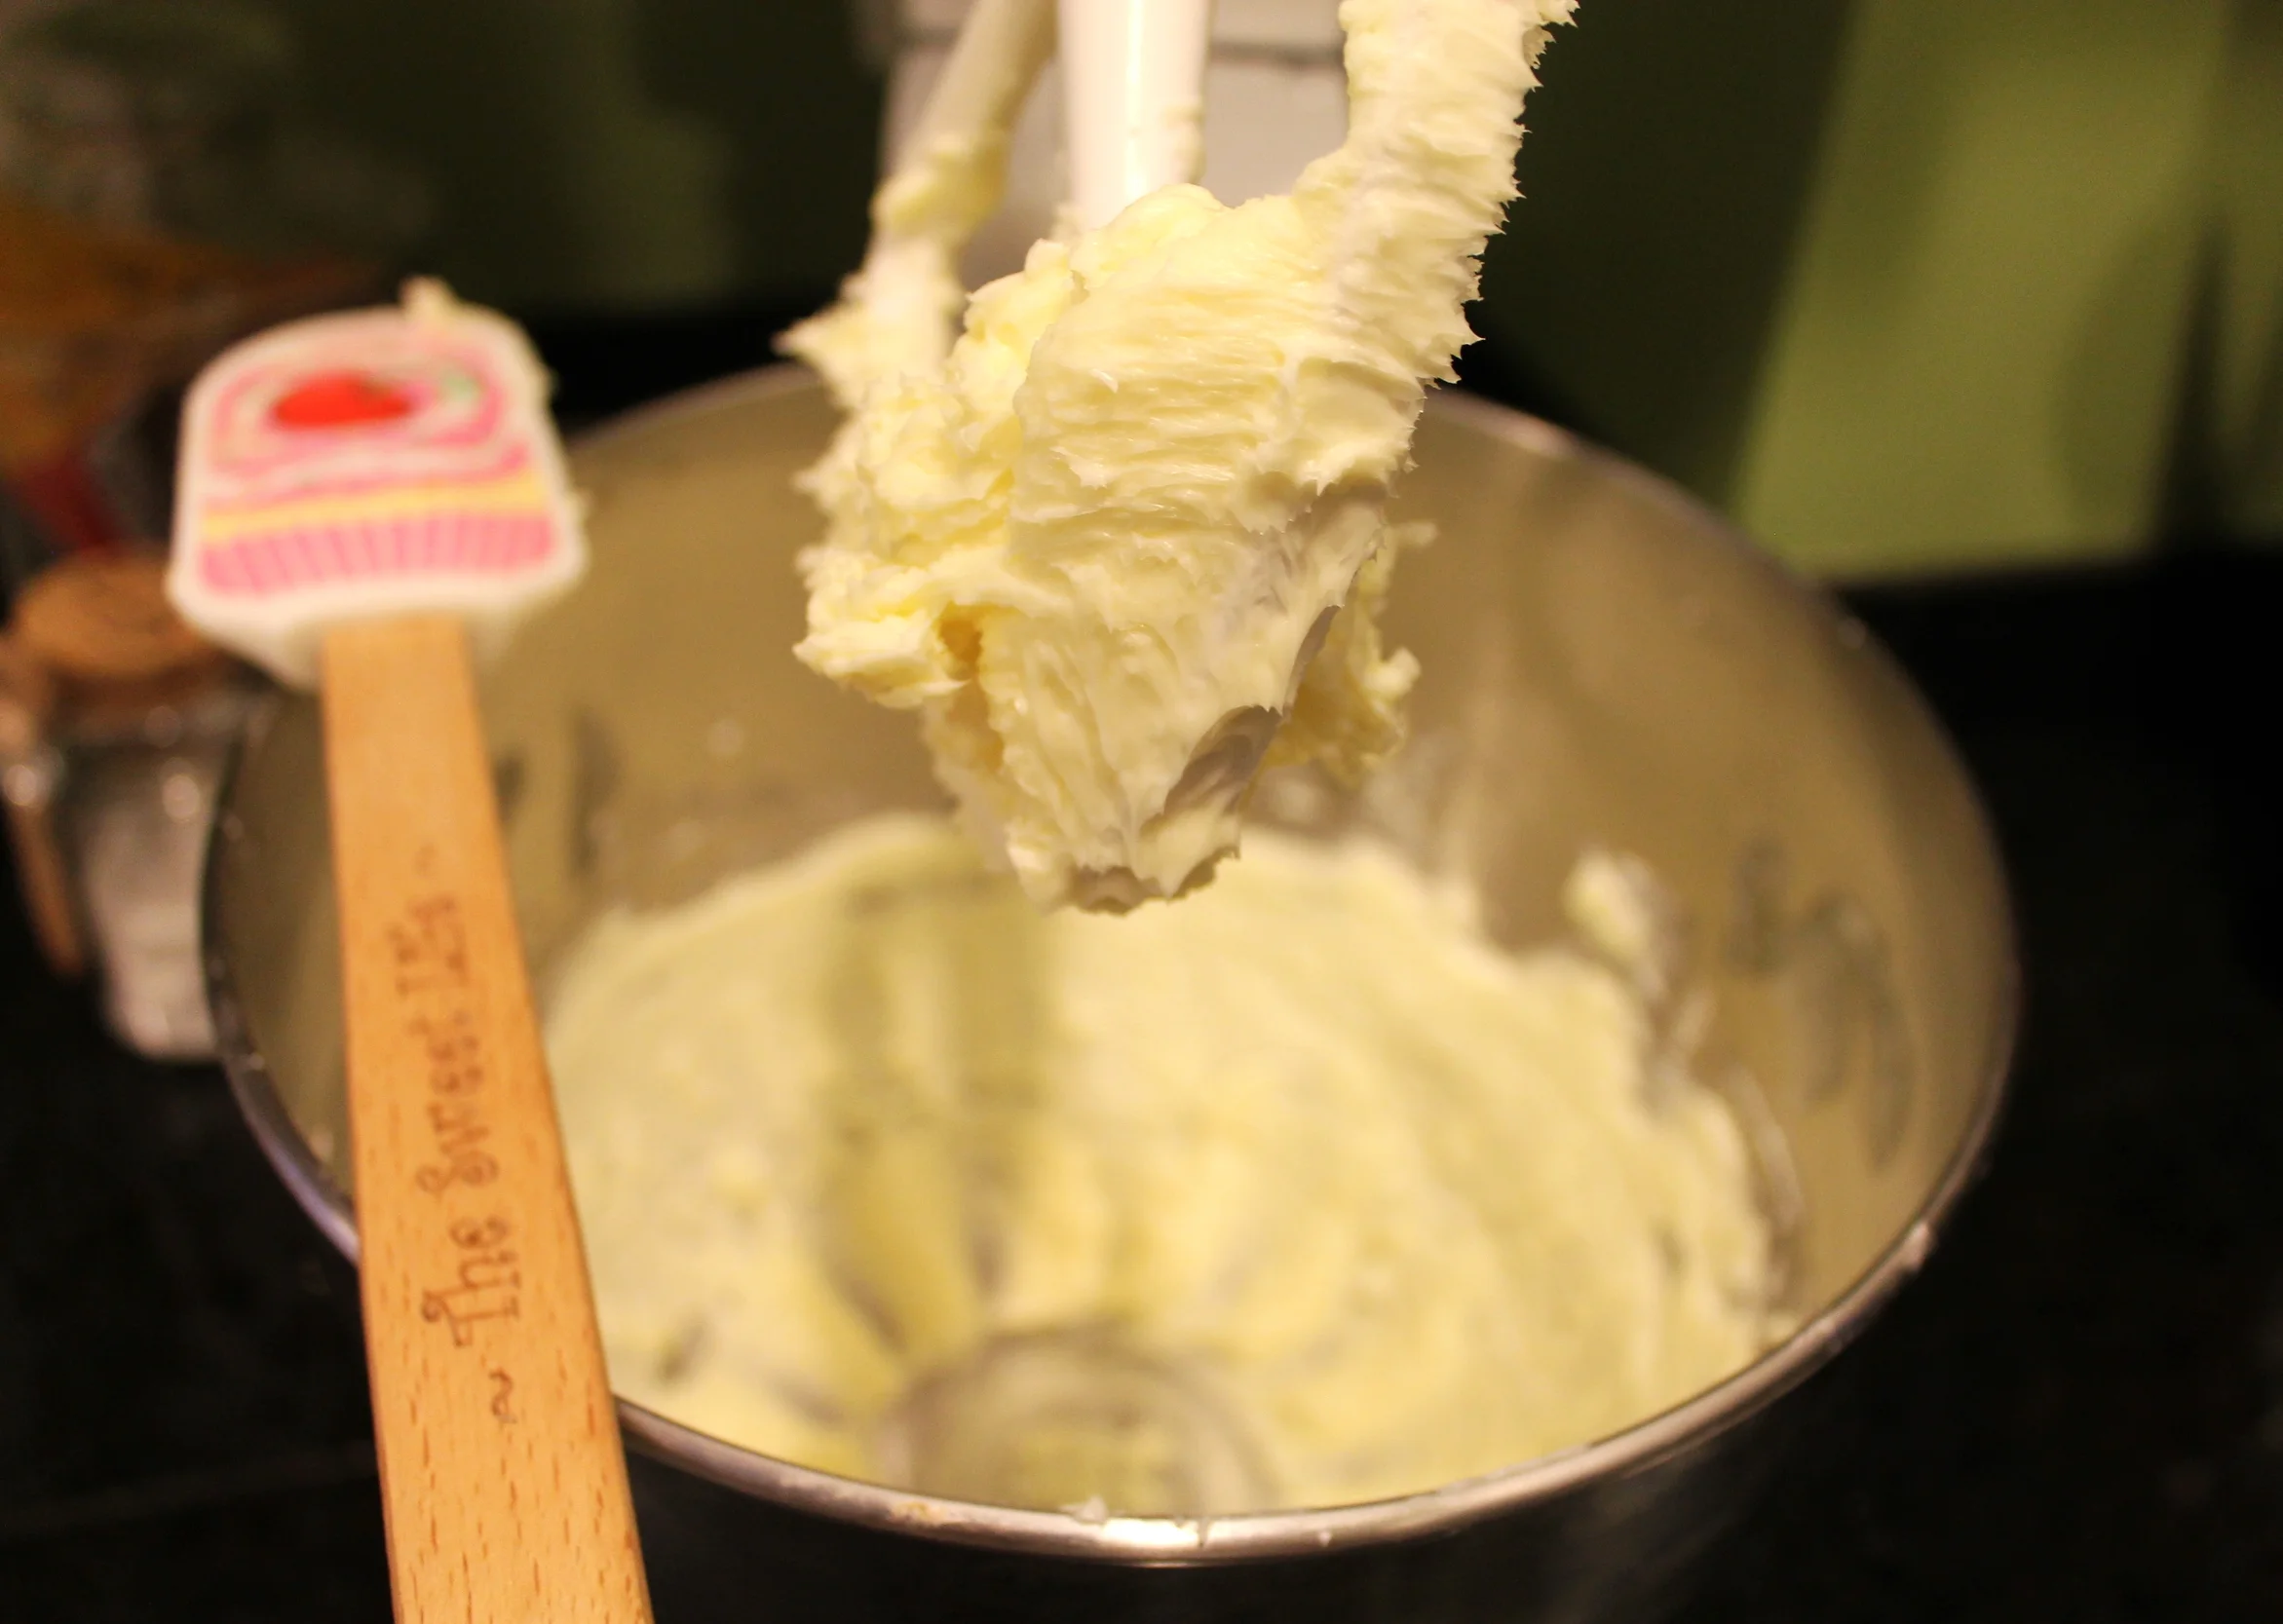
Butter, softened—4 oz, or 1 stick

Peanut Butter—4 oz, or ½ C

Confectioner’s Sugar—15 oz, or 3 C

Cocoa Powder—2.5 oz, or 1 C

Vanilla Extract—2 tsp

Milk—4 oz, or ½ C


process

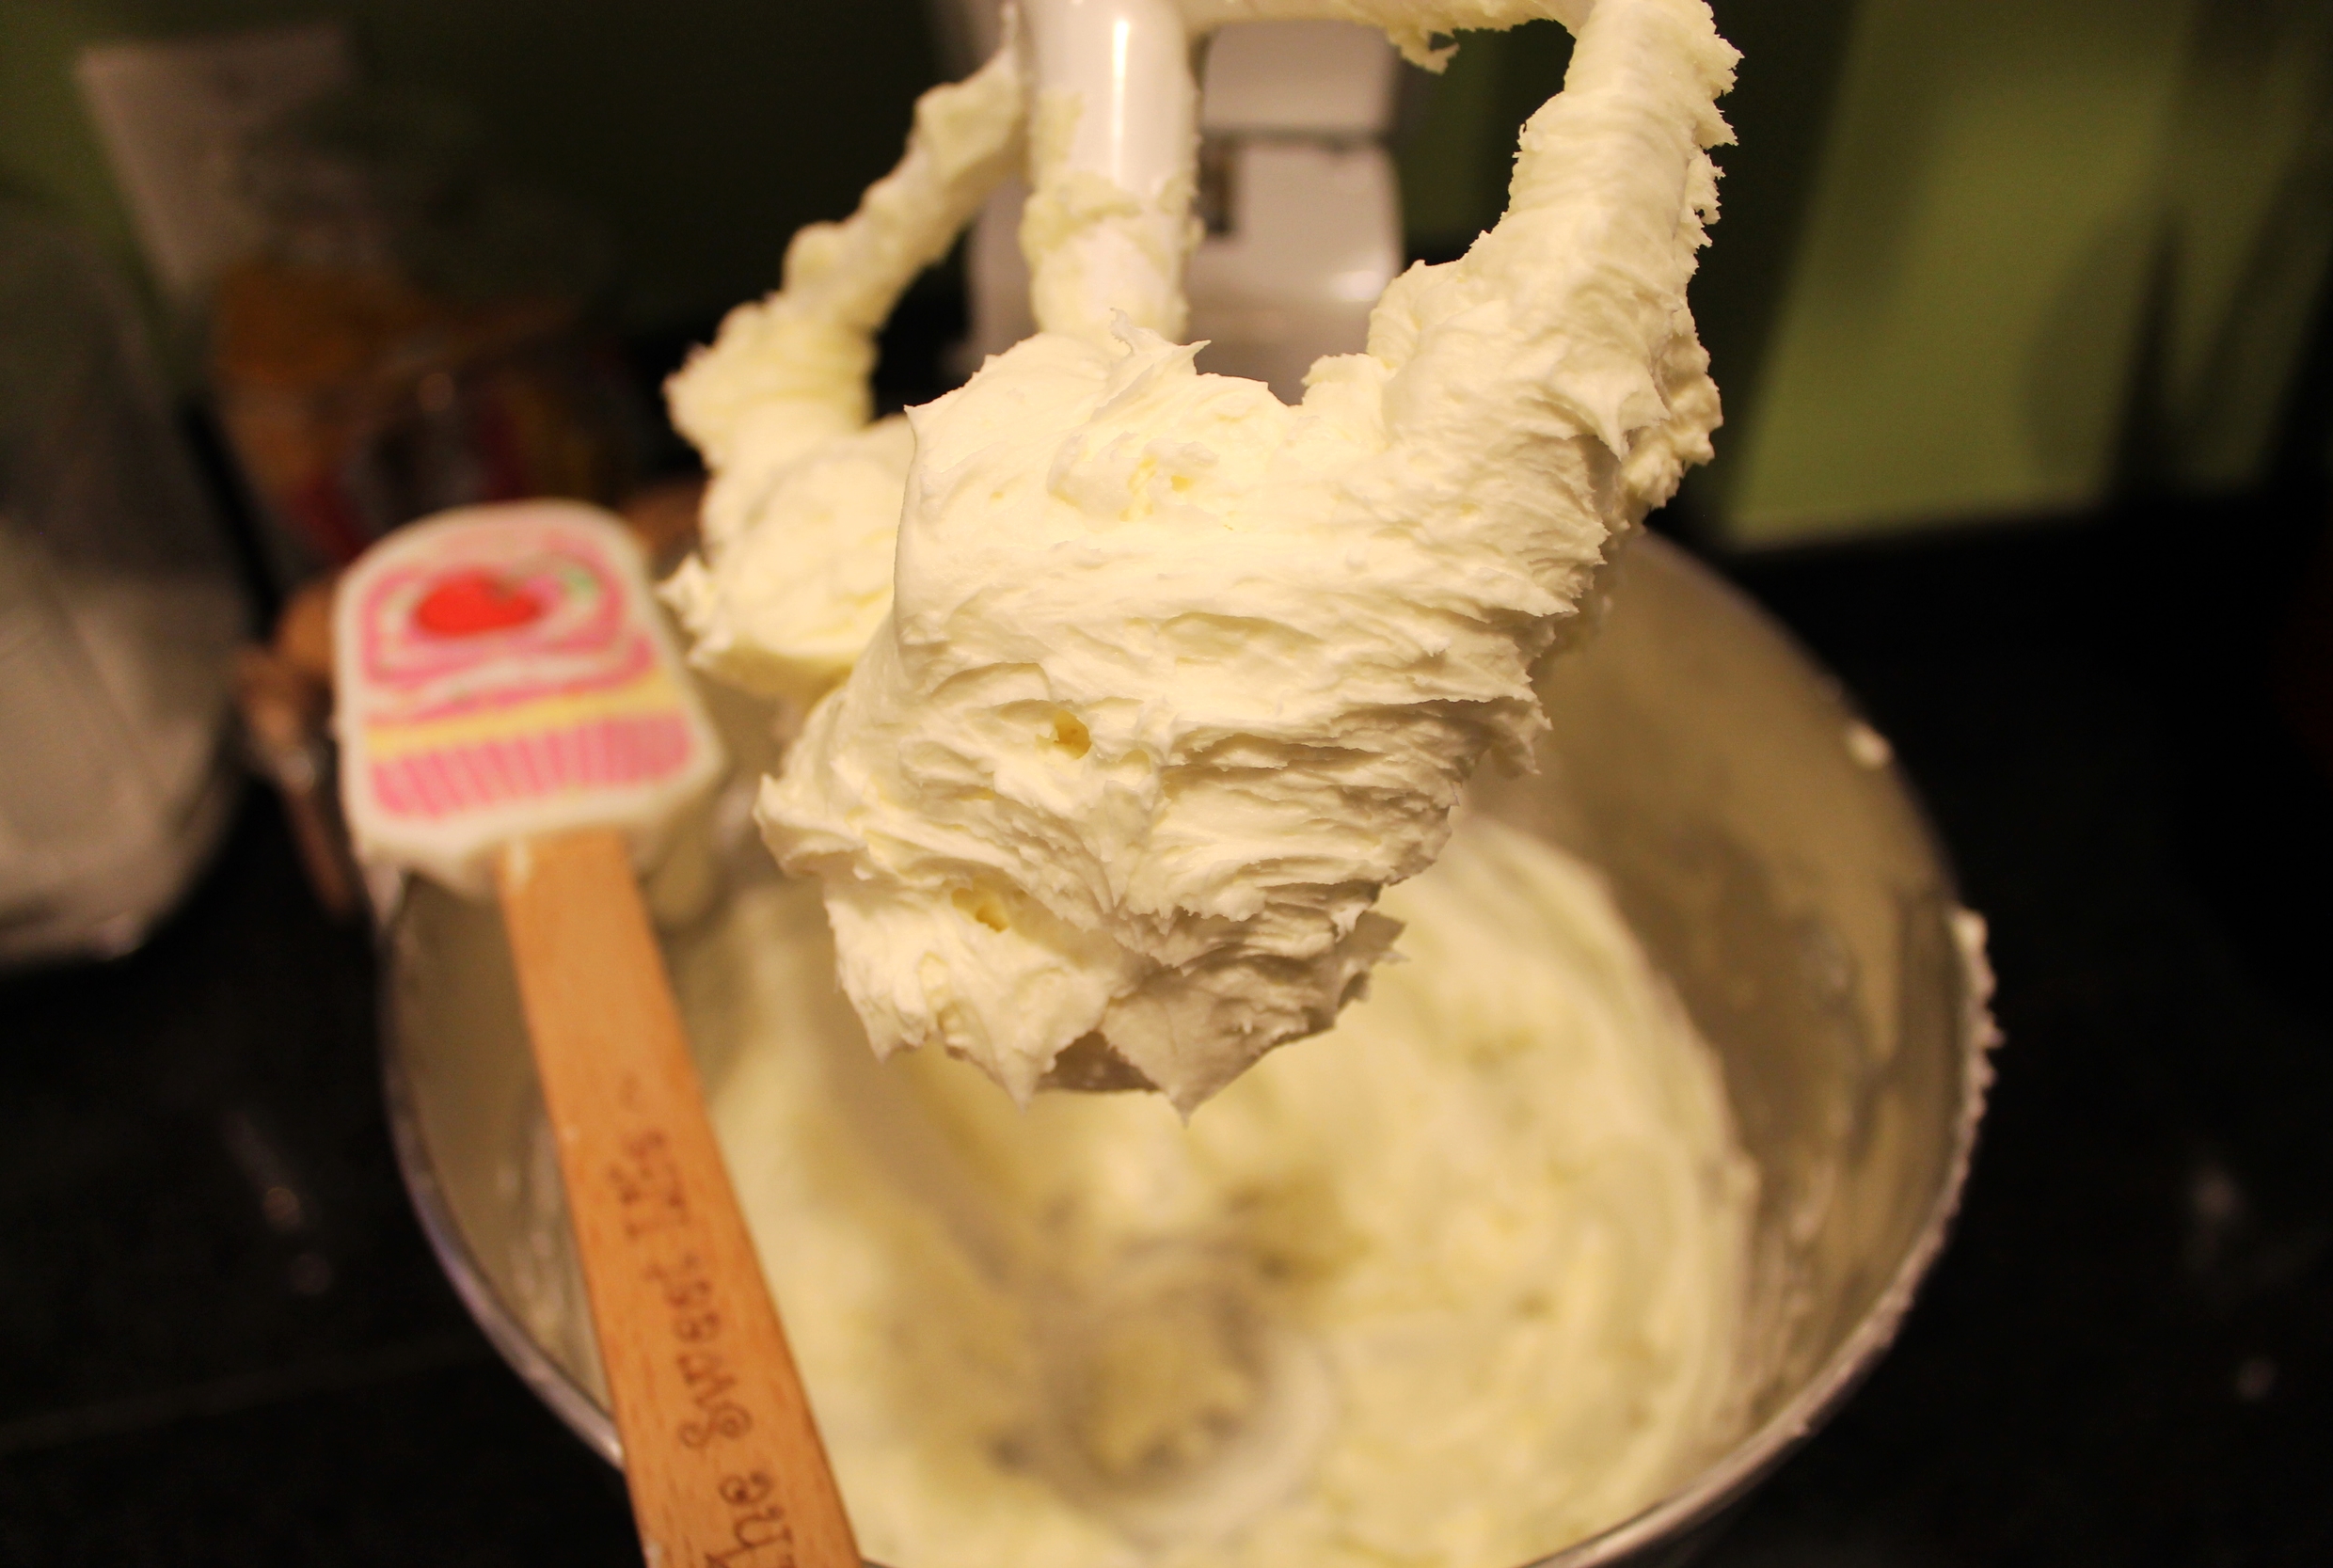
In the bowl of your mixer, use the paddle attachment to cream together the softened butter and peanut butter.

Sift together the confectioner’s sugar and cocoa powder.

Once your butter/peanut butter is smooth, slowly add in the sifted ingredients.

When combined, stream in your extract and milk.

When everything is added to the bowl, whip on high for about 30 seconds, to really make your buttercream nice and fluffy!

Now you can spread on the cooled cake.


meringue ingredients

Confectioner’s Sugar—9.5 oz, or 2 ¼ C

Egg Whites—4.75 oz, or 4 large

Vanilla Extract—2 tsp

Food Coloring—optional


process

Preheat your oven to 200˚ F.

In the bowl of your mixer, whisk together the sugar and egg whites.

Using a medium sized pot, create a double boiler with the bowl from your mixer.

Turn a burner on, to medium, and continue to whisk so that the sugar can dissolve.

Using a candy thermometer, cook this egg white/sugar mixture (constantly whisking) until it reaches 115˚-120˚ F.

When you have reached the correct temperature, transfer to your stand mixer, attach the whisk, and turn to high.

Whip for about 5-8 minutes, until stiff, shiny peaks form.

Add in your vanilla/flavor—which is optional.

Add in your food coloring—also optional!

When you have reached a medium-stiff peak with the meringues, transfer to a piping bag that has been fitted with a star tip.

Also—you may use a heavy duty Ziplock bag for this, and piping tips are not required, just make for a fun design!

On parchment paper or a Silpat, pipe out whatever meringues you like—I like rosettes, kisses and hearts, very simple to do!

When you are finished piping, place in your preheated oven for about an hour, rotating every 20 minutes, until they are completely dried out.

Decorate your cake with your fun and festive meringues!


to decorate

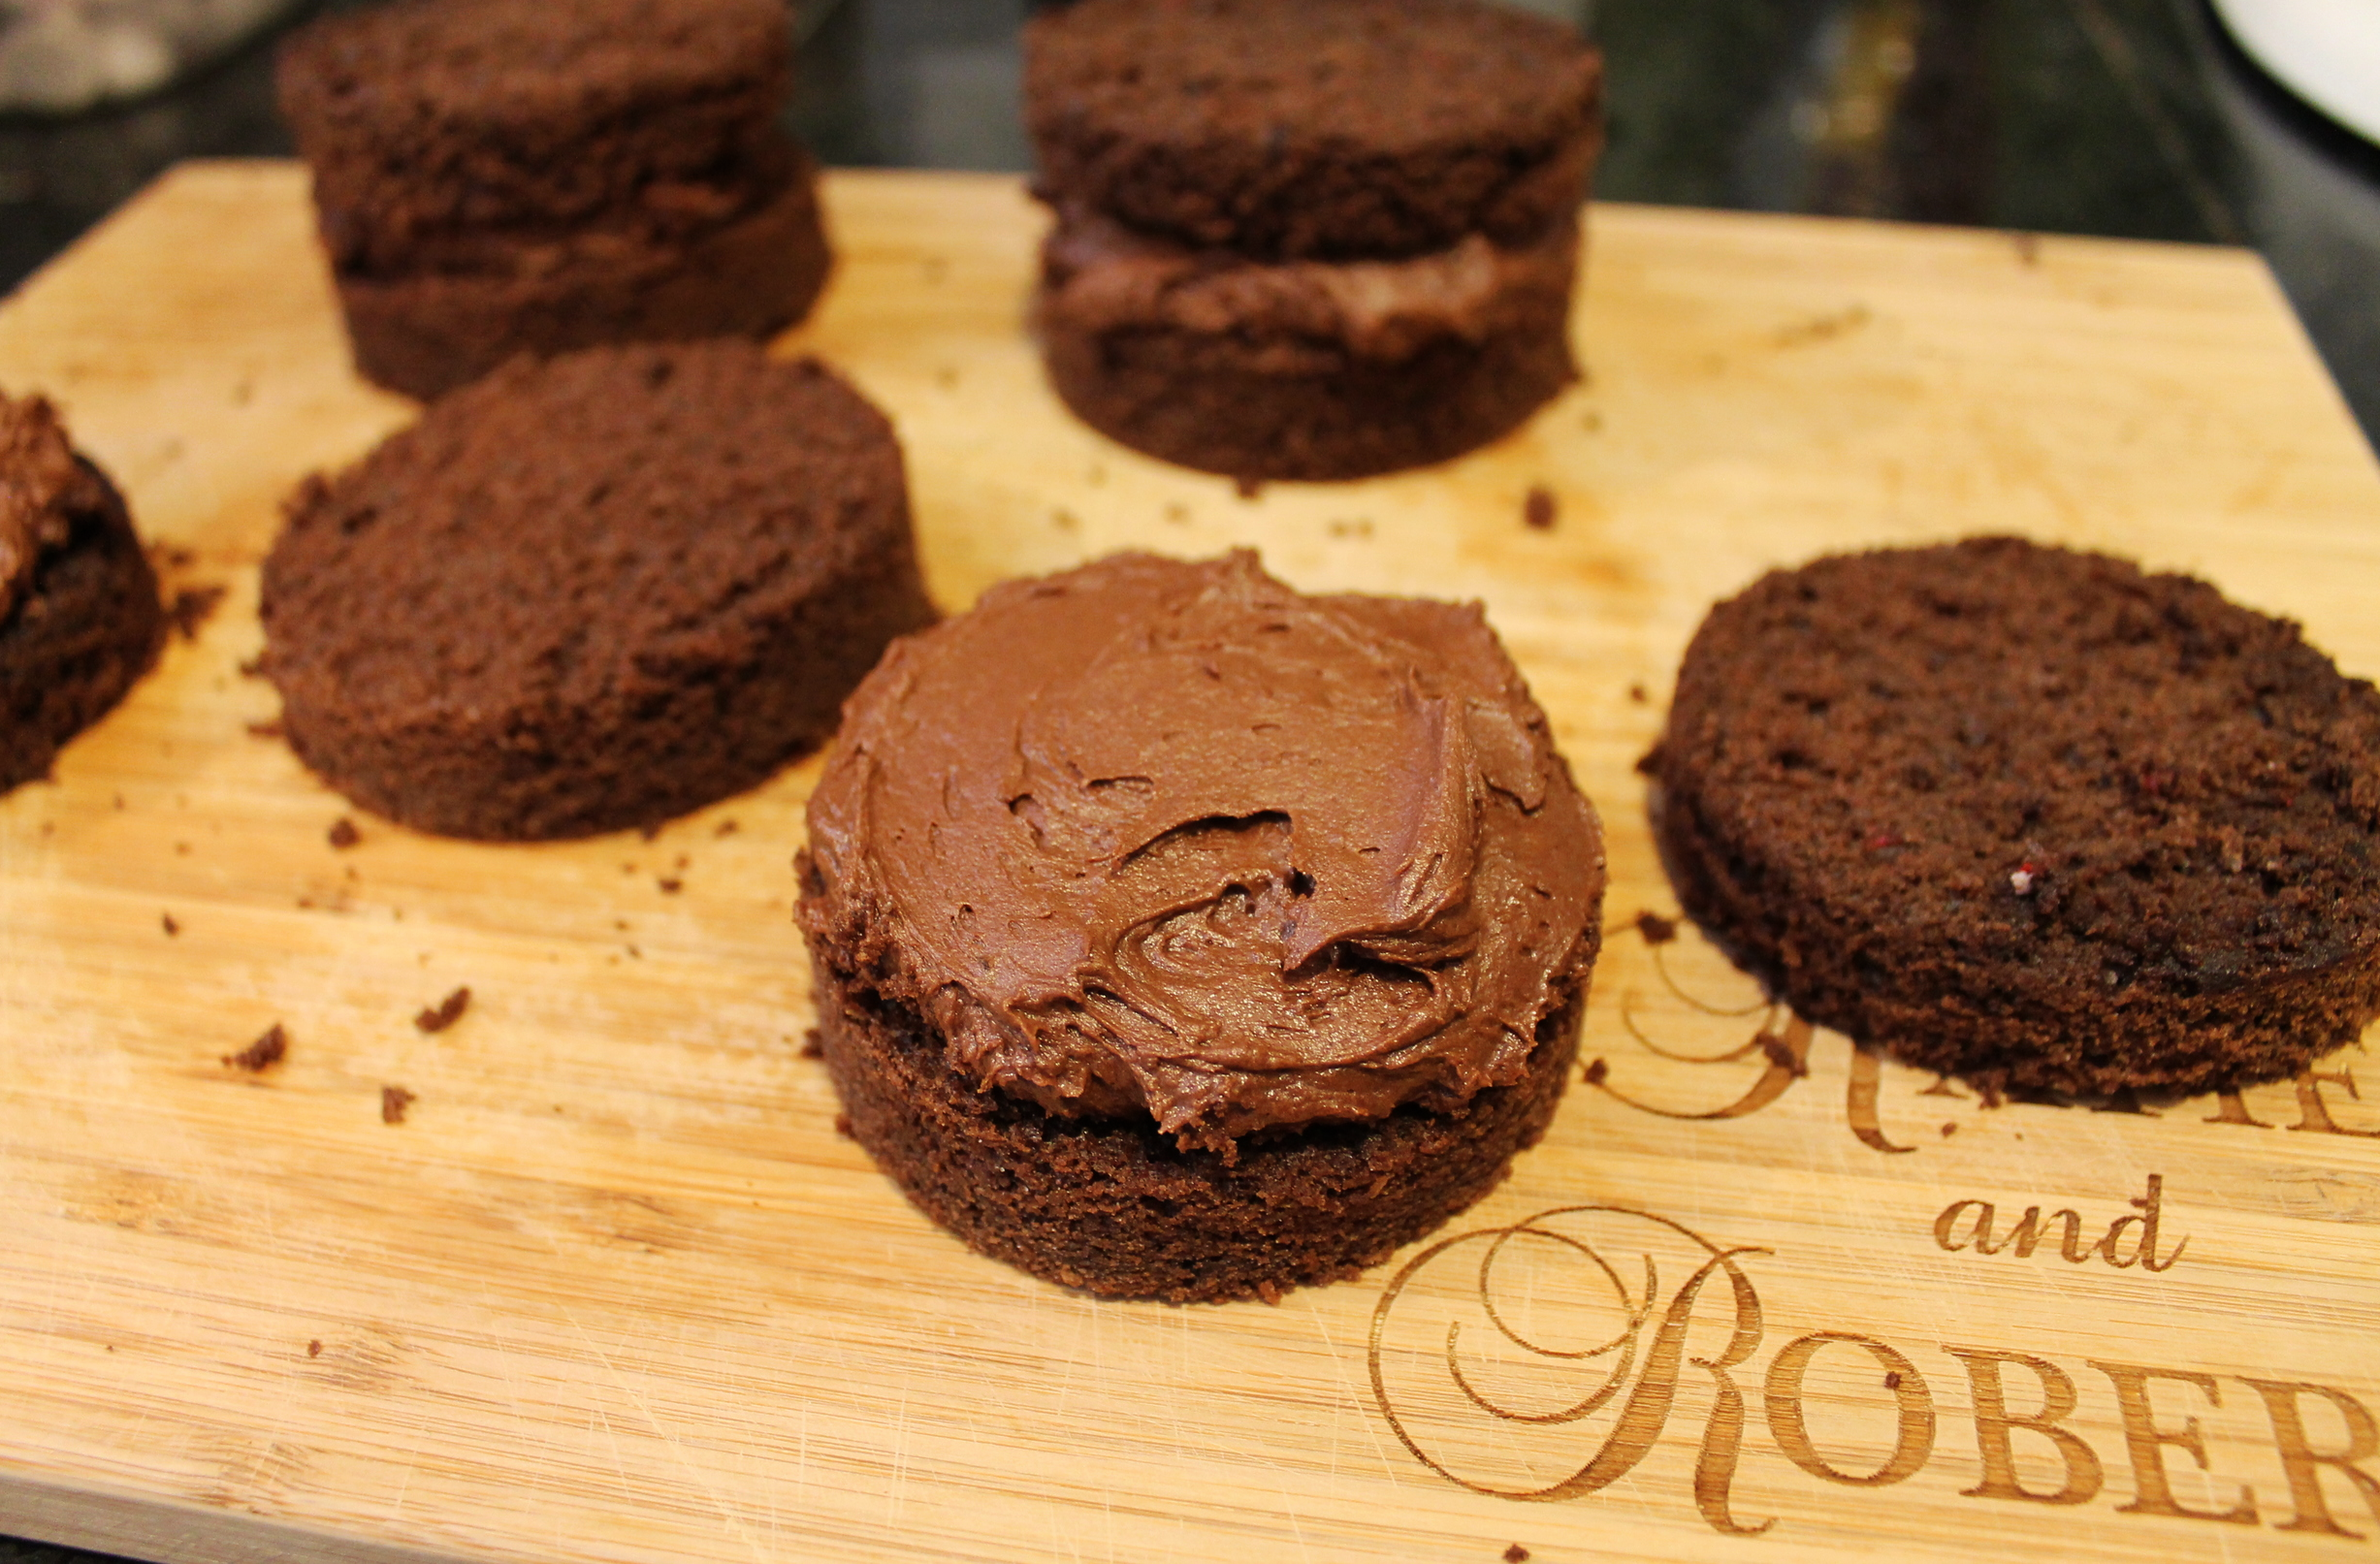
I made these into little anniversary cakes—super simple and basically individualized.

First, trim off the top of your cake.

Using a round cutter, cut out as many circles as you can, a 10” should make from 6-8, depending on the cutter size.

Cut each cake in half.

Spread a dollop of buttercream on the bottom layer of your cake (no simple syrup required!).

Place the second layer on, and spread more buttercream on top, decorate with meringues, sprinkles, or just eat like that!


Bon Appétit!

Chocolate Coffee Cake with Maple Spiced Buttercream

New week, new recipe, New Year, new you!

This past week was the Russian Old New Year. One of my dearest friends who I have met in Charleston is from Russia, so of course this is something that she celebrates. My wonderful friend, Elena, invited Roberto and I, along with some of our other friends, over to celebrate with her and her boyfriend—and it was amazing! She told us all about the traditions, all about why it’s particularly special, and heck, I even ate dinner at 9:00, on a Wednesday night, wild, right?!

A few days before this big party, my friend asked us to all give her 13 fortunes that we hoped to happen this year, a few to be silly, but mostly things we really wished to come true this year for ourselves. Mine ranged from eat more avocado toast (hehe) to be your own boss to Patriot’s will win the Superbowl! She wrapped all of these little fortunes inside of foil, and then stuffed them into some insanely delicious onion and potato dumplings—140 to be exact, AND Elena made them all herself…

What her families tradition is, is that you each eat as many dumplings as you can, just so that you get oodles of fortunes!...I somehow managed 16 or 17 dumplings…

After, we would read each one aloud and then Elena would truly dissect what was to happen to us this year, and that we all were to have an incredibly happy and successful 2016!

Some of our friends’ were about travel, others about career change, and mine were about being surrounded by wonderful friends and family, good health, and just all around happiness—which is 100% what I went into this year saying. Crazy coincidence, no?!

With all of these positive vibes going around, all starting with a hilarious evening with some of the greatest and most unique friends, I decided that I wanted to treat myself, and Roberto, even more! While I may be a fulltime ice-cream maker, we are about 90% of the time extremely healthy folks. Green smoothies and yogurt for breakfast, salad, carrots and hummus, fruit slices for lunch, soups, fish, grains for dinner—I can’t say that I hate it! Yes, eating to healthfully fuel our bodies is such an amazing choice that we are so lucky to have, which is why I decided to ditch the apple and peanut butter dessert for some moist, decadent chocolate cake with just a hint of coffee and a smooth maple buttercream!

Small indulgences, right? That’s what I am all about for this New Year New You thing I’ve got going on!

What do I love about this cake? First off—chocolate. Secondly, the dark cocoa, the sour cream, the great quality coffee, all of these make for such a dense, rich, spoil-me cake, that the smallest of slices is enough to satisfy. Thirdly, this heavenly cake hardly needs a frosting, but there are some things I can’t help myself with, so a lightly flavored maple buttercream certainly goes a long way—definitely doesn’t overpower, but complements perfectly the hint of coffee in the cake.

So the question, what has this Russian Old New Year taught me in its first few days? Well, definitely not to eat 16 mouthwatering dumplings in one sitting, but also that with good health and happiness, you need to treat yourself as fabulously as you treat others—and if that means a slice of this absolutely divine cake, then enjoy each bite!

IMG_6225.JPG

cake ingredients

Flour—5 oz, or 1 C

Cocoa Powder—1.75 oz, or ½ C + 1 TBL

Baking Powder—½ tsp

Baking Soda—¼ tsp

Salt—½ tsp

Coffee Grounds—0.25 oz, or 1 TBL

Butter, room temperature—6 oz, or ¾ C

Brown Sugar—9.25 oz, or 1 ¼ C

Eggs—3

Vanilla—1 tsp

Cream—4 oz, or ½ C

Sour Cream—4 oz, or ½ C

Chocolate Chips—3 oz, or ½ C


process

Preheat the oven to 325˚ F.

In a bowl, sift together the flour, cocoa, baking powder, baking soda, and salt.

Add the coffee grounds.

In the bowl of your mixer, cream together the butter and sugar.

Add the eggs, one at a time, and the vanilla.

Beat until smooth.

Slowly add in half of your dry, sifted ingredients.

Once incorporated, scrape the sides of your bowl and add in the sour cream.

When fully mixed in, add in the second half of your dry ingredients.

Add in the cream.

When you have added in all of the ingredients and they are completely incorporated, fold in the chocolate chips.

Spray either a loaf pan or an 8” cake pan with nonstick spray and line with parchment paper.

Pour your batter into the prepared pan and bake for 55-60 minutes, until the cake springs back when you touch it.

Allow to cool completely on a cooling rack before frosting it!


frosting ingredients

Butter, room temperature—4 oz, or ½ C, or 1 stick

Confectioner’s Sugar—5.25 oz, or 1 C

Maple Syrup—0.75 oz, or 2 tsp

Cream—0.75 oz, or 4 tsp

Cinnamon—½ tsp


process

In the bowl of your mixer, cream the butter until smooth.

Slowly add in the sifted confectioner’s sugar.

Once the butter and sugar have become very smooth, scrape down the sides of the bowl.

With the mixer in low, slowly stream in the maple syrup and cream.

Add in the cinnamon.

Cream until smooth.

Now this is ready to frost your cooled cake! You may either do the entire top, or give everyone a dollop on their own slice.


Bon Appétit!

Pumpkin Chocolate Fudge Cake

IMG_5819.JPG

Here is dessert #1 of my little Thanksgiving Dessert Twists series. This year, I have decided to go on a different route than normal using the same major ingredients—pumpkin, apple, pecans. First stop is pumpkin pie!

While you can never replace a pumpkin pie, with its warm spices, natural wholesome pumpkin flavor, flaky, buttery crust, I believe you give it a nice chocolate friend for us that are super obsessed! I know that you’re seeing pumpkin everything everywhere right now—from the latté to the candy, the chip to even the beer, it’s been absolutely huge this fall, and rightfully so. Pumpkin is something that obviously screams autumn, and holidays, and warm coziness. As you have read in many, many of my most recent posts, you just can’t make it through September-November without a pumpkin baked good! Like here and here.

So, naturally, I have added yet another pumpkin dessert to the table, but this time not only is it full of rich chocolate, this fudge cake can be made in fabulous individual ramekins—basically made to order! After an extremely long afternoon of eating that incredible Thanksgiving dinner, you can pop one of these little cakes into the oven, digest for 30 minutes while it bakes and cools slightly, and then truly indulge. They can even be made a day ahead of time—bonus points!

I love the denseness in this cake. Looking at the ingredients, chocolate is what it’s mostly made up of! You’ve got a tiny bit of butter + the pumpkin purée for a bit of fat, eggs to bind it, a touch of sweetness, and then some flour to give it some body. There isn’t even that much sugar in it! Can we argue that it is mildly healthy?! Sure!

And, it is Oh. So. Fudgy. Like, out of this world. This is like a deluxe, eat at a really nice restaurant dessert—and you can have it for any party, not just Thanksgiving, and blow people’s minds!

Choose your favorite chocolate, try not to eat half the bar like me, and treat yo’self to the most luxurious chocolate pumpkin fudge cake there is!

IMG_5811.JPG

ingredients

Semi-Sweet Chocolate (melted)—4 oz

Butter—0.75 oz, or 1 ½ TBL

Brown Sugar—1 oz, or 2 TBL

Eggs—2

Flour—0.65 oz, or 2 TBL

Salt—pinch

Puréed Pumpkin—1.25 oz, or 2 TBL

Cinnamon—0.1 oz, or ½ tsp


process

Over a double boiler, melt your chocolate. Once melted, remove from the heat and allow to cool slightly.

Preheat your oven to 425˚ F.

Rub the inside of 2 ramekins with butter.

In the bowl of your mixer, cream the butter and brown sugar.

Add the eggs.

Once combined, add the flour, salt, cinnamon and pumpkin.

When all is mixed well, add a small amount of the melted chocolate, just so that the eggs won’t be shocked by the warm chocolate therefore they won’t cook.

Once the chocolate has been mixed well with the batter, slowly stream in the rest of your chocolate. Mix until just combined.

Pour the batter evenly into the 2 ramekins, they should not be filled any higher than ¾ of the way.

Place on a sheet pan and place in the oven.

Bake for 12 minutes, the cake will just start to pull away from the sides of the ramekin.

Remove from the oven, allow to cool for just a couple of minutes.

The center is slightly molten, and will become extra rich and fudgy the more that it cools!

You may either eat right out of the dish, or invert onto another place, dust with confectioner’s sugar, add a little bit of whipped cream, and enjoy!


Bon Appétit! 

Ginger Apple Cake with Dulce de Leche Drizzle

IMG_5834.JPG

I know that an apple pie is basically a must at any and all fall events, especially at Thanksgiving, but today, I am giving you an addition to an apple pie—a ginger apple bourbon cake. Those three ingredients go together better than a peanut butter & jelly fluffernutter.

Mmm mm mmm.

Come to think of it, I don’t know why all apple pies don’t have the ginger and bourbon in them as well. Although bourbon and I weren’t that great of friends until we met up in Louisville and became besties, now I have the urge to put it in every single thing that I bake with. Whether cookies, cakes, pies, in a glass, we are sort of attached at the hip.

Did I just say that I am best friends with bourbon? I guess it can’t be too far off, seeing as I am basically a cookie in human form—yes, I seem to eat at least a couple a day…

So, when I decided to bake this cake, I figured that I wanted as much flavor as possible, for this to taste more like an apple covered in bourbon and rolled in ginger, which, I believe, is what the final product truly tastes like. By soaking the apples in the alcohol, they really absorb all of the flavor, and then adding the saturated apples as well as remaining liquid into the cake batter, it’s like a delicious punch in the face!

Okay—let’s go for a big hug of flavor instead.

Fresh, minced ginger. Enough said. Covered in some caramel or dulche de leche. I know I have you salivating!

As I sit here and munch on a piece that is bigger than I care to admit, I feel like if I could just hand out a cake to each of my readers, you would be instantly sold and would be saying “this is the bomb”—like Roberto did. Sadly, I can’t see all of you fabulous KBBakers and give out cakes, so you’re going to have to trust my apple-ginger-bourbon trio, knowing that it is to die for, and bake a few cakes yourself!

IMG_5824.JPG

ingredients

Granny Smith Apples—2 medium

Butter—6 oz, or 12 TBL

Brown Sugar—3.75 oz, or ½ C

Sugar—2 oz, or ¼ C

Eggs—2

Bourbon—0.75 oz, or 2 TBL

Flour—6.25 oz, or 1 ¼ C

Fresh Ginger, minced—0.35 oz, or 1 TBL

Cinnamon—0.2 oz, or 1 tsp


process

Dice the apples into small cubes.

Combine the diced apples along with the bourbon in a small saucepot.

Put on the heat, bring to a boil, and then turn off the heat, cover and allow to sit until ready to put in your cake batter.

Preheat your oven to 325˚ F.

In the bowl of your mixer, cream the butter and sugars.

Add the eggs.

Once incorporated, add in the sifted flour, cinnamon and minced ginger.

Add in the apples/bourbon mixture.

Only mix until your batter has formed, overmixing will lead to air bubbles in your final product.

Spray a bundt pan with nonstick spray, and then coat with a light layer of flour so that the cake will come out easier after it has baked and cooled.

Pour your batter into the prepared pan.

Bake for 45 minutes, until the cake springs back when touched.

Remove from the oven and allow to cool completely before taking it out of the cake pan.


to make dulche de leche

Fill up a large pot with water and bring to a boil.

Take a can of sweetened condensed milk and remove its label.

Once your pot is boiling, place the can (I like to make at least 2 cans at once, always a great sauce to have on hand!) on its side, making sure that the water is fully covering the can.

If you do not keep the cans covered with water the entire time, there's a chance that the cans will explode from uneven heat!

Allow the cans to simmer for anywhere between 2 hours 30 minutes and 3 hours.

After the time has passed, very carefully remove the cans from the simmering water (oven mitts and tongs!),

Allow them to cool completely before opening.

Once cool, open and use!

Store in an airtight container in the refrigerator.


Bon Appétit!